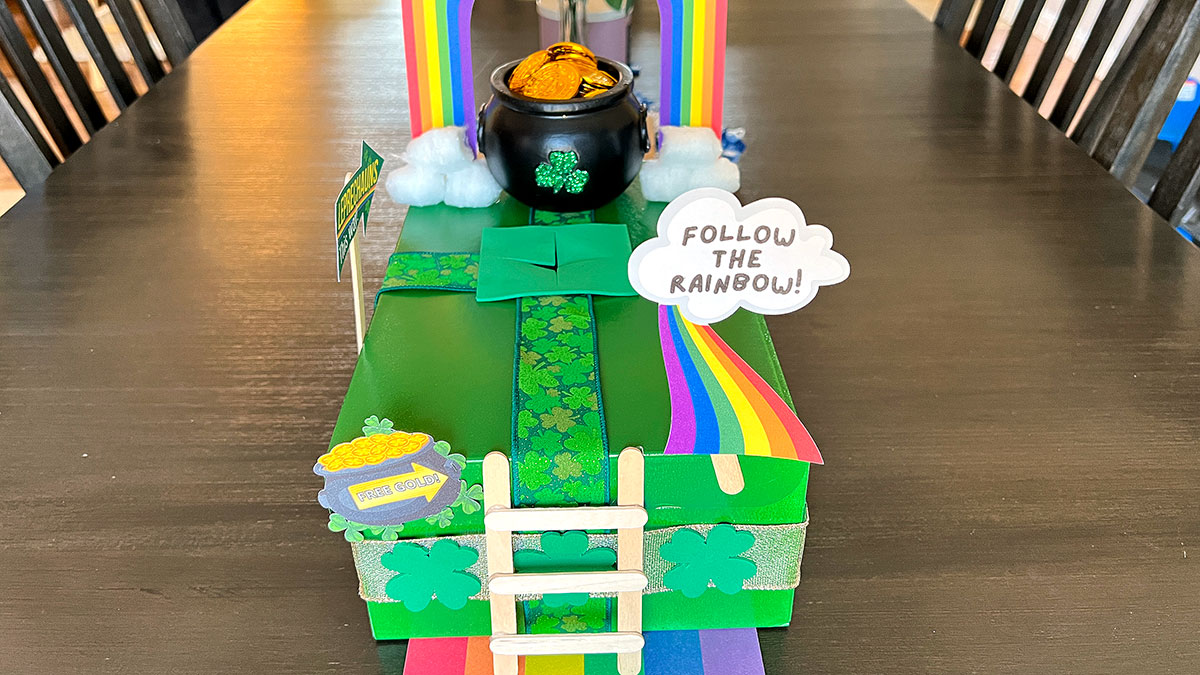
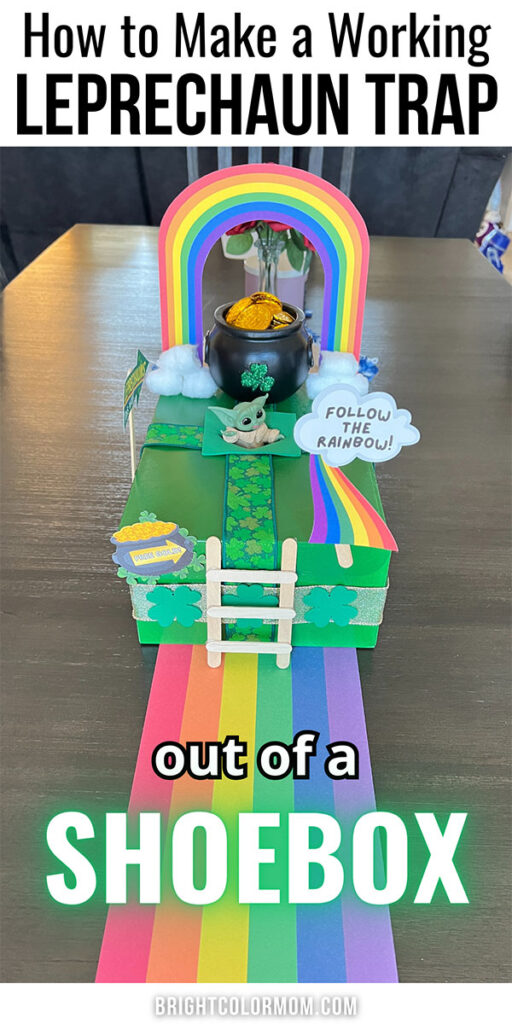
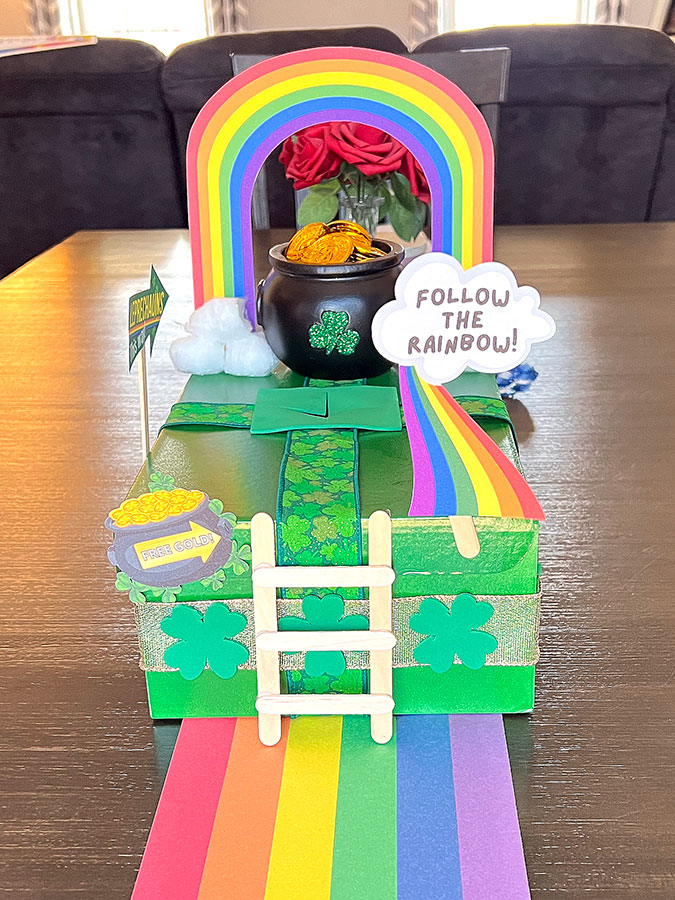
Whether your child was given a school assignment to build a leprechaun trap or you just want to craft some St. Patrick’s Day fun at home, a shoebox leprechaun trap is an easy, affordable way to complete the project! Despite how “busy” it might look, this was an easy shoebox leprechaun trap to build.
Each element is pretty simple. And you don’t have to copy it exactly. Use it for ideas to DIY your leprechaun trap as you see fit! Use a cereal box instead of a shoebox. Prop open your shoebox instead of using a trap door. Once you start thinking creatively, the possibilities are endless.
This post may contain affiliate links. If you make a purchase after clicking one, I may receive a small commission at no cost to you.
Materials Needed
To make a leprechaun trap out of a shoebox, the only material you have to have is, of course, the shoe box! These are the materials I used to make mine but feel free to use things you already have on hand for yours.
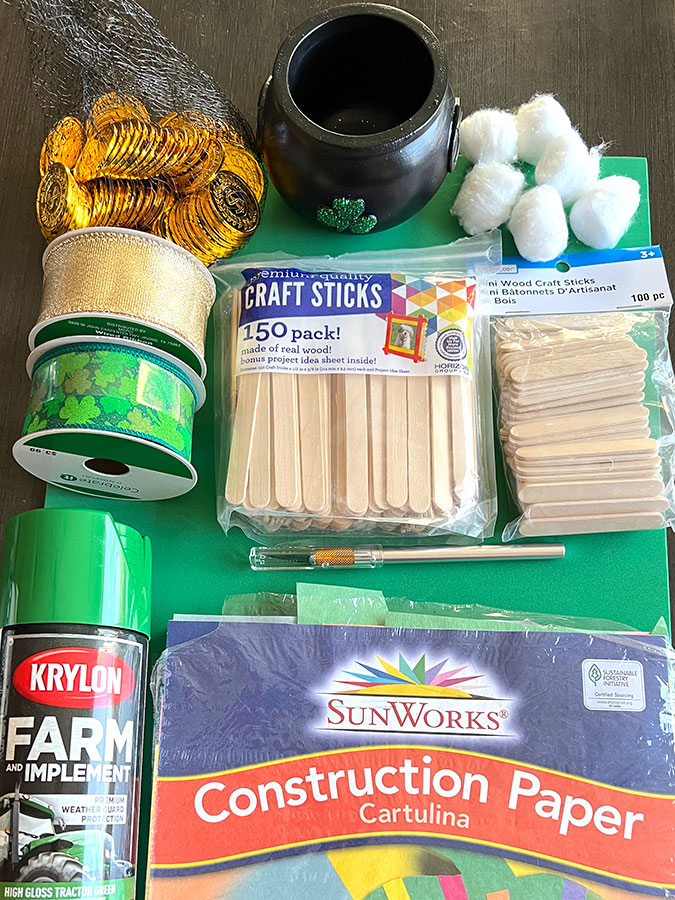
- Shoebox (mine is 10.5” x 7.5” and 4.5” tall)
- Green spray paint
- Polycrylic spray
- X-acto knife
- Scissors
- Green craft foam
- Printable white cardstock
- Shamrock-pattern ribbon
- Gold ribbon
- Construction paper in rainbow colors
- Double-sided tape
- Regular tape
- Hot glue gun and glue sticks
- Craft sticks (regular and mini)
- Cotton balls
- Leprechaun pot
- Plastic gold coins
If you’d like to recreate my leprechaun visit (you’ll see it at the end!), you’ll also need some fine gold glitter and a sturdy piece of cardstock. I also used a Cricut Maker 3 with a deep point blade (in addition to the standard fine point blade) to make the cutting easier!
I already had most of the materials on hand. But I bought all the St. Patrick’s Day-specific things (foam, ribbons, leprechaun pot) at Michael’s with a 25%-off coupon while they were already 30% off and spent less than $14!
How to Make a Leprechaun Trap from a Shoebox
1. Paint your shoebox green (and seal it if desired)
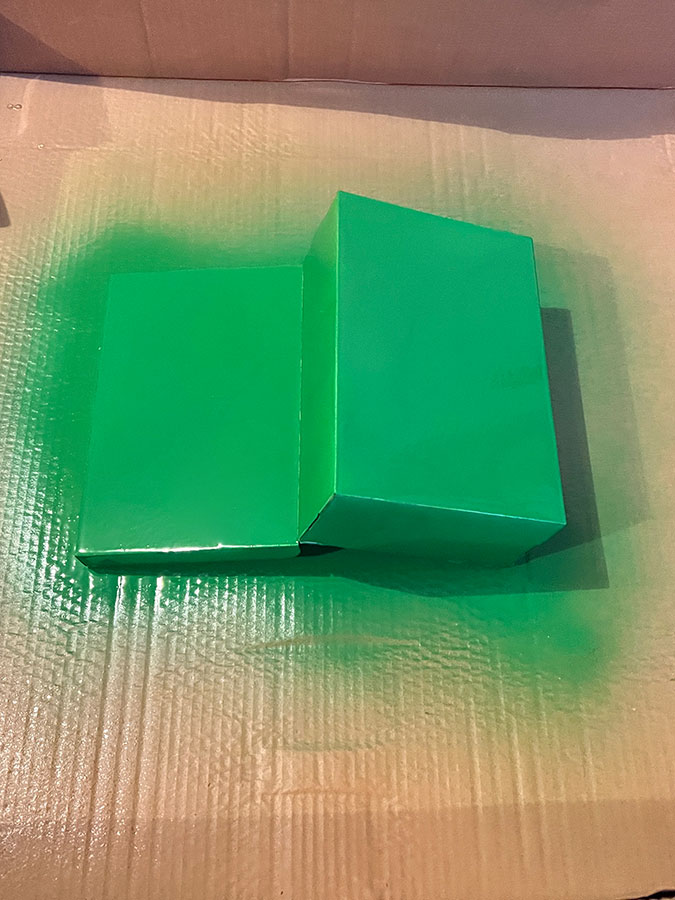
You can paint your shoebox any color you like, but St. Patrick’s Day is known for being green! Feel free to brush on acrylic paint if you have some on hand. It takes longer, but it’s a lot cheaper, and the kids can do the painting that way. You could even wrap it in paper instead of painting!
I like things to move quickly, and already had green Krylon on hand. So I spray-painted my daughter’s old Adidas box in the garage the day before we assembled the trap. A perfect coating wasn’t the goal, but I did give it two separate sprays for decent coverage. After giving it a few hours to dry, I also sprayed a single layer of matte Polycrylic over it before I went to bed. This helped the box feel less sticky and reduced the shine from the glossy paint.
2. Cut a hole in the top
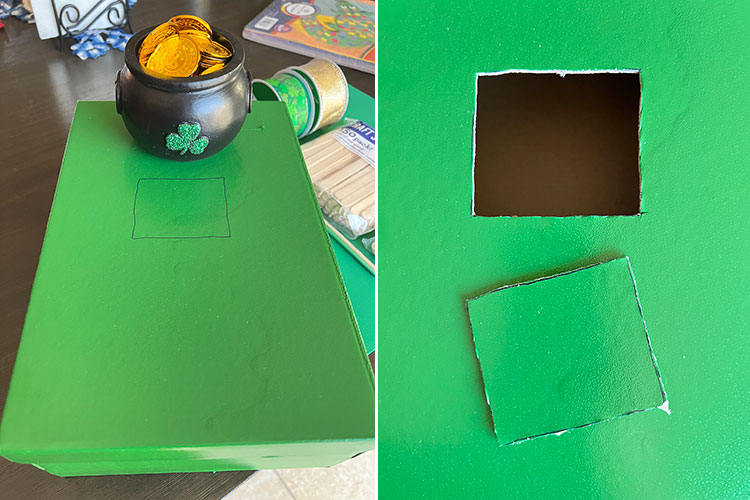
To determine where to cut the hole, I placed my pot of gold on the back of the trap. Then I used a pen to draw a rough square right in front of it, large enough to capture a little leprechaun. Using my X-acto knife, I cut around the outline I drew to create a hole. An adult must do this part – never let children use sharp knives!
3. Wrap the shoebox in shamrock ribbon
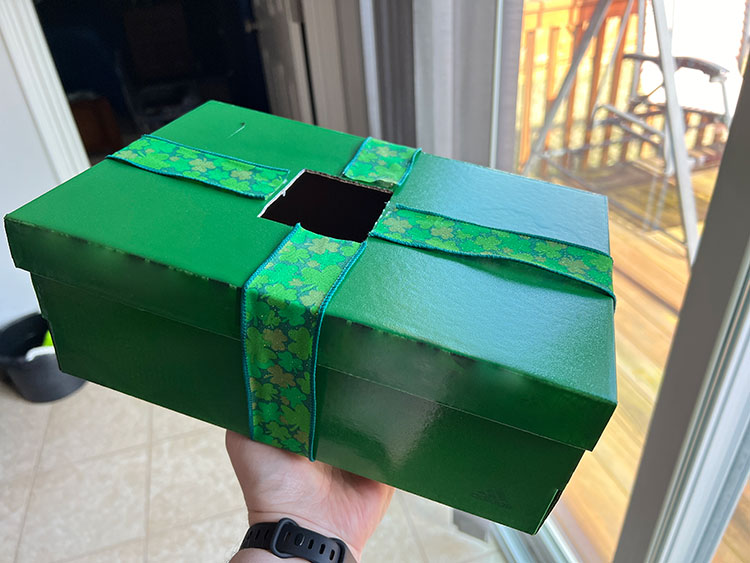
I wrapped the clover-patterned ribbon I found around the shoebox twice, around the long way and then again around the short way. Both times, I started on one side of the hole I cut out and ended on the opposite side, cutting the length with regular scissors. I used double-sided tape on each end to hold the ribbon in place.
4. Wrap gold ribbon around the box
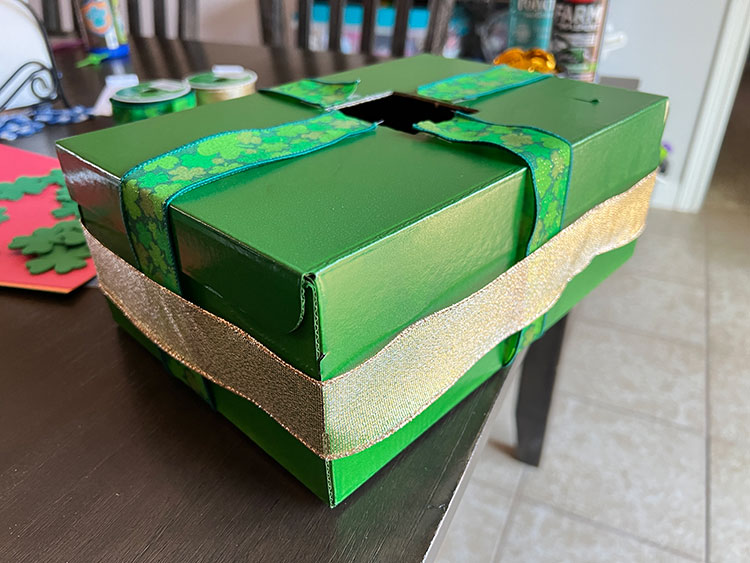
Just for aesthetic appeal, I also added some gold ribbon around the perimeter of the box. Once again, I just used double-sided tape to hold the ends down. I started in the back (the end where the pot of gold would sit) and overlapped it a bit with the end of the ribbon. For my design, I wasn’t worried about taping it down all the way around, because I knew the shamrocks I attached would hold it all in place.
5. Cut shamrocks and a trap door out of green foam
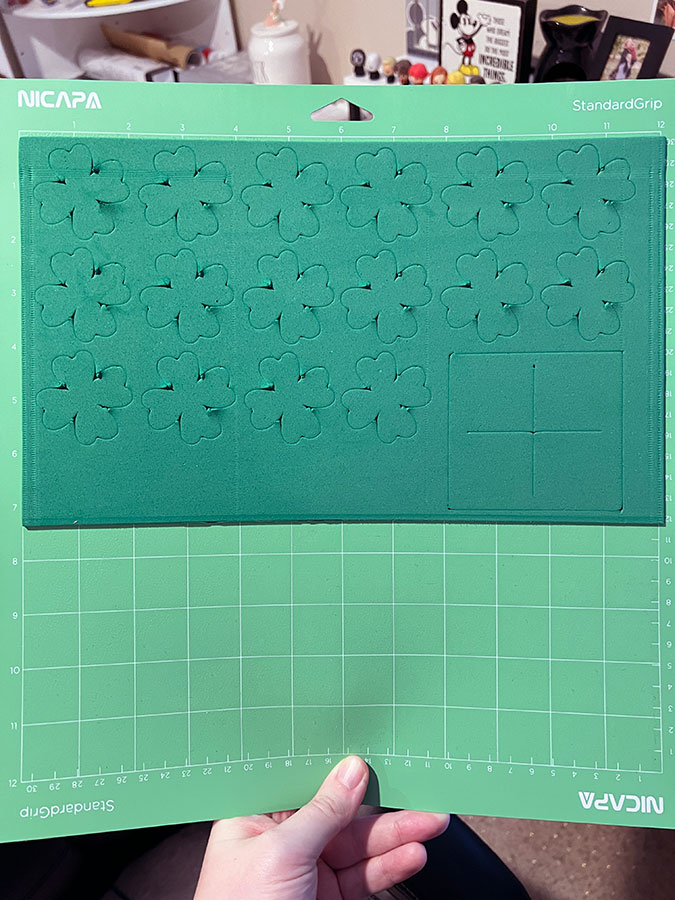
To make this step super-easy, I used my Cricut with the deep point blade to cut all the shamrocks and the trap door out of my craft foam! I cut a total of 16 shamrocks, each about 1.75” wide. The Cricut didn’t cut them 100% perfectly because they were relatively small for using the machine to cut from foam, but I was happy with the results (and the time saved). You can always trace shamrock shapes onto your foam and cut them out by hand. It’ll take longer, but it also gives your kids another step to help with!
For the trap door, I measured the hole I’d cut from the shoebox, then added a rectangle in Cricut’s Design Space about half an inch bigger on each side. I made sure to add a couple of cut lines in a plus sign in the center of the rectangle (without having them cut all the way across).
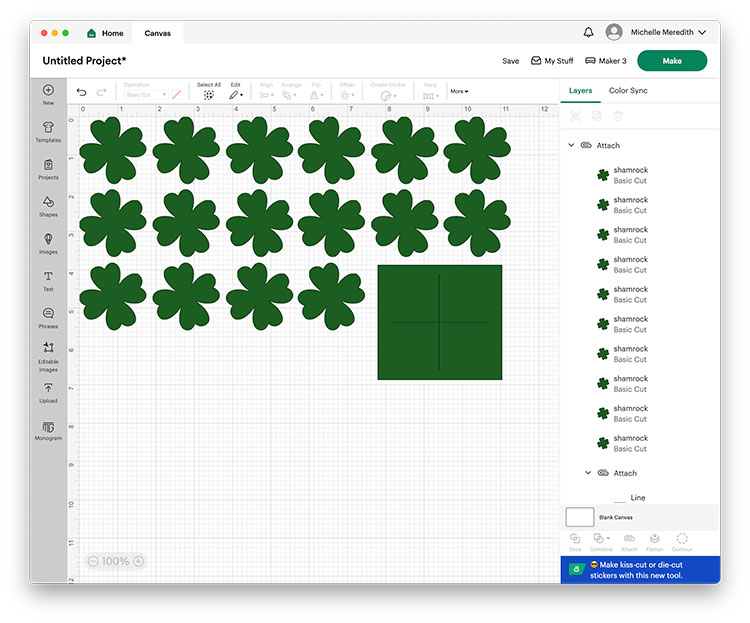
6. Hot-glue the shamrocks to the gold ribbon
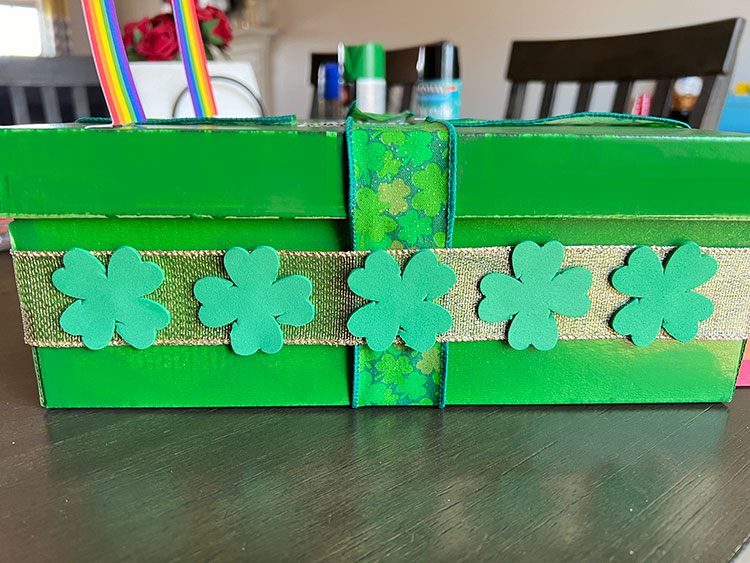
This step should also be done by an adult! I used a hot glue gun to draw a plus sign on the back of each foam clover, then pressed them against the gold ribbon on the box. The ribbon was sheer, and the hot glue was able to seep through, securely attaching both the clovers and the ribbon to the shoebox! The long sides each had five four-leaf clovers, while the ends each had three.
7. Hot-glue the trap door over the hole
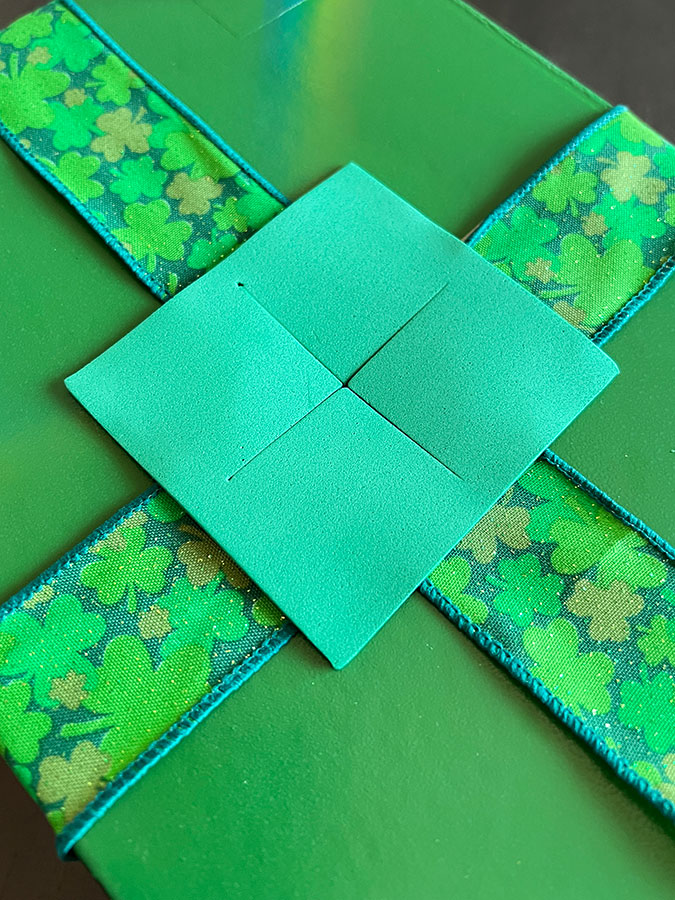
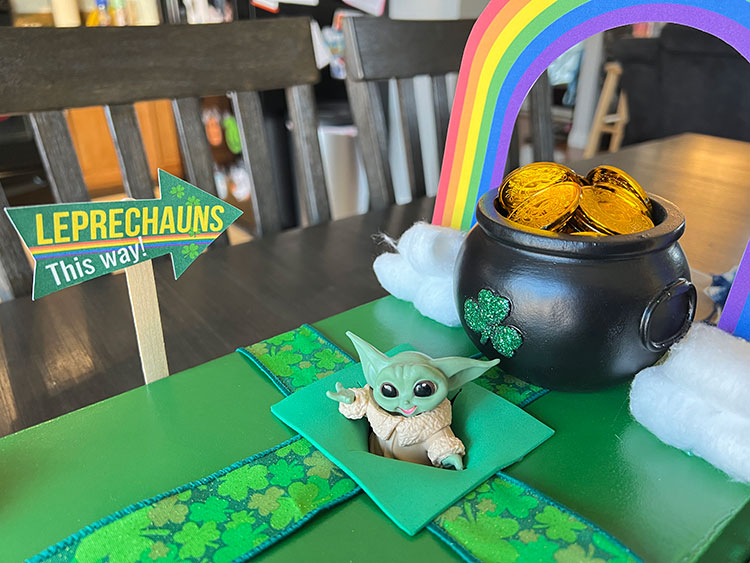
Please don’t let kids handle hot glue! I drew a thin line of hot glue around the edges of the foam rectangle I measured for the trap door. Then I carefully placed it over the hole in the shoebox so that the lines of glue were all connecting to the box. Since I measured the foam to be half an inch bigger on each side than the actual hole, this was easy to do and it easily covered the ends of the shamrock ribbon.
8. Create a rainbow road from construction paper
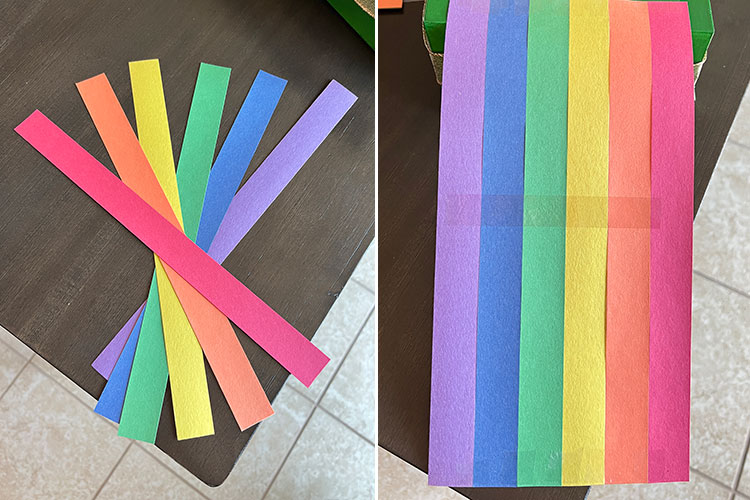
To create a rainbow path leading up to the shoebox trap, I cut one-inch strips out of 12-inch long red, orange, yellow, green, blue, and purple pieces of construction paper. A paper trimmer made quick and precise work of this! Then I laid them out side-by-side in rainbow order and carefully taped them together.
I started by taping one end together by attaching one color at a time. Then I placed tape across the middle, making sure they were perfectly aligned as I went. Finally, I placed tape across the other end.
9. Print and cut out a tall rainbow
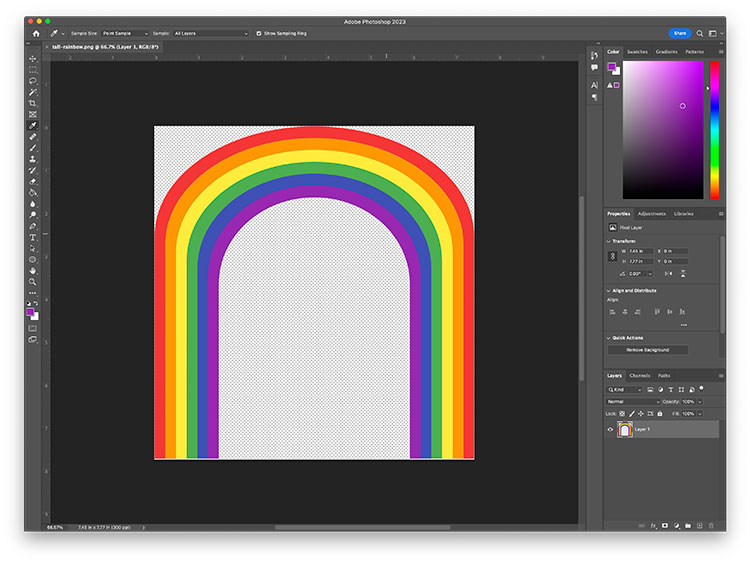
For this project, I specifically designed an extra-tall rainbow that would sit at the edges of the shoebox while leaving plenty of room for the pot of gold underneath. Since I needed it a little bigger than the Print-Then-Cut feature of my Cricut could handle, I just printed it out on white cardstock and cut it out by hand.
If you’d like to attach some fun signs like I did, now is a good time to print and cut those out as well! I did use my Cricut for my signs. Fill out the form below to get my special rainbow design for free! I also included the shamrock shape I used with my Cricut.
10. Attach the rainbows and cotton-ball clouds
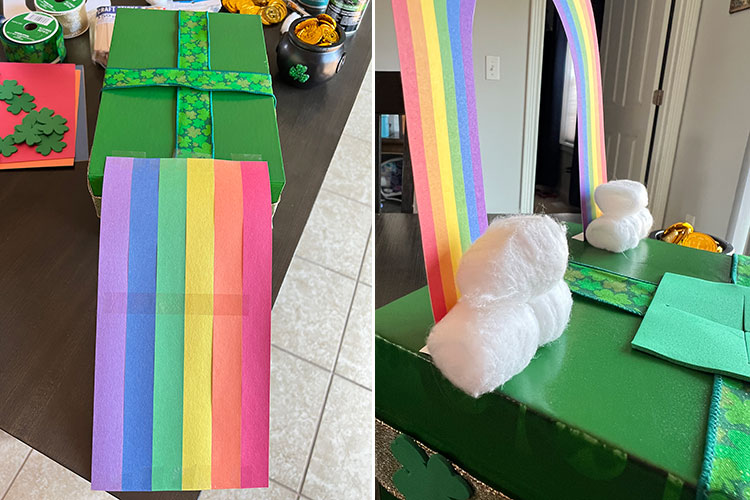
First, I attached the rainbow road by turning the shoebox over and taping it to the bottom. Since I wanted the red to start on the left when looking at the trap, I taped it with the purple to my left (since it was upside down). Then I turned it right-side-up and attached the cardstock rainbow.
First, I folded about a quarter-inch of each end backward so I would have something to tape to the box. I used my double-sided tape to attach it near the back of the trap, and carefully manipulated and rolled the cardstock so that it stood up straight. Then I used hot glue on the cotton balls to stack them up in front of the ends of the rainbow.
11. Hot-glue craft sticks to make a ladder
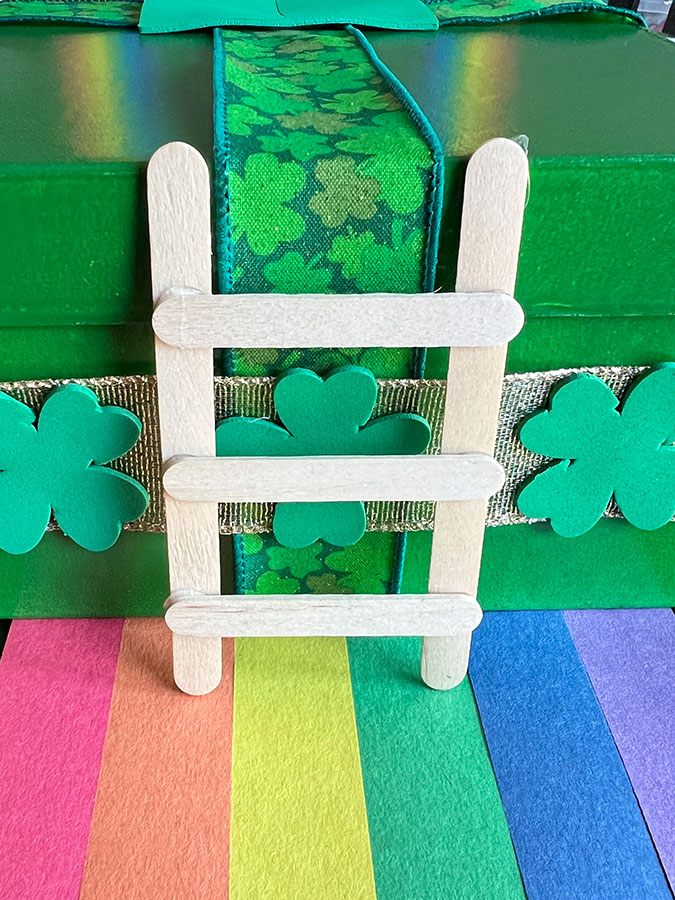
For the ladder, I used two regular 4.5”-long craft sticks and three mini craft sticks. I hot-glued the middle rung to the center of one longer stick, and then the other. Then I glued the other two mini sticks above and below that one. I chose to also hot-glue the top of the ladder to the edge of my shoebox, but you can always leave it loose and prop it against the trap.
12. Fill the pot with gold coins and place them under the rainbow
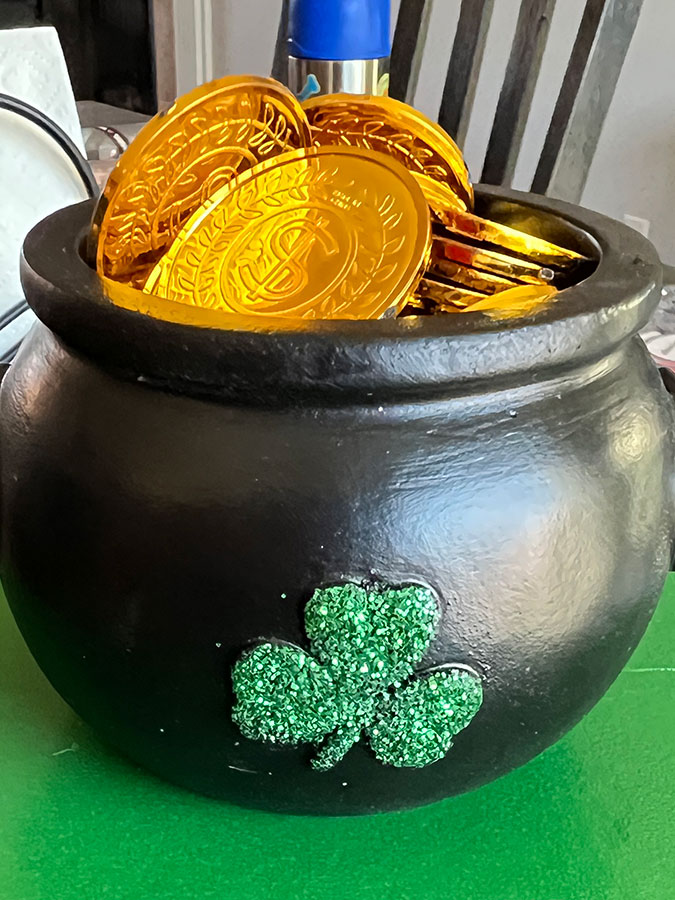
Since I already had gold coins from a previous birthday party, I was so happy to find this adorable empty pot! I stuffed as many plastic coins into the pot as I could and placed it under the rainbow, just behind the trap door. Your leprechaun trap project is complete!
Decorate it with Signs
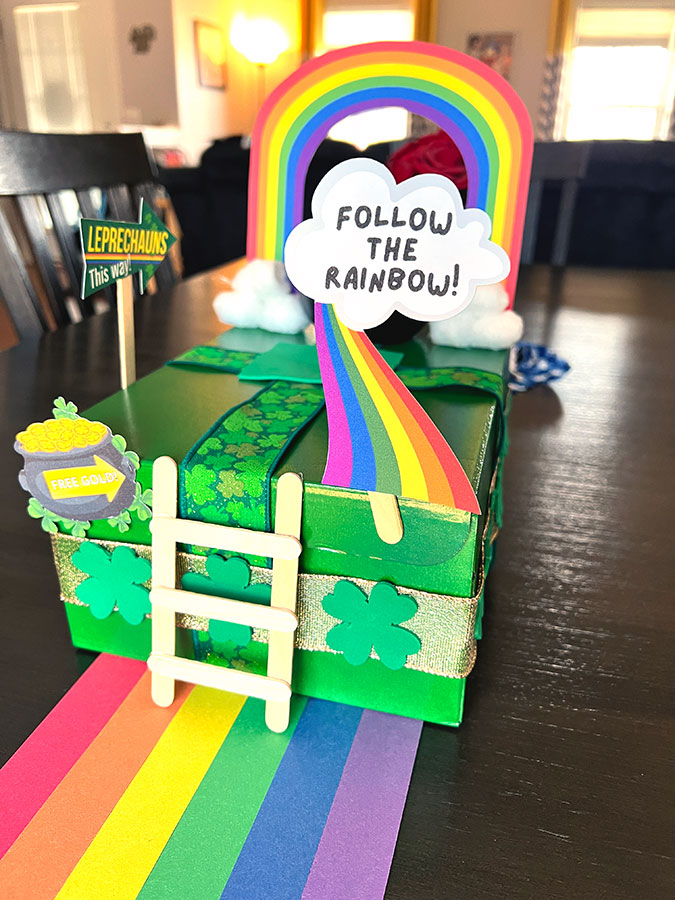
For an even more fun aesthetic, I added some signs I previously designed specifically for decorating leprechaun traps! You can get a couple of my signs for free, or you can check out all of them in my shop.
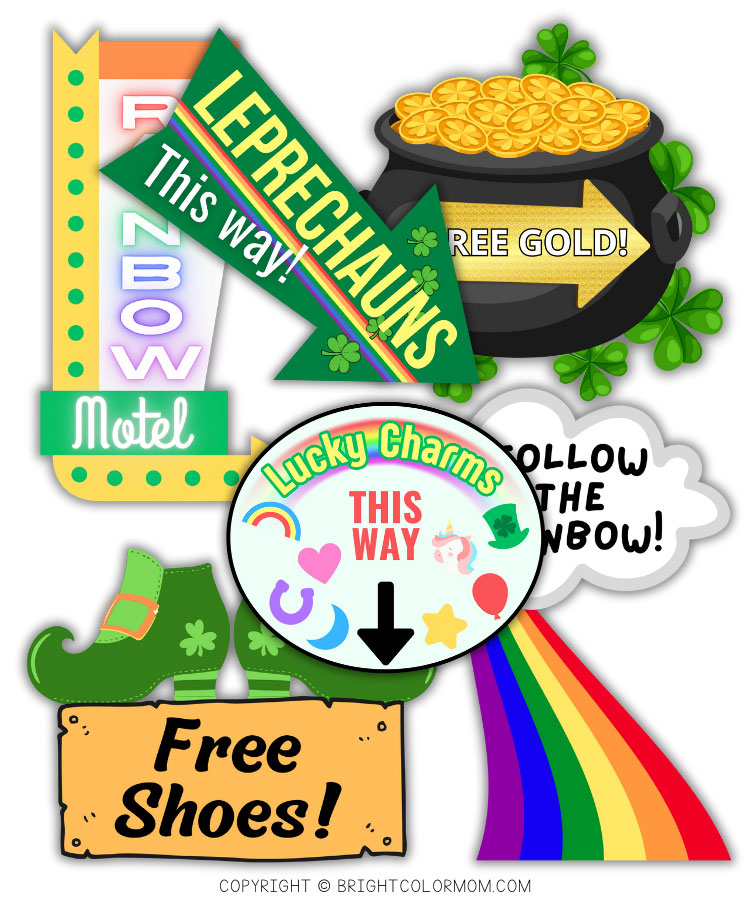
What to Leave in a Leprechaun Trap
Leprechauns can’t resist gold, of course! You could leave a pot of gold like I did, or just create a trail of gold coins that lead him down into your trap! Good-luck charms are also a clever lure for leprechauns. You could even leave a trail of the marshmallows from Lucky Charms cereal, which are all things some people believe bring good luck. Leprechauns are also known for their shoe-cobbling skills, so why not leave an old shoe in need of repair inside the box?! That would be genius!
Taking a Leprechaun Trap to School
To transport this particular leprechaun trap, the pot of gold should be removed and carried separately in a grocery bag. I put the gold coins in a Ziploc bag as well, so they didn’t fall loose all over the grocery bag. If you didn’t glue the ladder to the box, you’ll want to put that in the bag as well. The rainbow road can be folded backward underneath the box when carrying it.
Your child can easily assemble the trap themselves by unfolding the rainbow road, filling the pot with gold, placing it under the rainbow, and propping up the ladder. If your shoebox trap is meant to stay at school through St. Patrick’s Day, check out my instructions for building a LEGO leprechaun trap to keep at home!
Leave Leprechaun Tracks for St. Patrick’s Morning
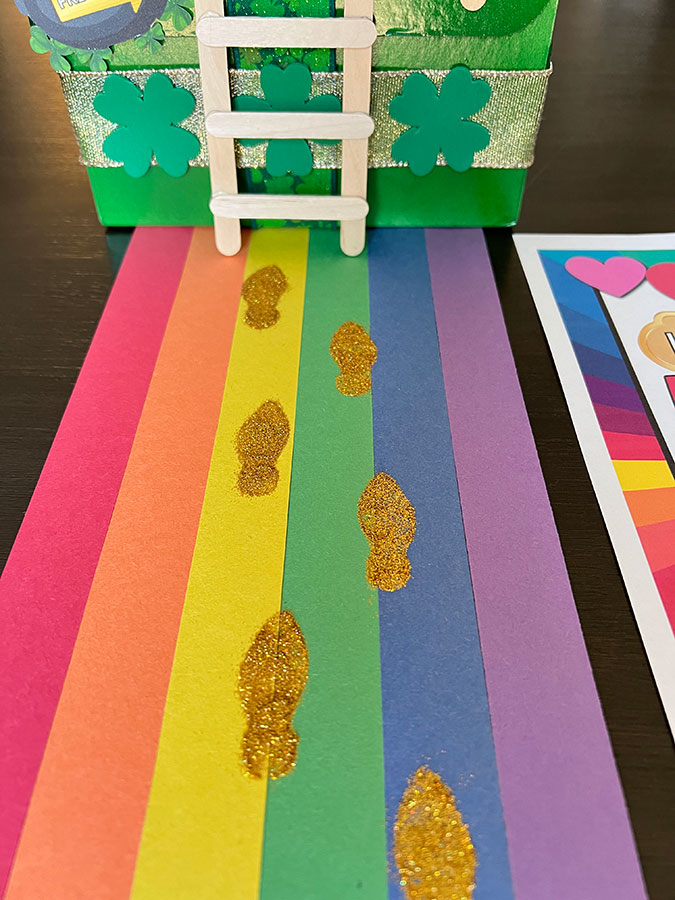
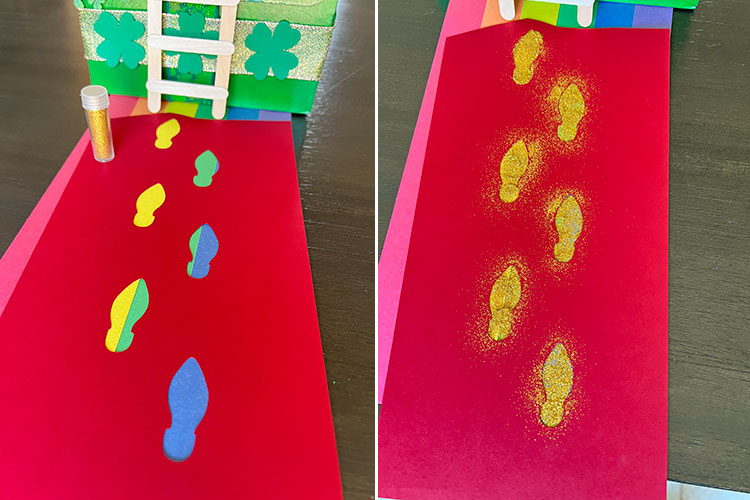
To really WOW your kids on St. Patrick’s Day morning, make it look like a leprechaun came by to steal the gold during the night! I created an SVG of leprechaun footprints and arranged them in Design Space to look like tracks that would fit on top of my construction paper rainbow road. The SVG comes free with my leprechaun notes.
I used my Cricut to cut the tracks out of heavy cardstock and placed it over the rainbow. Then I sprinkled a small amount of fine gold glitter over each footprint. After using my finger to spread out the glitter to cover each hole, I very carefully lifted the cardstock to reveal the fake leprechaun footprints. Just don’t forget to take the gold coins out of the pot!
Print a Note from a Leprechaun
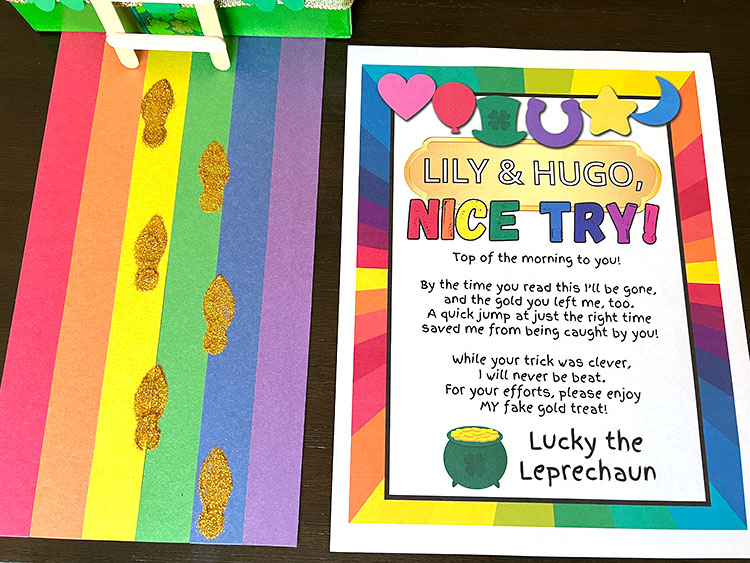
To leave zero doubt about who left the glitter tracks, I also customized and printed a letter from the leprechaun with my kids’ names at the top! It let them know that their trap was indeed well-made, but alas, leprechauns are just too smart. You can get a free blank leprechaun note, or get one of the premium designs from my shop!

See the Trap in Action
I hope you’ve gotten lots of great ideas for designing your own shoebox leprechaun trap. This is just one trap I made, but you can get lots of leprechaun trap ideas here! Just for fun, please enjoy this photo of Grogu getting stuck in our trap!
