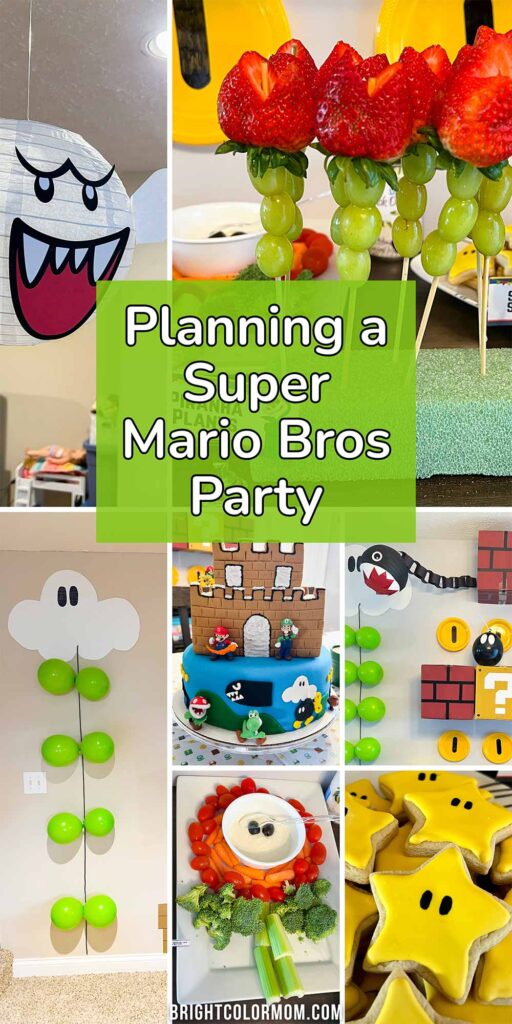
Planning birthday parties can be daunting – I know, I go through it at least twice a year! Are you looking to create an unforgettable celebration for your little video game enthusiast? Look no further than my guide to throwing a legendary DIY Mario birthday party.
My son Hugo got deeply into Mario games after getting a Nintendo Switch from Santa. We have at least a dozen of them now (not counting my old Wii, Gamecube, and Nintendo DS games). Mario is my favorite video game series, too! I gently suggested that he choose Mario as his party theme for the next year, and he thought it was a great idea. And man, did I go bonkers with this one!
I’ve got all the ideas you need to throw a Super Mario birthday party, from toad-ally awesome decorations to fire-flower-fueled food and real-life Mario party games. Let’s-a go!
This post may contain affiliate links. If you make a purchase after clicking one, I may receive a small commission at no cost to you.
The Super Invitation
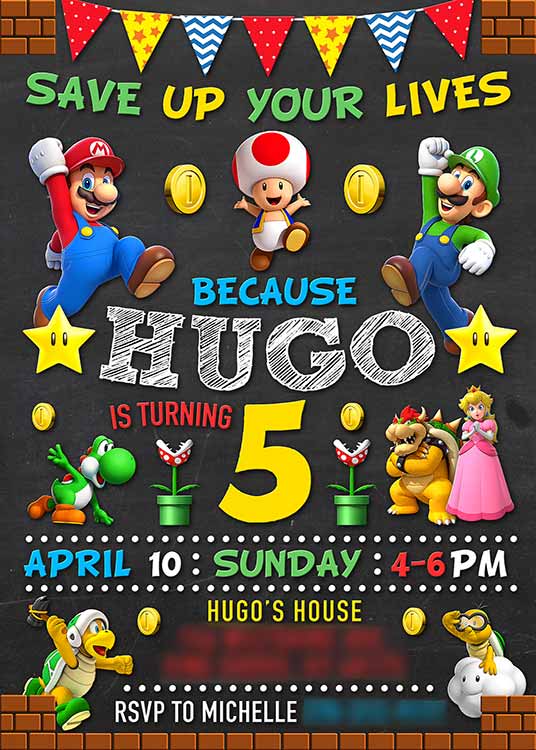
I taught myself how to use Photoshop when I was just 12 years old, and I try to put those skills to work at every opportunity. So I always design my kids’ birthday invitations! Hugo looked at a few styles and settled on the chalkboard trend. I focused on the good guys, but I made sure to include his favorite baddies – Bowser and Lakitu.
Since I’m a dinosaur (born in the 80s), I still prefer to send out physical invitations. In the mail. I know, it’s crazy. But I have always ordered my prints through Mpix and absolutely love their quality.
Mind-Blowing Decorations
I held NOTHING back when coming up with DIY decorations for this party. To date, it is by far my most elaborate setup (though Lily’s Encanto birthday party is pretty close). As guests walked in the door, they were fully immersed in a life-size Mario game – complete with coins, blocks, and bad guys.
Approaching the Door
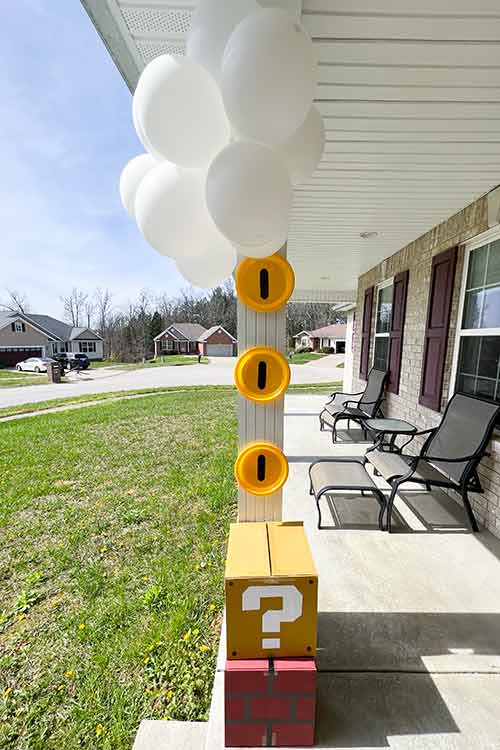
On the porch column to the immediate left of our walkway, I placed the initial decorations to set the tone. A “cloud” of white balloons were strung together with fishing line and tied around the top of the column. Plate “coins” were taped in a vertical line below it. And resting at the bottom were a question block and brick block!
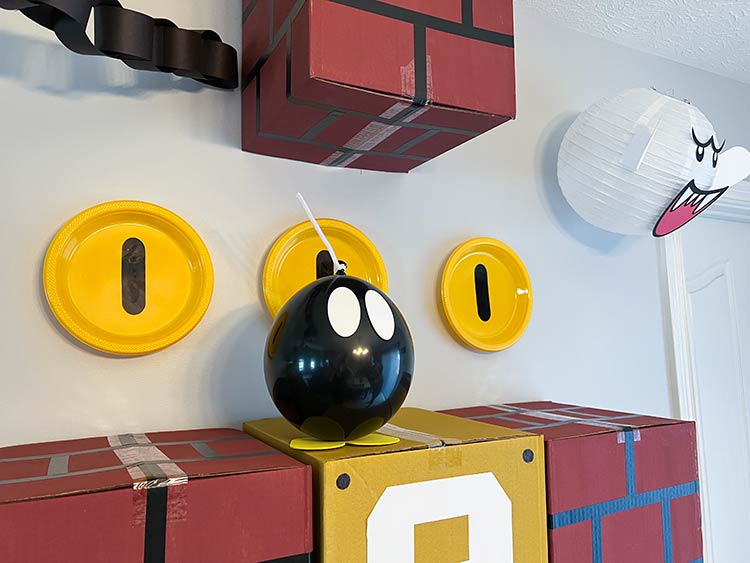
I used plastic yellow plates instead of paper for durability and colored the black coin centers on with Sharpie (and I went through a few markers – wait till you see how many coins are around the house!).
For the bricks, I ordered a pack of 12x12x12 cardboard boxes and painted them with red and yellow acrylic paints (before I taped them together). The question mark box design is just white cardstock question marks with white Sharpie points in the corners. I used black gaffer tape (leftover from my film school days) to create the brick look on the red boxes. 1-inch electrical tape would work, too.
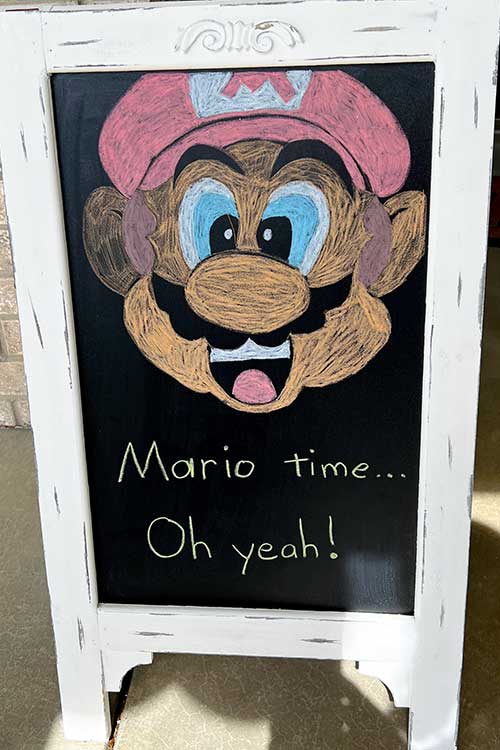
Since I got my chalkboard easel, I use it as a welcome (and exit) sign for every party, set up on the front porch. Mario was drawn freehand with dustless chalk!
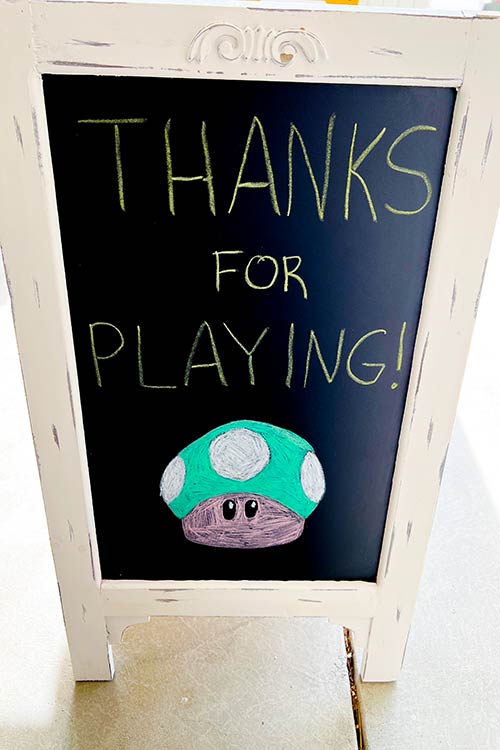
This is the side guests saw as they left the house. I thought giving everyone a 1UP mushroom on the way out might boost their energy after the chaos, haha.
Entering the House
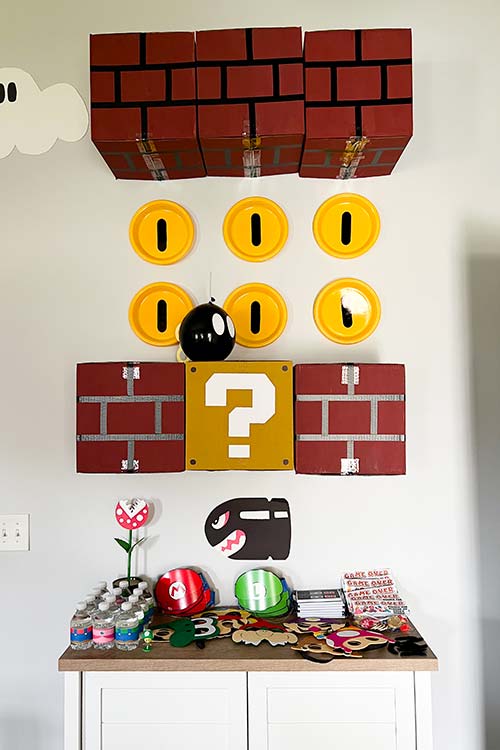
Once guests came through the front door, this was the first thing they saw, so I wanted it to be amazing! After much trial and error, I realized no wall-safe tape on this earth was strong enough to hold even empty cardboard boxes to the wall. So I had to suck it up and buy a bunch of velcro Command strips to hang them up. Fortunately, it only took two per box (one in each top corner).
Cloud
The cloud (up there in the top left) was cut freehand out of a poster board with Sharpie eyes drawn on. There are many more around the house. Well, there’s more of everything – just wait and see!
Bob-omb
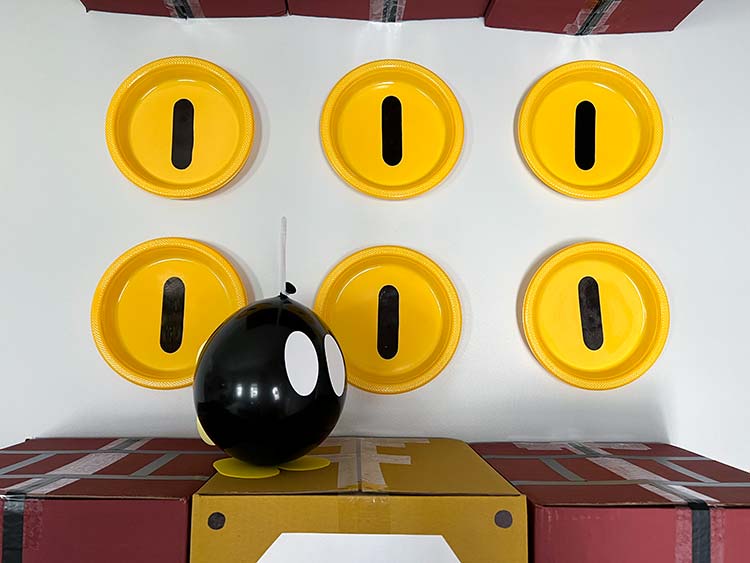
Bob-omb is literally a black balloon that could explode if popped! His eyes are white cardstock and his winding mechanism is yellow cardstock (with an extra bit folded over to attach it to the balloon with double-sided tape). The fuse is white pipe cleaner tied around the balloon knot (carefully placed to not poke the balloon). He also has yellow craft foam feet!
Piranha Plant
The piranha plant’s head is all cardstock cut out with my Cricut Maker 3 and taped around a wooden dowel I spray-painted green. The leaves are also cardstock, bent and gently folded out after being glued to the dowel. I stuck the “stem” of the dowel through a circle of cardboard and hot-glued the end to the bottom of the little terra cotta pot so it would stand up straight. The pots were also spray-painted green.
Banzai Bill
For whatever reason, Hugo really loved the Bullet Bills and Banzai Bills during this time. So I cut a few out of construction paper and taped them around the walls!
Chain Chomp
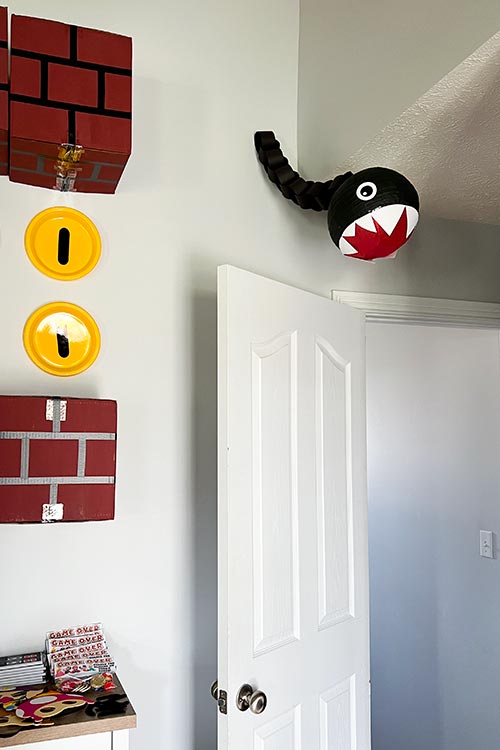
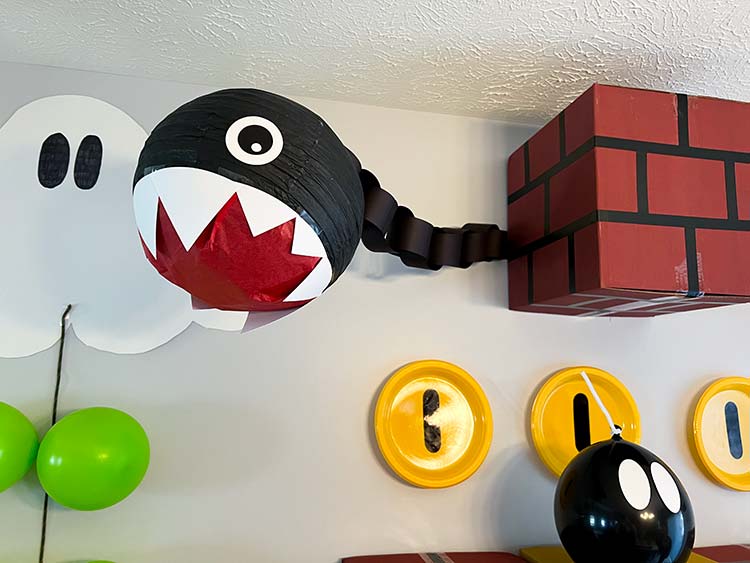
Just to the right of everything above the party favor cabinet, I hung a Chain Chomp to look like it was attacking people as they walked toward the basement door! I cut the facial features out of cardstock and red tissue paper (the Cricut cuts tissue paper with a rotary blade!) and hot-glued them to a black paper lantern.
The chain links are made from construction paper exactly like kids do in school, with one end looped around the metal bar of the lantern’s structure. I used fishing line to hang the head away from the end of the chain, which was taped to the wall.
Various Living Area Decor
Boo!
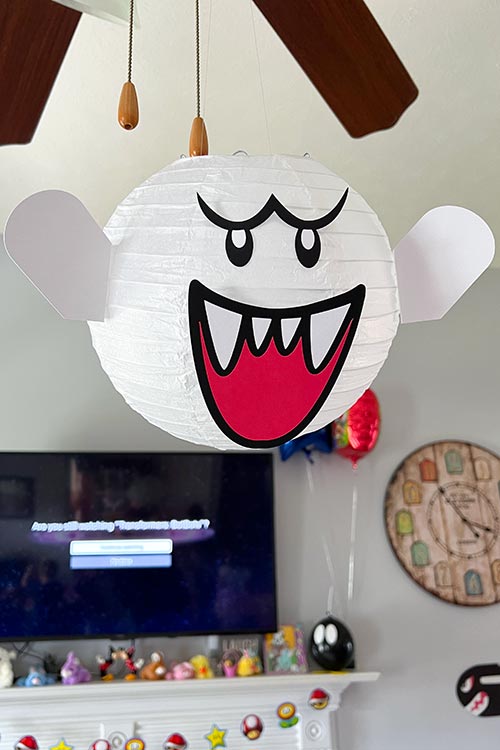
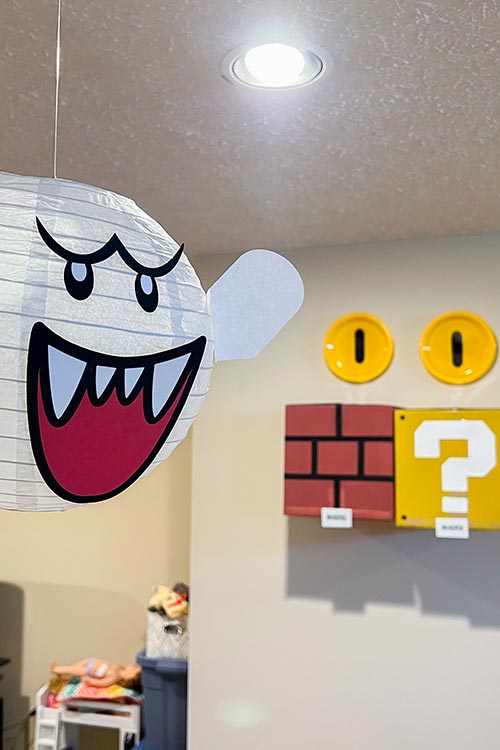
I hot-glued cardstock facial features and white ghost arms to white paper lanterns to look like Boos! One hung from the living room ceiling fan, and several more could be found throughout the house. Some were large and some were small, just like in the game!
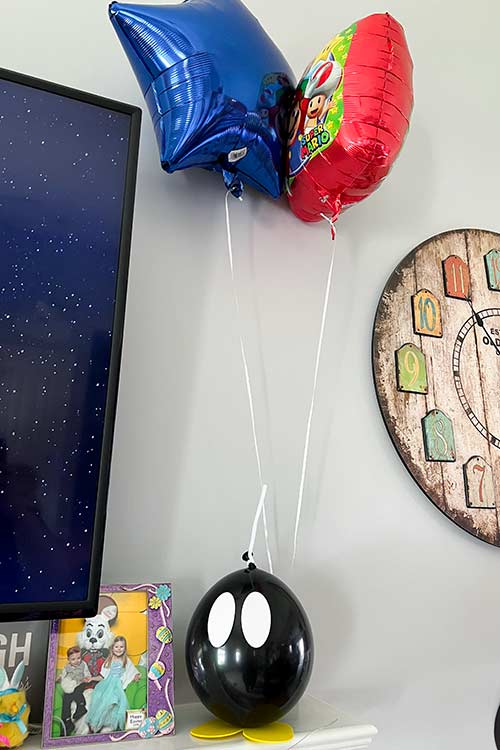
In addition to my gobs of DIY decor, I did purchase some licensed Mario mylar birthday balloons to fill with helium and have floating around the house. I hid the balloon weight in this picture behind another Bob-omb!
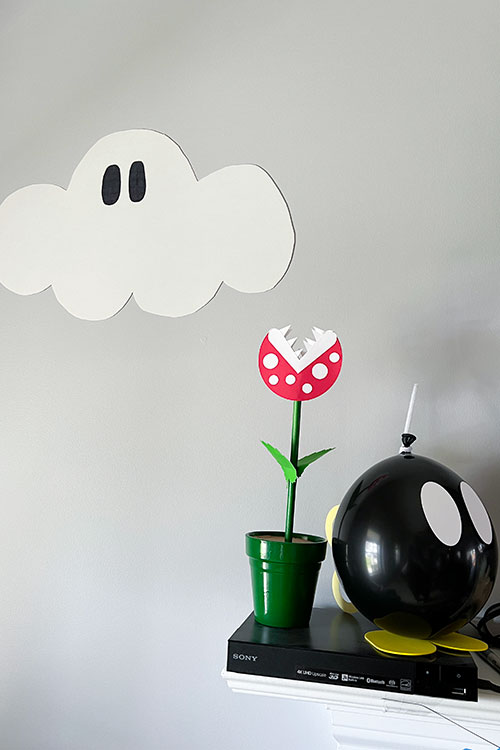
On the other end of the mantle, I placed another Piranha Plant and Bob-omb. A small cloud was on the wall nearby.
Store-Bought Decor
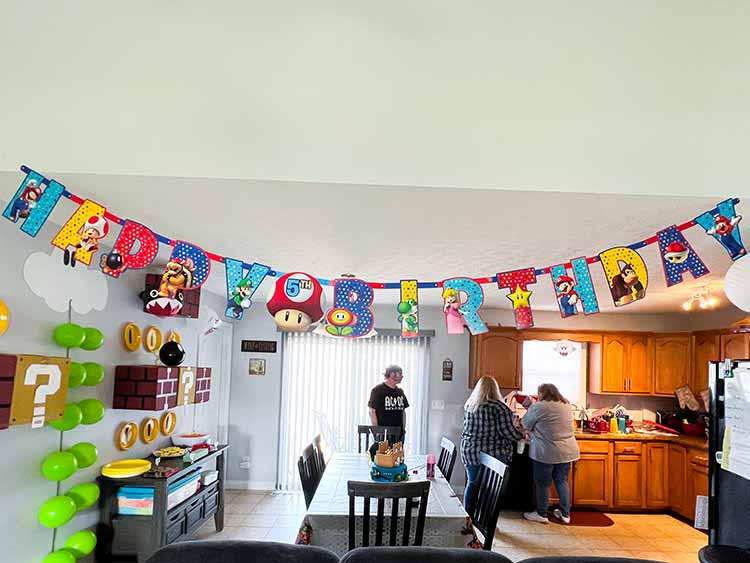
The Mario birthday banner was not DIY, it was a lucky Party City find! It’s still available on Amazon. I have a ceiling height difference between the living room and kitchen, making the bit of wall between them the perfect place to hang a massive 10-foot banner like this one.
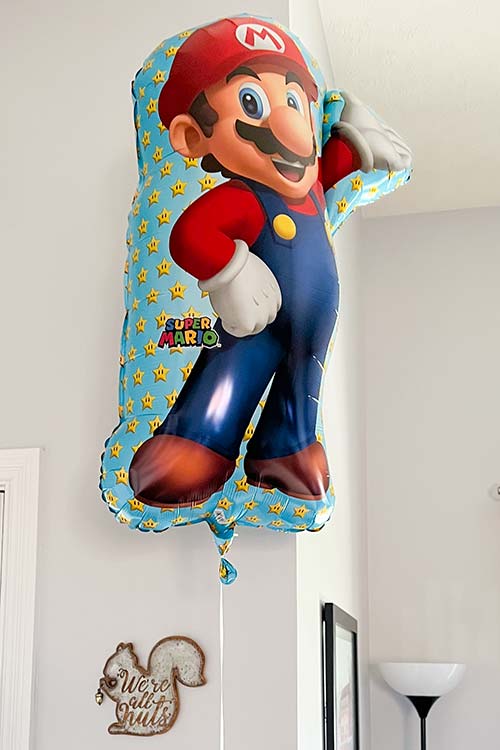
This giant mylar balloon came with the smaller ones. I was skeptical that it would actually float, but he did! Pro tip: Don’t keep floating balloons on a short wall by the front door. They’ll try to fly out every time it’s opened!
Thwomps
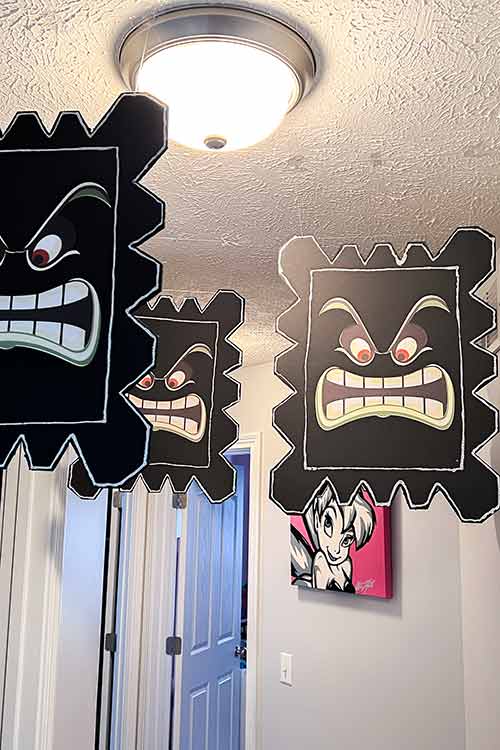
I am so proud of these Thwomps! They were fun to make, but cutting the black foam boards down to the Thwomp shape was time-consuming. I drew the shape onto each board with a silver Sharpie, then used an X-acto knife to cut along the outline. The border and rectangle around the face were drawn in silver glitter glue.
For the facial features, I turned an image of a Thwomp into just its eyes and mouth in Photoshop and uploaded it to Design Space. My Cricut used Print-Then-Cut to cut them out of regular copy paper, then I glued them onto the boards.
Hanging them was tricky! I poked holes in the top corners of each Thwomp and ran a fishing line through them because I wanted them to look like they were hovering. It took a LOT of tape (and a few Thwomps landing on my head for real) before they finally stayed put on the hallway ceiling.
Kitchen Backdrop
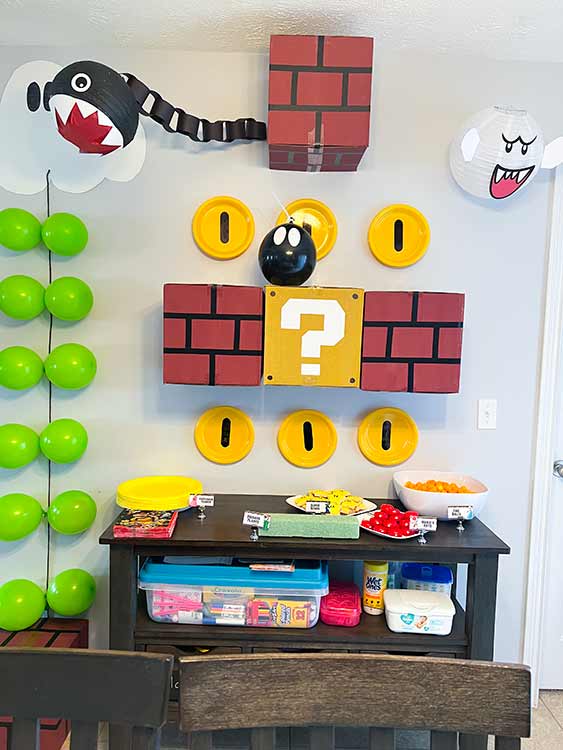
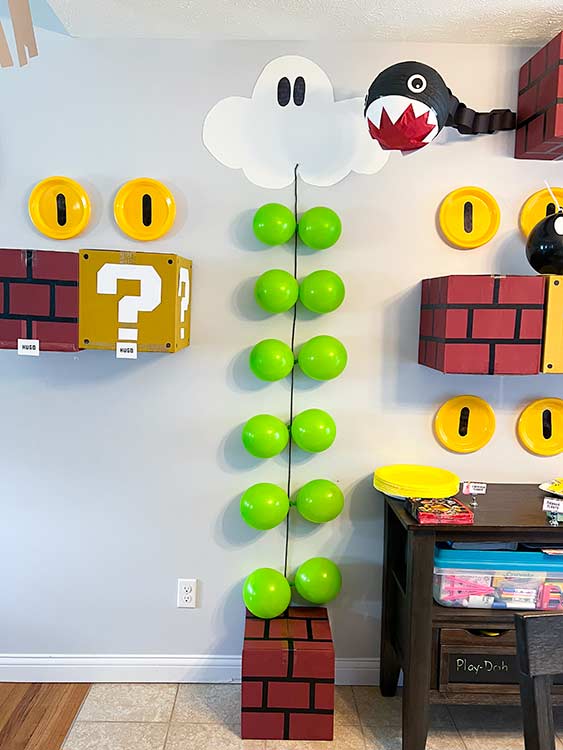
The scene set up over and around the server ended up looking truly amazing. All the coolest decorations were visible and well-placed, including bricks, number blocks, coins, a Chain Chomp, a Bob-omb, and a Boo.
I even made a fun little vine ladder out of green rope and under-inflated green balloons. A cloud perched perfectly right at the top, with a brick to get it started at the bottom.
The Basement
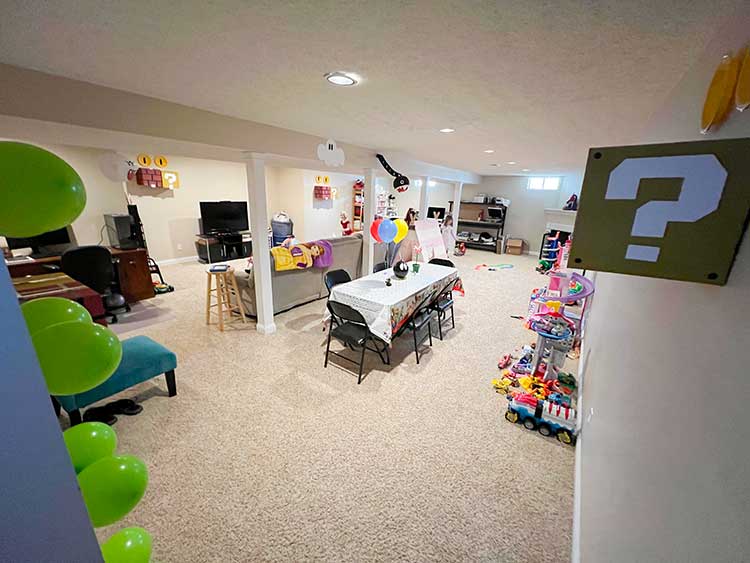
I don’t always do a lot of decorations in the basement, but I knew a lot of the kids’ activities would take place down there for this party, so I made sure to add lots of fun touches!
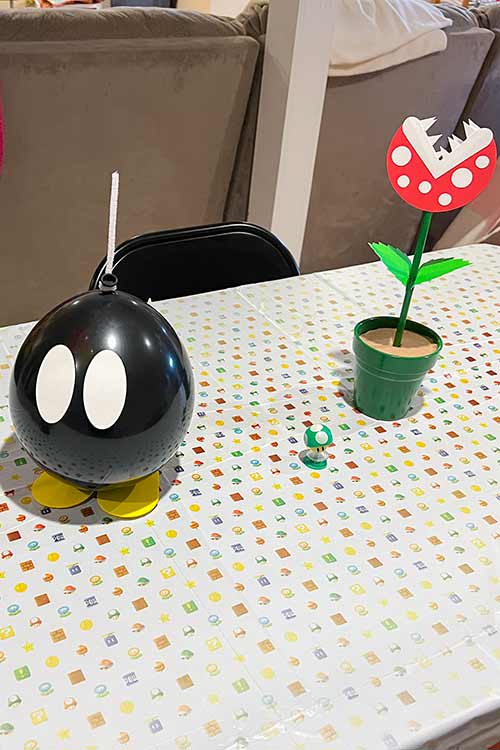
The table had a plastic Mario cover (this particular one is no longer available), with a Bob-omb and Piranha Plant as centerpieces. Small Mario-themed toys, like that tiny 1-UP mushroom popper, were scattered around.
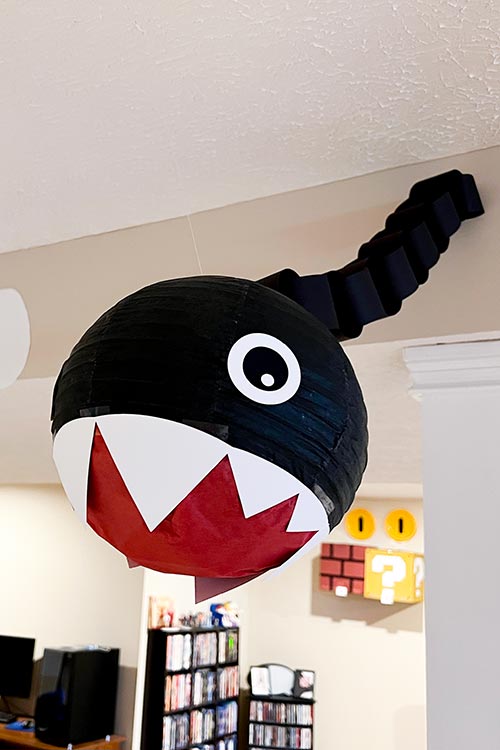
Another chain chomp hovered right over the table!
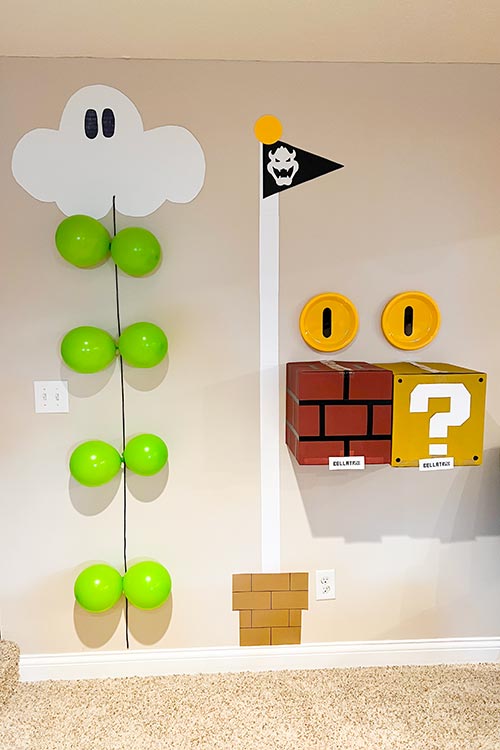
On one end of the basement, I set up another balloon vine ladder like the one upstairs. Well, my husband did, which is why it has way fewer balloons… I’m not sure I’ve ever seen a vine ladder so close to the goal post at the end of a level, but it seems like a good idea, because then you could just climb to the top and jump right on the flag!
The goal is made completely out of cardstock, and I just drew lines to make the brown paper look like bricks. And yes, I know there would never be coins and bricks after the flagpole, but those needed to be there for a specific reason (I’ll get into that in the party favors section). Of course, I had a couple of Boos hanging around the basement, too.
Power-Up Food and Drinks
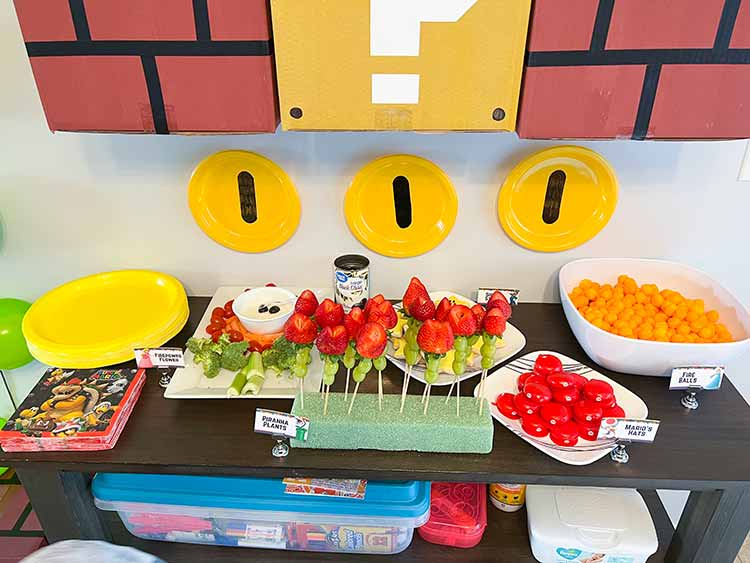
My buffet setup looked more sparse than usual, but the main dish (pizza) just wouldn’t fit next to the rest of the food. So they had a little breathing room this time. These are all the themed foods I served (puns included)!
Mario’s Pizza
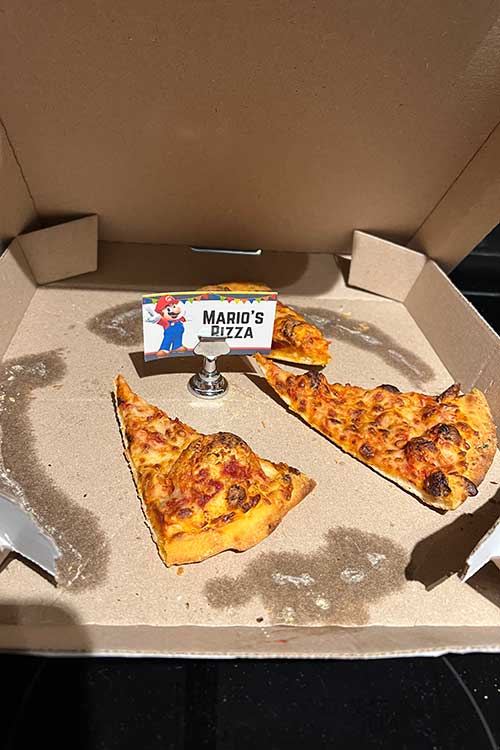
A birthday party favorite main dish, I’m not sure any other food could be better for a Mario-themed party. After all, he’s Italian!
Piranha Plants
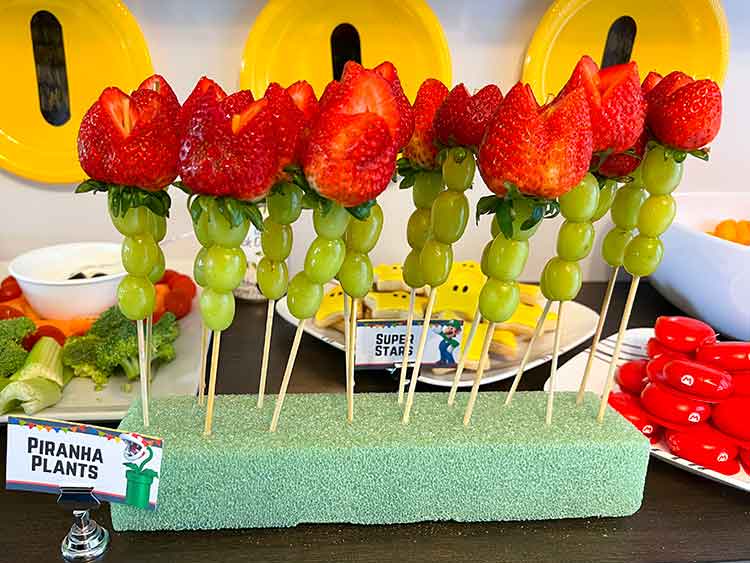
The fruit skewers were so cute and easy to assemble. A few green grapes were topped with a strawberry cut to resemble an open Piranha Plant mouth. To hold them upright, I stuck the skewers into a foam block I attached to the table with velcro Command strips (so the weight wouldn’t tip it over).
Firepower Flower
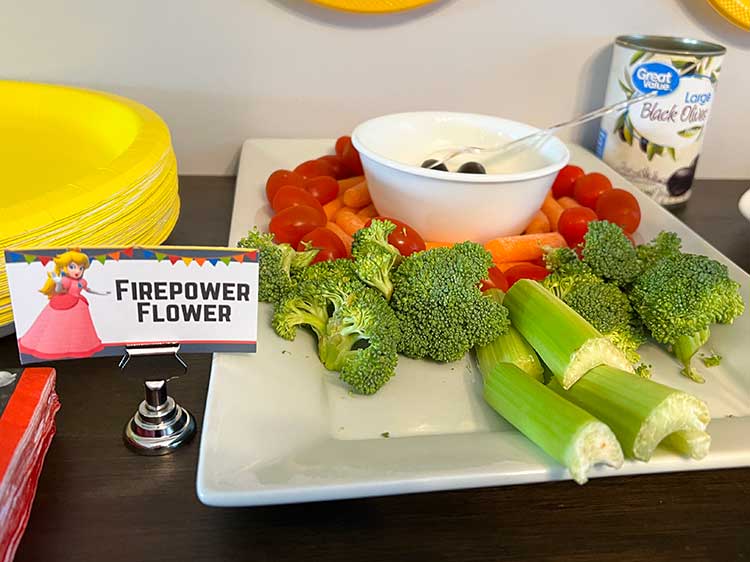
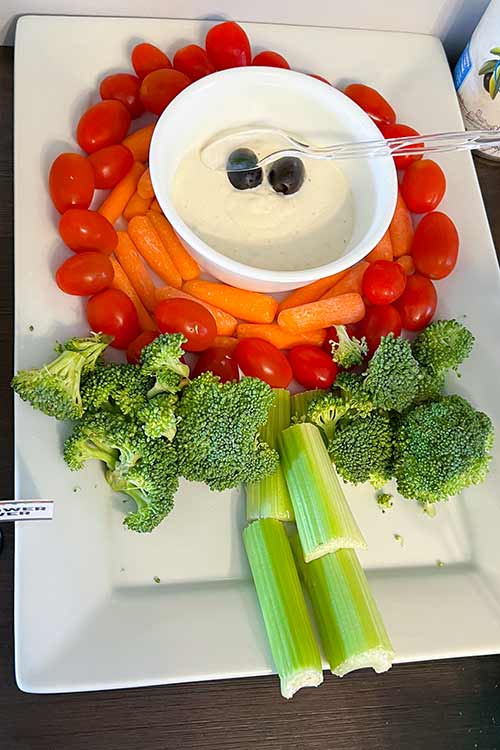
In an effort to make the veggie tray more appealing to the kids, I arranged them into a Firepower Flower! The face was a bowl of ranch with two whole black olives for the eyes. Baby carrots and grape tomatoes surrounded the bowl to form the flower. Celery sticks made the stalk, while broccoli formed the leaves.
Mario’s Hats
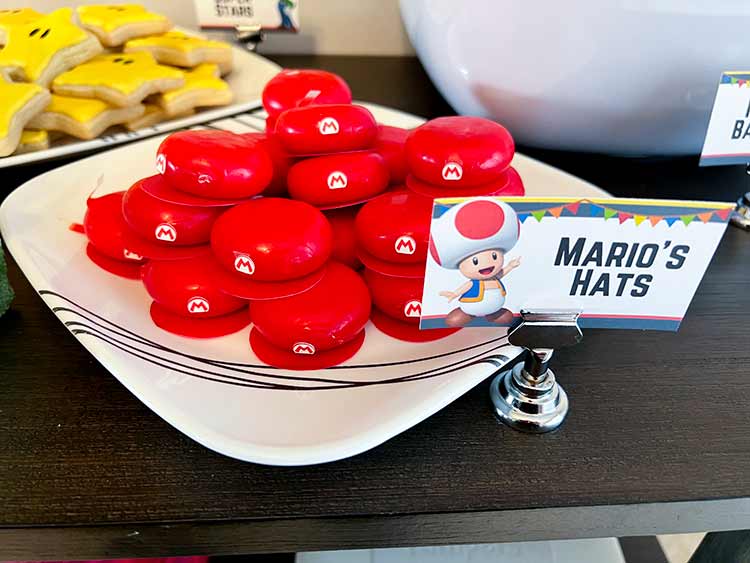
This plate of Babybel cheeses took a lot of planning. These were a BIG hit! I just wish Babybels weren’t so expensive.
I took the wrappers off but left the wax on (since I needed the red anyway). My Cricut cut out the teeny tiny “M” logos for the caps and I attached them to the wax with tiny pieces of double-sided tape. The brims were actually circles I cut out of a red plastic folder by hand and attached underneath with double-sided tape. They were refrigerated until the party started.
Fire Balls
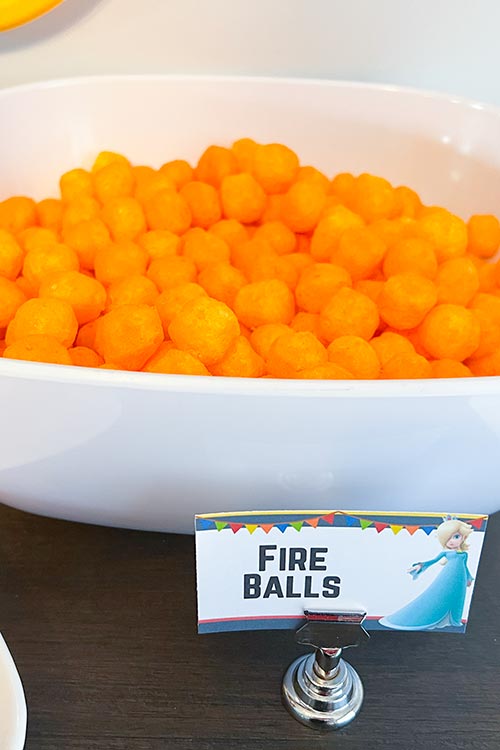
Cheese balls are perfect for this, and kids love them!
Super Stars
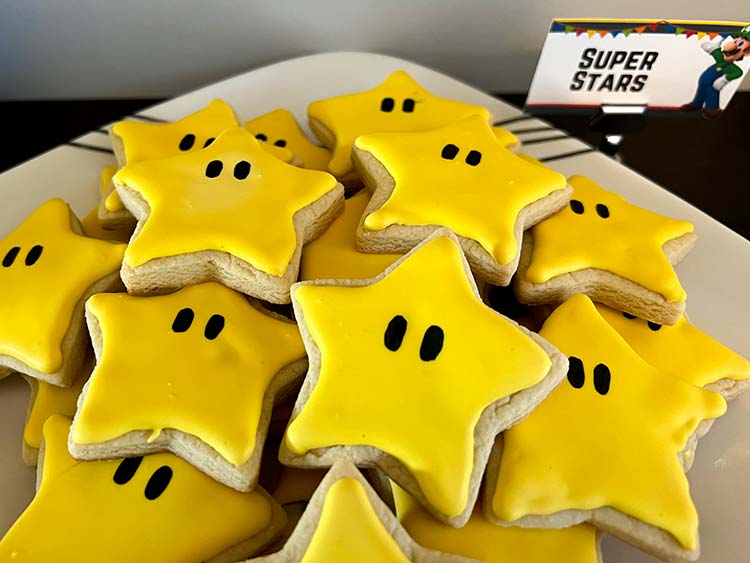
I usually have at least one sweet for guests to snack on before the cake is cut. I made cutout sugar cookies (my favorite method is to just add flour to a roll of premade, refrigerated dough) with a star cutter and covered them in yellow royal icing. The eyes were drawn on with a black edible marker!
Yoshi Lemonade
This was literally just homemade lemonade with soda water and green food coloring added.
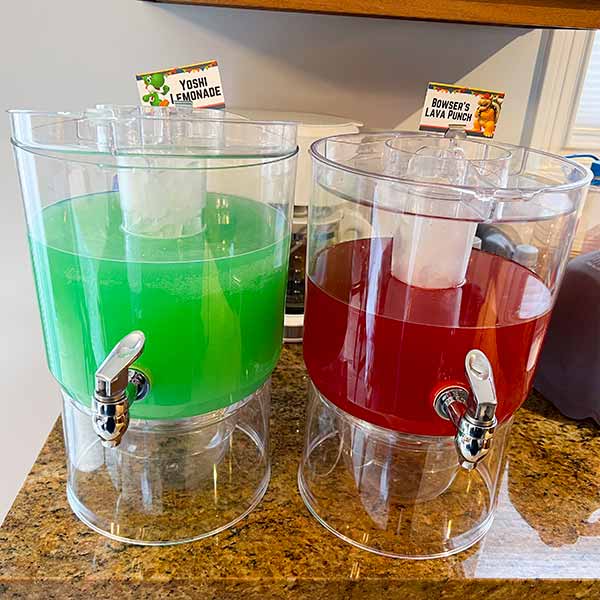
Bowser’s Lava Punch
Plain red Hawaiian Punch!
The Coolest Party Games
ALL of our party games were DIY. The kids enjoyed all of them – but especially the last one.
Pin the Moustache on Mario
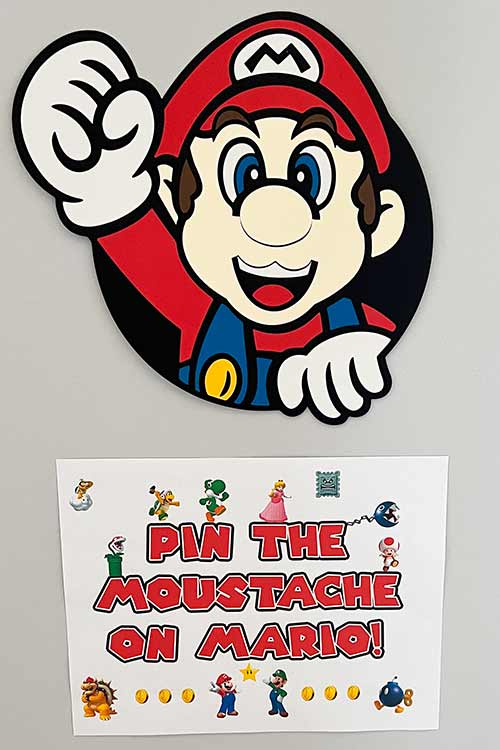
I used my Cricut to make my own “Pin the Mustache on Mario” game. The sign below it was designed in Photoshop and printed on white cardstock. Doesn’t he look weird without his mustache? But that’s okay, I had plenty on hand for the kids to try and place properly on his face while blindfolded. The mustaches were also made of cardstock and I put double-sided tape on the backs for them to stick.
Fireball Toss
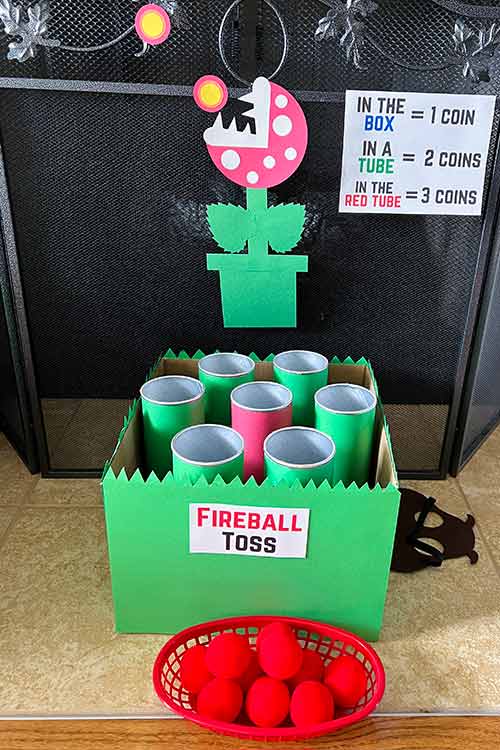
This game took quite a while – and a lot of Pringles – to make, but it was so cute in the end! I kept a box that was 12x12x8 I received for a delivery, and it was perfect. After covering it in green construction paper, I cut the overhang on the top to look like grass. Six Pringles cans were wrapped in green construction paper, with one more wrapped in red. I used a hot glue gun to attach the bottoms of the cans in the bottom of the cardboard box, placing the red can in the very center.
The game was simple. The kids were given a set number of red foam “fireballs” that they had to toss from a distance into the cans. For decoration, I also cut a fireball-breathing Piranha Plant out of construction paper (using the Cricut) to hang above the game! I also made a little point chart.
- 1 coin for getting a ball in the box (but not in a can)
- 2 coins for getting a ball in a green tube
- 3 coins for getting a ball in the red tube
This game kept the littlest cousin well-occupied throughout the party.
Goomba Stomp
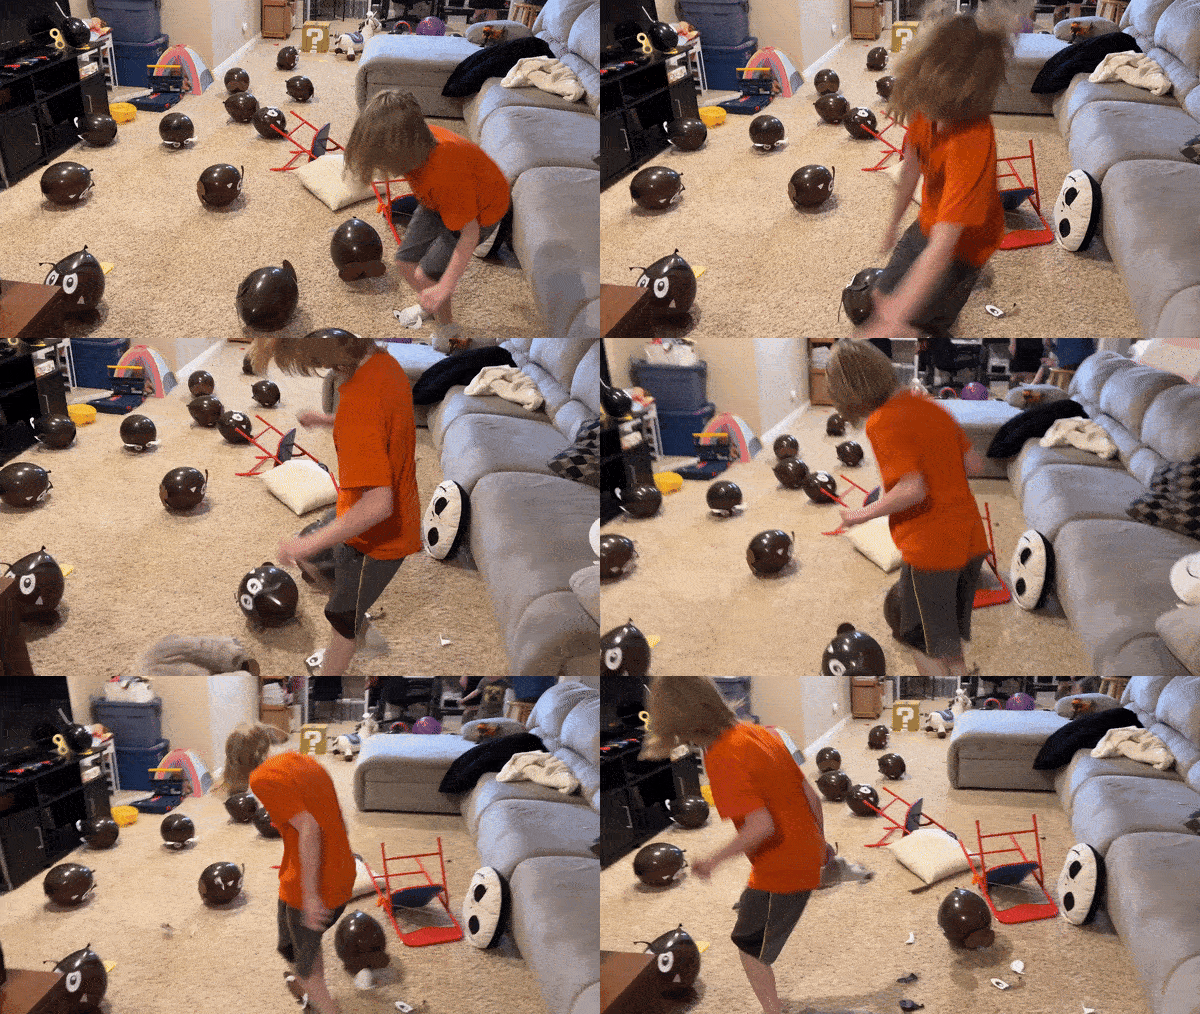
This was less of a game and more of a rage-filled chaos segment, and it is one of my favorite memories from this birthday party. Long before party day, I cut out tons of Goomba parts: eyes and mouths out of the regular paper they were printed on, and brown feet out of sheets of brown craft foam (all with the Cricut).
The morning of the party, I blew up 30 brown balloons with a hand pump, then used double-sided tape to attach the faces and feet for each Goomba. I wrangled them all into a giant garbage bag and kept it in the storage room in the basement.
When the time came, I had Josh and a couple of the other dads go to the basement and set the Goombas up everywhere while the kids were upstairs playing the other games. Then the kids were sent to the basement – where they spent a glorious three minutes jumping, stomping, and body-slamming on the Goombas until they were all dead!
DIY Mario Cake with Bowser’s Castle
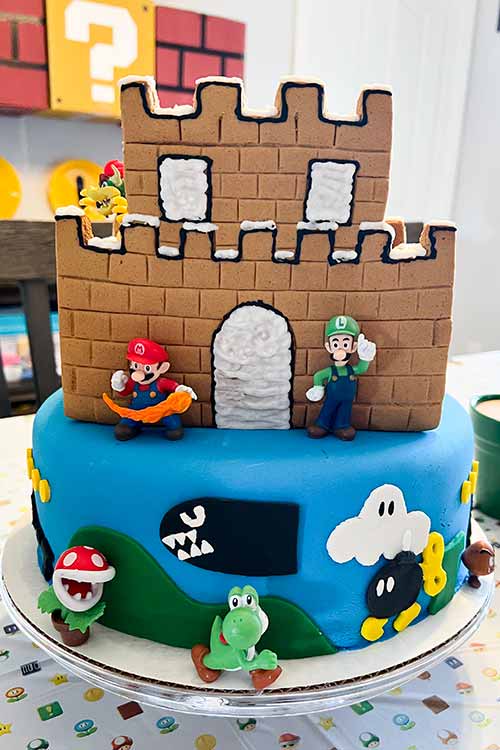
Once again, I made my own cake to Hugo’s specific requests. This one wasn’t terribly hard, it was just time-consuming to cut out all the little fondant pieces by hand.
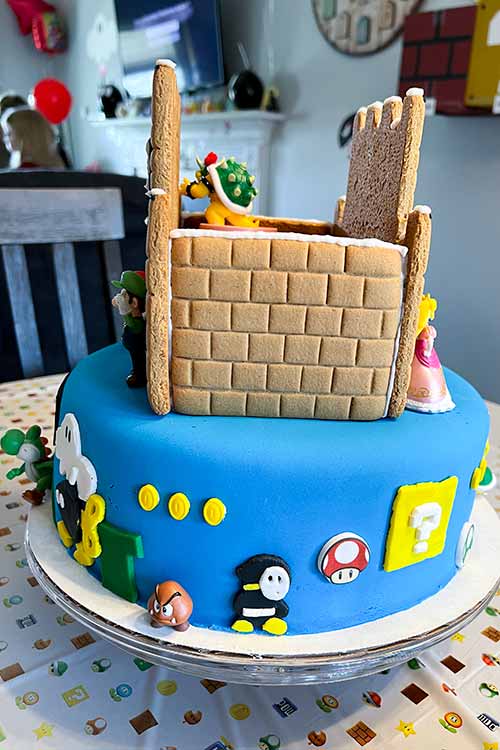
He wanted an old-fashioned vanilla cake with buttercream frosting, but he knew for what he wanted I’d have to use fondant to cover it. But he also loves Bowser and really wanted me to incorporate his castle.
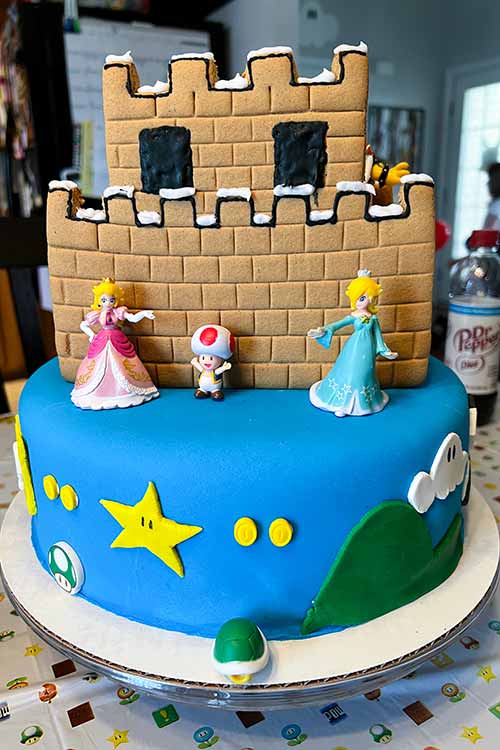
Bowser’s Castle on top ended up being super easy! I found a ready-to-make gingerbread castle kit at Walmart and assembled it on top. (Unfortunately, it is no longer available.) I placed a paper cup, trimmed to size, upside down inside the castle for Bowser to stand on. The castle also came with candy coins I placed in the “sky” around the cake so I didn’t have to make fondant coins.
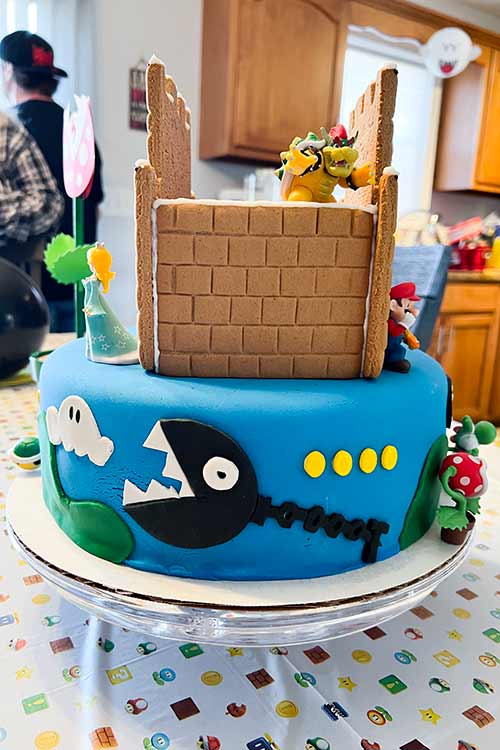
I used the characters from a big toy pack to help decorate it, but the set didn’t have all of Hugo’s favorite creatures, so those were the ones I made out of fondant. This included a Shy Guy, Bullet Bill, Bob-omb, and Chain Chomp! Of course, since then, they’ve released new character packs that include most of those guys, too. Oh well!
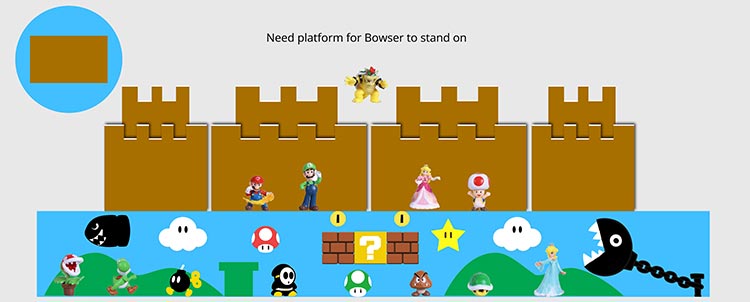
To get everything lined up, I made a preliminary plan in Photoshop (see below). It didn’t come out exactly as planned, but it was pretty good.
Unforgettable Party Favors
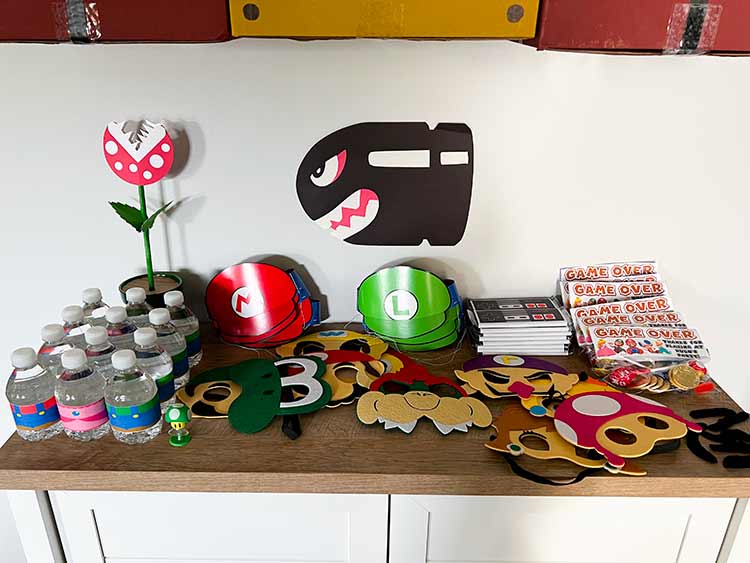
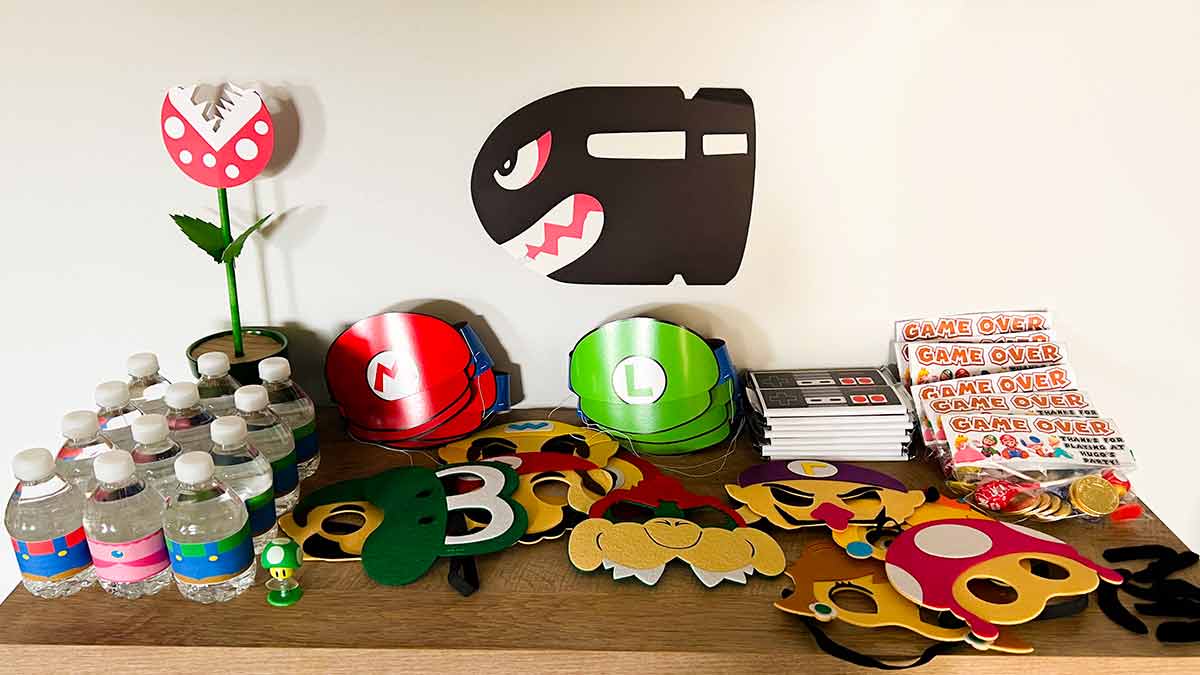
I came up with so many fun party favors – for both kids AND adults! Walmart had a pack of fake mustaches the kids could wear around the house. Everyone became a Bro!
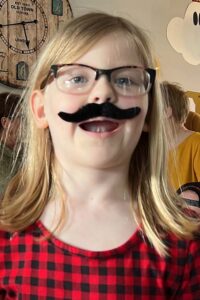
They each got to pick between a Mario and a Luigi hat. I found them at Walmart but they don’t carry them anymore. You can find them at Party Makers, though! I also found a pack of felt Mario character masks for the kids. Everyone got to pick a favorite character to wear. It even had Daisy (my favorite), Wario, and Yoshi!
All the kids took home the little water bottles featuring the clothes of either Mario, Luigi, or Princess Peach. They also got a small bag filled with Tootsie Pops and chocolate gold coins (because, you know, Mario collects coins). The tag I designed and stapled to the top said “GAME OVER: Thanks for playing at Hugo’s party!”
And just for the adults – who would be much more appreciative of them – I wrapped full-size Hershey bars in paper I printed to look like the classic NES controllers!
Favors Hidden in a Party Activity
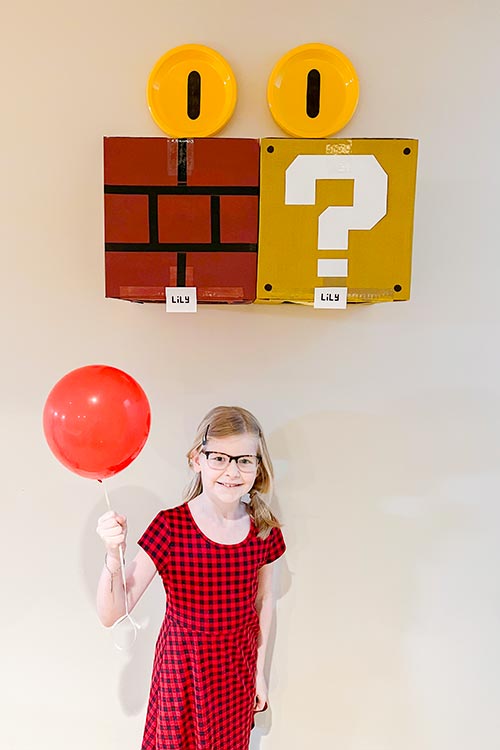
There was one more “favor” for the kids that doubled as a fun activity. You see those two blocks my daughter is standing under with her name on them? Every kid had a pair of blocks attached to the wall somewhere in the basement, with the height based on how tall the individual kid was!
These were special bricks, though. I’d cut holes out of the bottom, filled them with goodies, then glued two layers of tissue paper to cover the holes. I also made small slits in the tissue paper with an X-acto knife to help them rip a bit more easily. Tissue paper is tougher than you think!
Once every kid was in position under their blocks, we let them “punch” up into the bricks to reveal the treats inside! They included more gold coins, Tootsie Pops, and Mario fruit snacks.
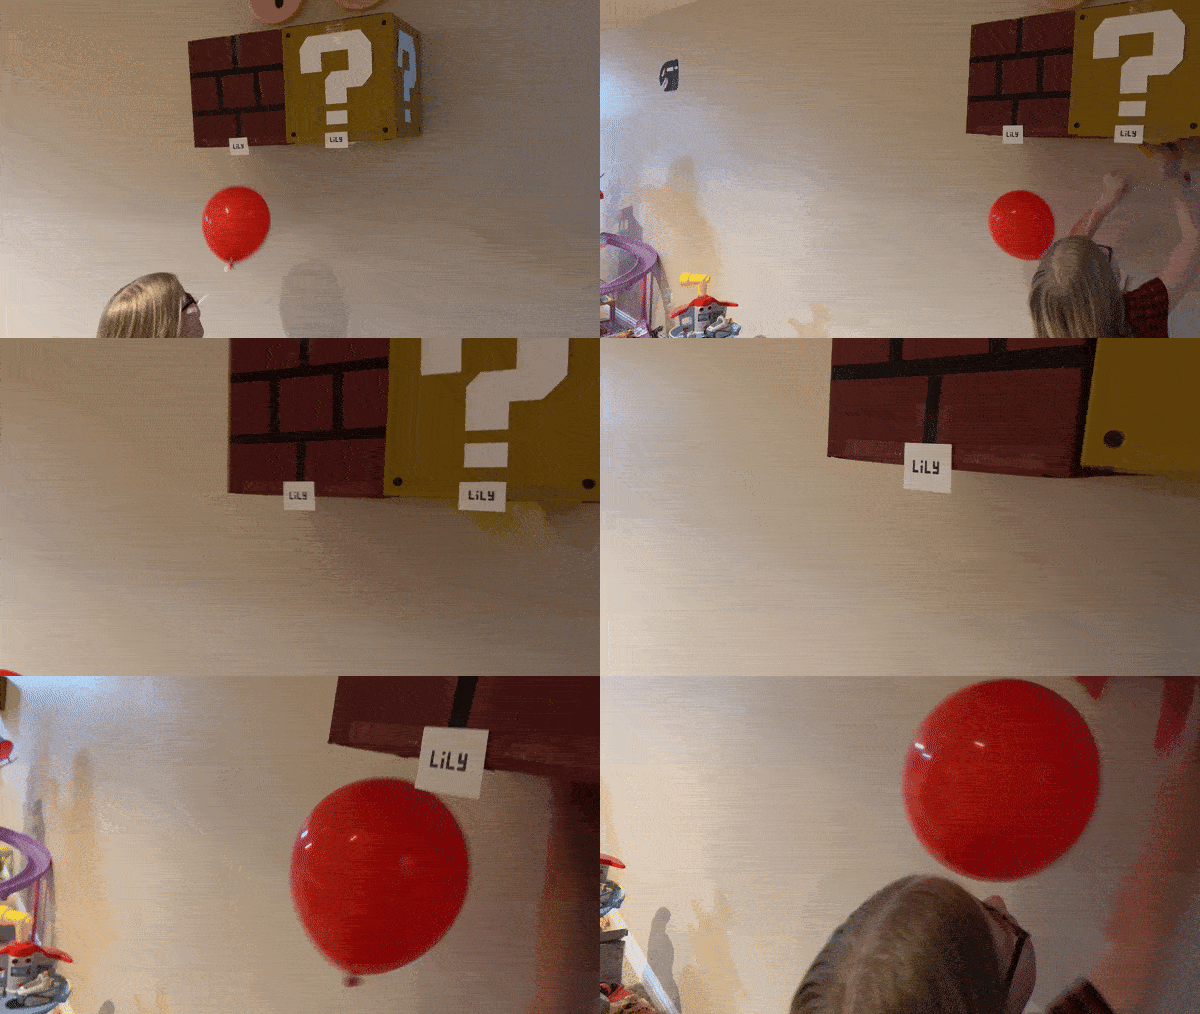
I was extremely proud of this idea. My great-niece was by far the shortest child in attendance, so her blocks are the ones low to the ground right after the flagpole, away from the chaos of the other kids!
There you have it! With a little creativity and these ideas in your arsenal, you’re well on your way to shell-ebrating with a Mario birthday party that will have the gamers in your life jumping for joy. Just make sure you have fun with it! It’s okay if you can’t do all the things that I did.
Between the special foods, multiple DIY party games and decorations, the punching bricks… It was a lot and I’ll probably never do quite this much again. Pick and choose the ideas you like best and forget the things you know you won’t have time for. Now go make some unforgettable Mario memories! Happy party planning!

