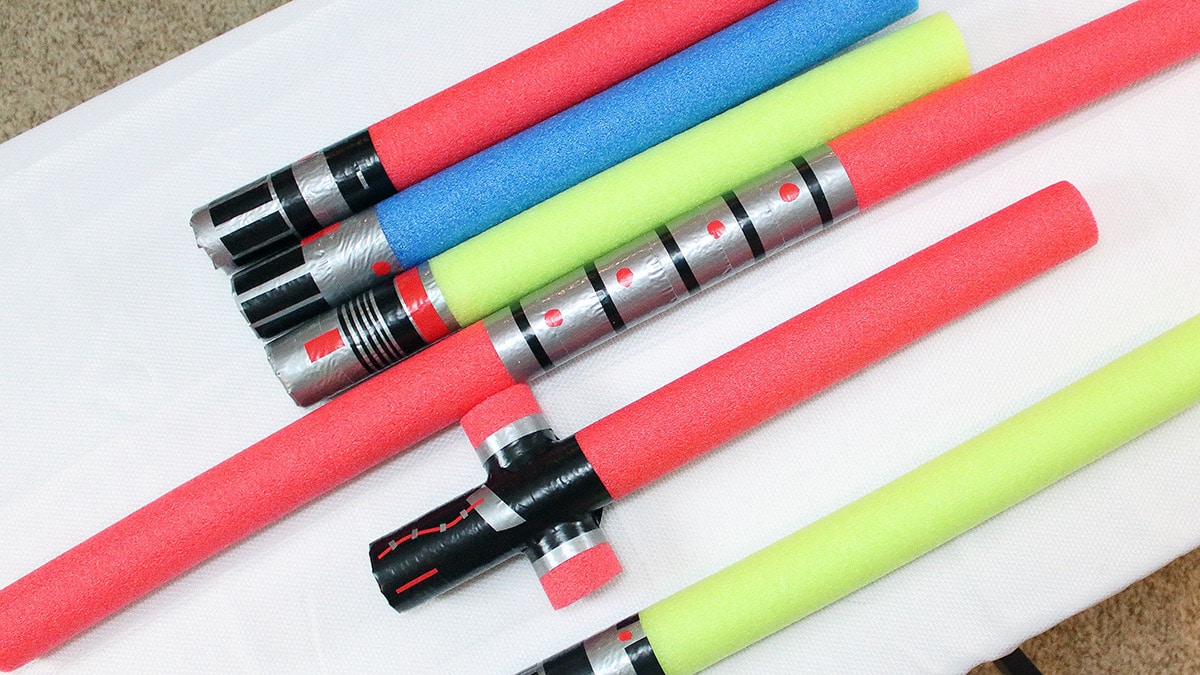
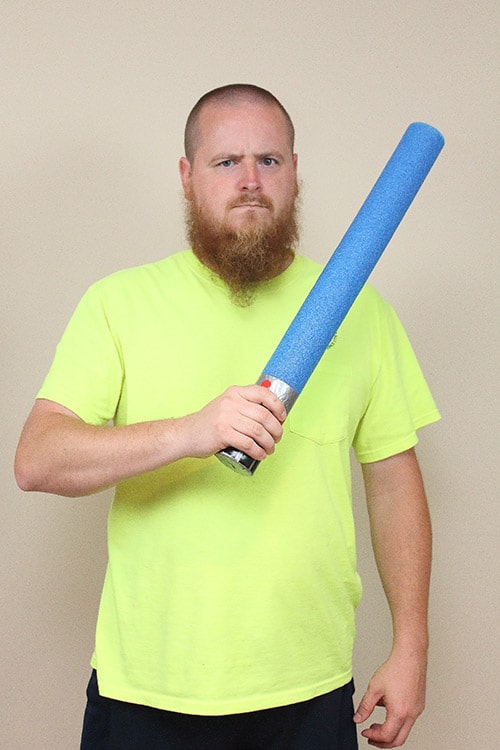
Recycled crafts are a a big hit in our house, especially with my daughter. She loves getting creative and hates throwing anything away. My kids no longer need pool noodles to float in the pool, so we decided to do a little Star Wars DIY and make a pool noodle lightsaber (or eleven)!
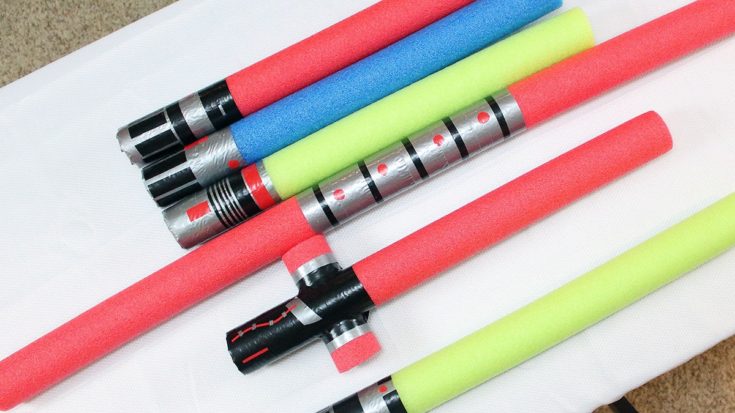
While we were at it, I decided to make a DIY pool noodle lightsaber tutorial for my readers. These are great Star Wars crafts for kids, and a DIY lightsaber is the best kind for roughhousing since it’s okay if they get beaten up. Six of these DIY pool noodle crafts were measured, cut, and decorated to be as close to real characters’ lightsabers as foam noodles and duct tape will allow. Because I’m a nerd.
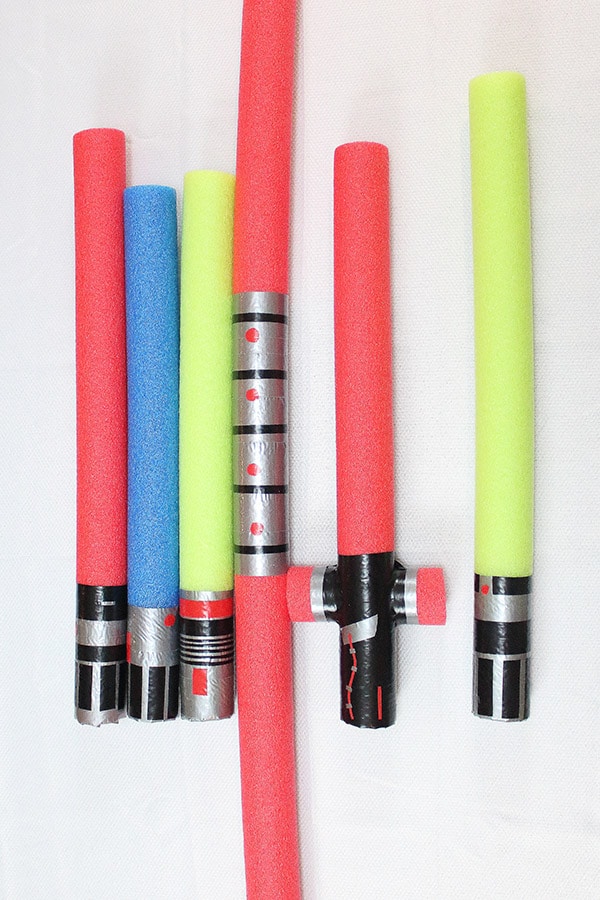
This makes a great Star Wars craft for both adults and kids (my husband and I both had a blast). You can make them for a May the Fourth Be with You party, or any time of the year for a Star Wars birthday party craft!
I’ve included a printable guide to creating REAL (well, movie-real) Jedi and Sith lightsabers out of pool noodles as well. It lists converted measurements of the hilts, blades, and details you should include in your tape design! Just look for it toward the end.
This post may contain affiliate links. If you make a purchase after clicking one, I may receive a small commission at no cost to you.
DIY Pool Noodle Lightsaber Tutorial
Supplies Needed
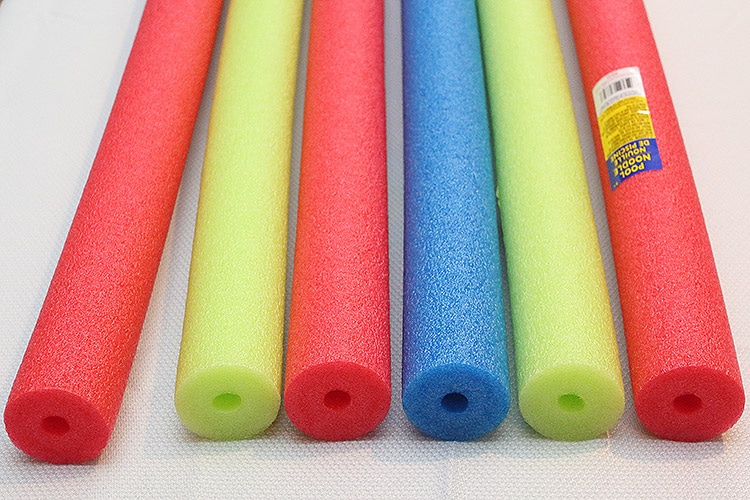
- Skinny pool noodles with hollow centers
- Silver duct tape
- Black electrical tape
- Red electrical tape
- Other washi tape colors or vinyl shapes (optional)
- Penlights or glow sticks (optional)
- Tape measure or yardstick (optional)
- Black marker
- Cutting board
- Serrated knife
- Scissors
- Baby wipes, or Goo-Gone and paper towels
The only items I did not already have and had to purchase were:
- Pool noodles (Dollar Tree)
- Duct tape (Walmart)
- Black electrical tape (Walmart)
- Red electrical tape (Walmart)
- Regular glow sticks (Dollar Tree)
- Glow necklace ropes (Walmart)
Total cost of purchased materials: $16.41 (after tax)
Price per lightsaber made: $1.49 (with plenty of tape leftover)
Note: This price point makes these a superb Star Wars party favor! We ended up making six character lightsabers:
- Darth Vader’s
- Luke Skywalker’s
- Yoda’s
- Anakin Skywalker’s
- Darth Maul’s
- Kylo Ren’s
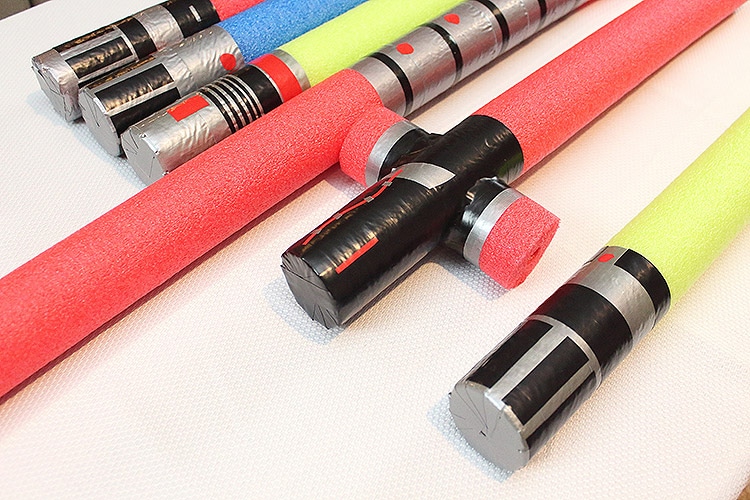
Kylo Ren’s was the most “complicated” – and also turned out to be my favorite – so I’ll go over exactly how I put the crossguard-style lightsaber together.
I wanted to try making the Darksaber and Ahsoka’s white lightsabers, but I didn’t find black or white noodles at any of the places I went. My Dollar Tree also didn’t have any yellow pool noodles, or I’d have made Rey’s lightsaber from the final movie! Still, we also made five other lightsabers with our own unique designs.
1. Cut the pool noodle to your desired length.
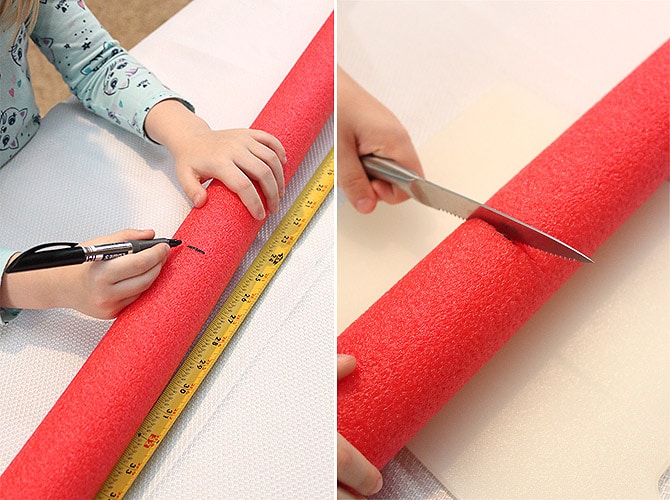
Lay out your cutting board and grab your tape measure, marker, and serrated knife. If you’re making a double-ended lightsaber (like Darth Maul’s), you probably won’t want to cut it at all. If you’re making Kylo Ren’s lightsaber, scroll down for detailed instructions on creating this one-of-a-kind lightsaber!
Otherwise, you can measure out to your desired length, mark it with the marker, and cut it with your serrated knife using small strokes over the cutting board. The foam cuts surprisingly easily! An easier method, if you don’t care about length specifics, is to shape the pool noodle into a U and cut in half at the bend.
Whether these are for children or adults, I don’t recommend making a single-bladed lightsaber longer than 30 inches or so (including the hilt). Leaving them longer means they are going to bend and wobble a lot more during battle (unless you reinforce them, but we’ll discuss that later)!
Tip: Pay close attention to the angle of your knife when cutting. The hardest part of this step was cutting straight ends. And make sure you clean your cutting board when you’re done cutting all of your pool noodles, because you don’t want any tiny bits of foam to end up in your food.
2. Wrap the cut end with duct tape.
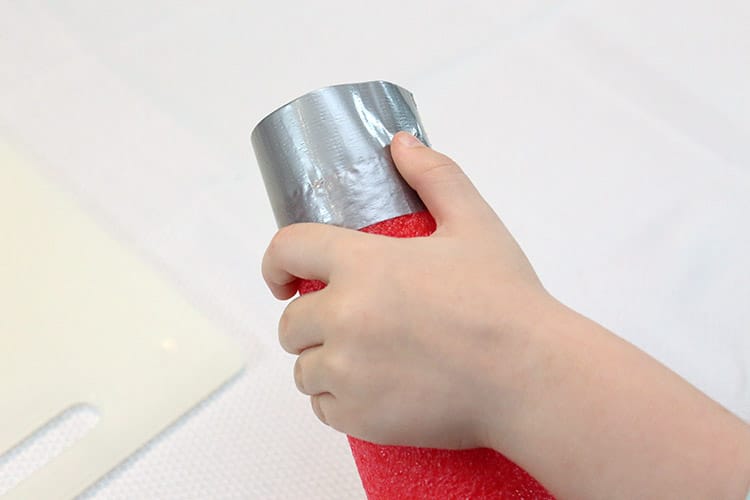
This step does not apply to making Darth Maul’s or Kylo Ren’s lightsabers. Otherwise, when wrapping the duct tape around the end, leave about half the width hanging past it. Wrapping the cut end helps cover up any imperfections in your knife cut. Leaving it halfway out allows you to cover the entire end of the pool noodle with tape.
To do this with the least wrinkles possible (and the coolest design), cut slightly angled snips into the excess duct tape all the way to the end of the noodle. Once the tape is cut all the way around, start folding them toward the center one at a time, pulling it tight at the angle that helps the crease lay flat without wrinkling. You should have a cool spiral design with a covered hole.
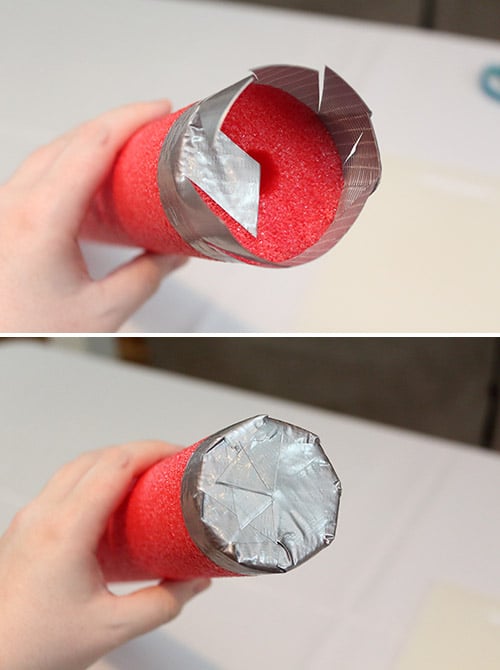
Tip: The smaller your strips of tape, the less bulky your knots will be once they’re folded down (I made my cuts about 1/4-inch wide). Bonus tip: If your brand of duct tape is extra-sticky and leaves gooey residue on your scissors with each cut, just wipe the scissor blades with a baby wipe or a paper towel soaked in Goo Gone.
3. Continue wrapping the base with silver duct tape to create the hilt.
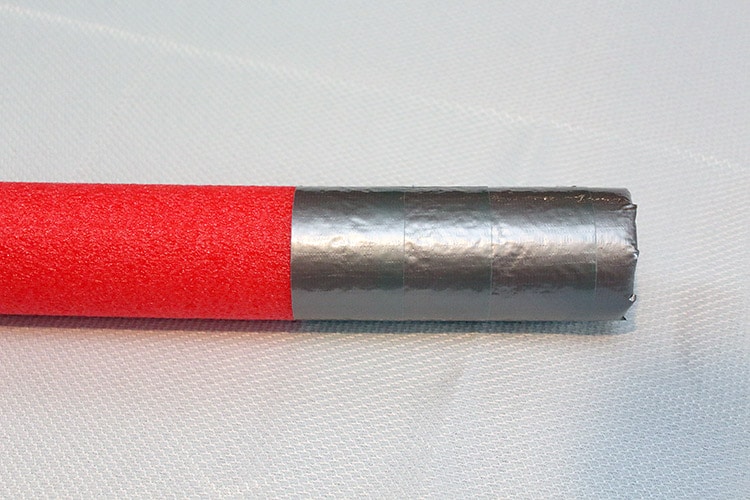
I measured and marked where I wanted the hilt to end for the Jedi and Sith lightsabers so they would be to scale compared to the length of the pool noodle. (These measurements are available in my free printout below!) If you’re not that picky, just wrap about a fourth of the pool noodle in silver tape – about three or four wide strips, or the width of two hands.
Tip: Regular duct tape is slightly translucent, so if you don’t want any of the noodle color to show through, you’ll want to wrap each section twice. Always start your duct tape on the same part of the noodle (what will be the “back”) so any visible seams are all on one side.
4. Add your lightsaber design.
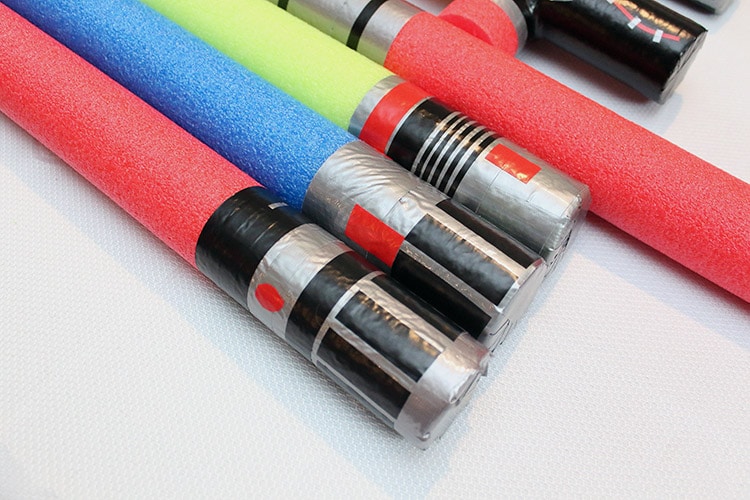
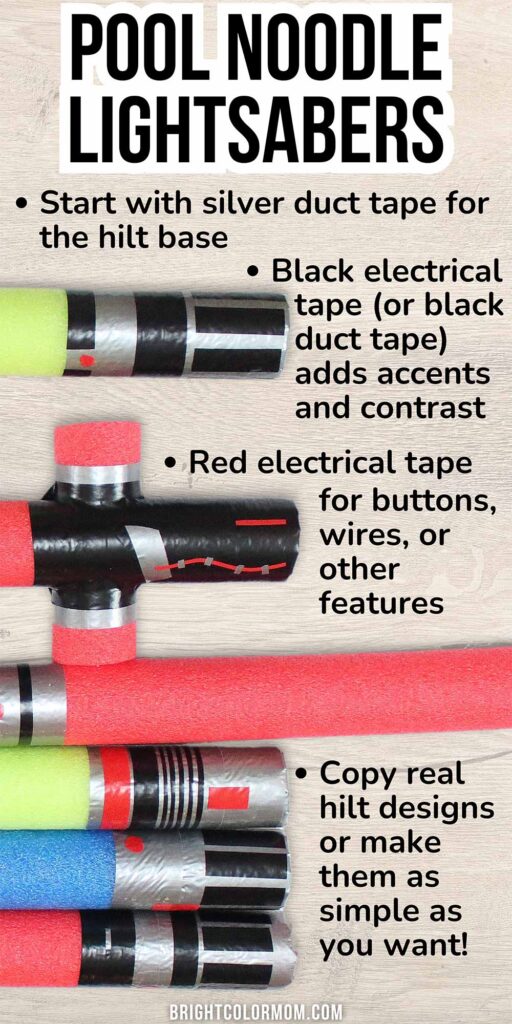
You can use electrical tape, stickers, markers, or adhesive vinyl to finish your lightsaber design. For the most part, our lightsabers were decorated with black electrical tape, with some red squares or rectangles. We even used X-acto knives to cut some circle “buttons” out of the red as well!
The simplest way to cut shapes out of electrical tape is to press it firmly on your acrylic cutting board and use the tip of a very sharp X-acto or paring knife to cut it. If you have a Cricut or Silhouette machine, you can use any color vinyl you like to create truly unique designs! This method also makes it easy to cut the tape into smaller-width strips (like I did on Luke Skywalker’s green lightsaber).
Tip: Hold the roll of tape tightly when winding it around the lightsaber to help prevent wrinkles. But if you do mess up, both the duct tape and electrical tape come back off of the pool noodle fairly easily to try again.
5. Duel!
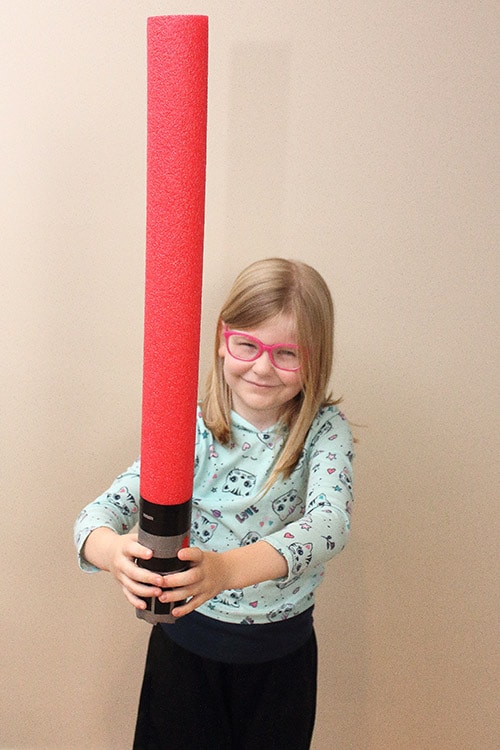
Let everyone enjoy their new, safe-to-hit-with lightsabers!
How to Make a Double-Ended Lightsaber
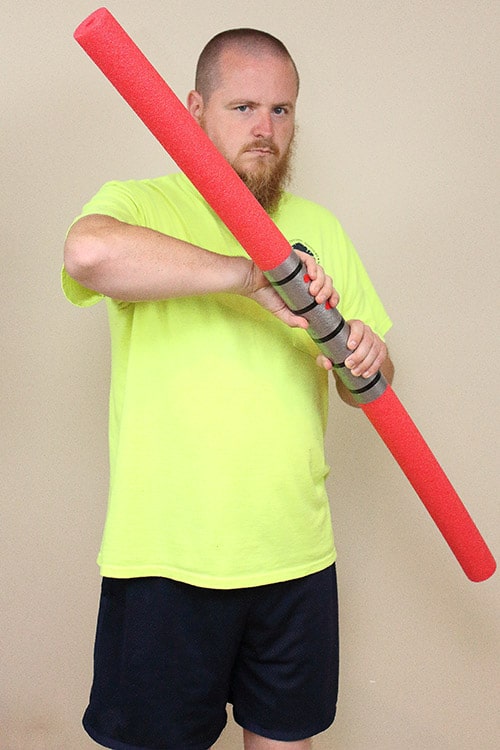
Darth Maul’s lightsaber was one of the easiest to make. I didn’t cut the noodle at all! Some pool noodles are 52 inches long; the ones I got at the Dollar Tree were 46-47 inches. Lay out the tape measure and mark where you want the hilt to be in the middle (it spanned about 11 inches of my full-length pool noodle). Proceed as normal to wrap in duct tape and add your designs, and voila! You have a dual-blade foam lightsaber.
How to Make Kylo Ren’s Lightsaber
This was such a special weapon to make! I really love this one.
1. Cut a red pool noodle to make the main blade and crossguard.
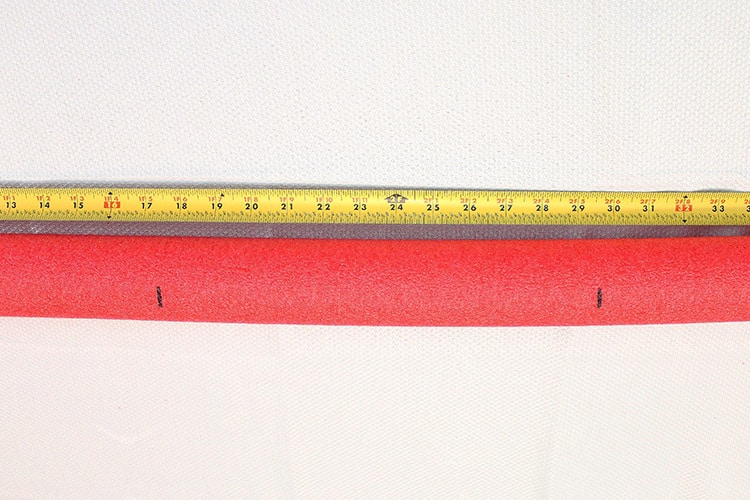
For my dimensions, I cut a 24-inch piece as well as a 6.5-inch piece. The longer piece forms the main blade and hilt, while the smaller piece forms the crossguard.
2. Mark off both noodle pieces for gouging.
First, on the larger piece, mark off where you want the top of the crossguard to be (it should begin about ¾ of an inch from the top of the hilt). Then measure to 2.5 inches below that and mark again. On the smaller piece, mark off a gap in the middle that is also 2.5 inches wide.
Using your serrated knife, cut through these marks – but not all the way through! Cut each mark to about halfway through the pool noodle. Then, slice through the middle of the pool noodle between these two cuts, once on each side, to connect them. You should now be able to remove the gouges from the pool noodles (you may have to make a few small cuts with your knife to pull them loose).
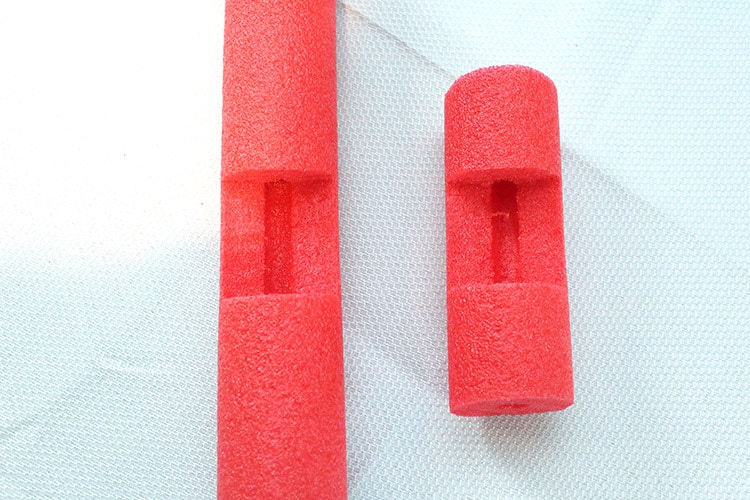
Now, you should be able to press the hollowed-out portion of the small noodle against the hollowed-out portion of the large noodle to make the crossguard form!
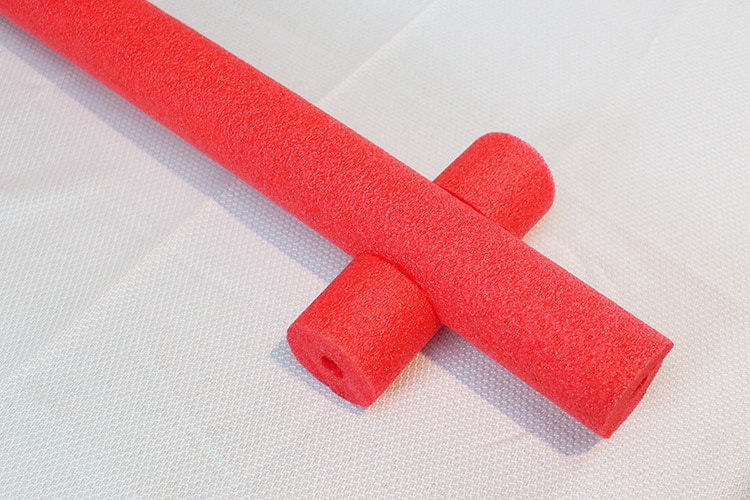
3. Criss-cross black electrical tape around the joined noodles to secure.
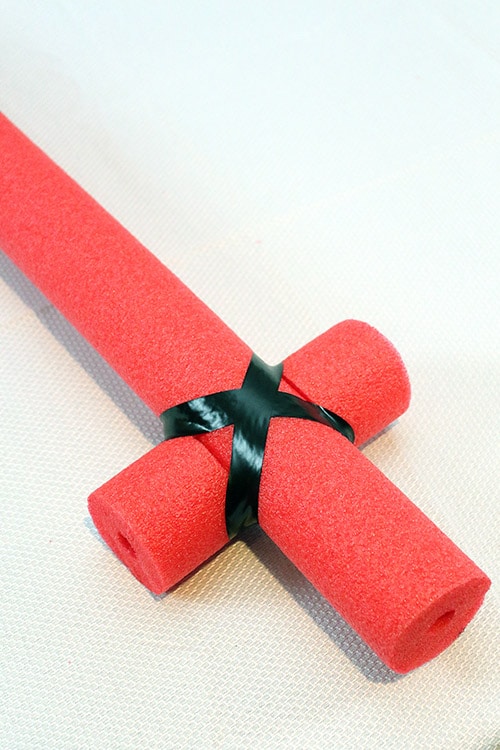
Make a loop of tape diagonally across two corners, cut the tape, then create another loop across the opposite corners. You’ll notice that they probably don’t fit 100% flush against each other, and that’s okay. In fact, that just makes it easier to stick glow sticks through each length of pool noodle without them bumping into each other.
Once the pieces are secured together, wrap a piece of black tape around each side of the crossguard. Then you can start wrapping the hilt in black from the top to the bottom, stretching and angling around the crossguard as necessary. Just don’t go all the way to the bottom yet!
4. Cover the end of the hilt in overlapping pieces of electrical tape.
Since this tape is much narrower than the duct tape, you can’t use the snipping and folding method. Instead, just lay strips of black tape over each other in a circular pattern until the entire end is covered. Leave a small overhang of each piece going onto the body of the hilt.
Once that’s done, continue wrapping your hilt in circles of tape until you’ve covered it down to the bottom edge. This will cover up all of those random ends from the strips.
5. Cut silver duct tape into strips.
You’ll need the strips to be about 7.5 inches long to wrap around the full circumference of the crossguard parts of the hilt. Place a strip of duct tape this long on a cutting board. Cut them down to be just under half an inch wide, then partially overlap them on the black pieces of tape already around the smaller noodle.
6. Decorate as desired.
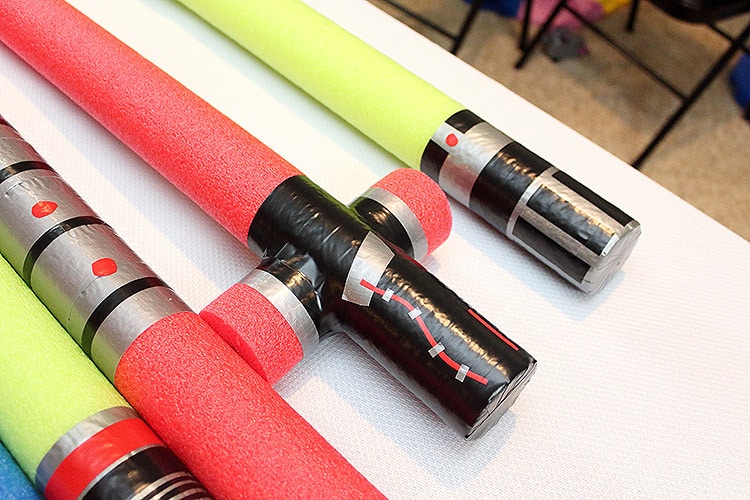
Once the hilt is covered in black, it will already stand out against the other character’s lightsabers. I just added a crooked piece of duct tape, then used narrow strips of red electrical tape to recreate a couple of the red wires that appear to hang out of Kylo Ren’s lightsaber. They are held close to the hilt by small silver fasteners, which I also cut from bits of duct tape.
Pool Noodle Size Matters
Fat pool noodles exist, and I don’t think they look nearly as cool as the thinner ones for making lightsabers. The ones I got at Dollar Tree are 2.25” wide with a half-inch hollow center (important if you want to illuminate your lightsabers – see below for ideas)!
For length, it doesn’t matter as much. The cheap ones I got were shorter than some other brands, but even cut in half they still produce 23”-24” lightsabers, which is a great length for avoiding a lot of bending during play. If yours are 52 inches long, they will still work fine once cut in half.
These Are NOT Waterproof
While pool noodles are, of course, waterproof, the tape is not. Neither duct tape nor electrical tape is waterproof. If you submerge your foam lightsaber in water, the duct tape will eventually get gooey and start to pull away, while the electrical tape begins to fall off. So while these are made with swimming pool toys, pool noodle lightsabers do not make good pool toys.
Light-Up Pool Noodle Lightsabers
Glowing foam lightsabers would be great for nighttime games. Even if it’s pitch-black outside, everyone will be able to see each other’s lightsabers to play-fight! Pool noodle lightsabers are perfect for adding light because they have hollow centers. We experimented with several ways to achieve a movie-style glowing lightsaber effect.
Flashlights
Flashlights are tricky because you only have about a half-inch opening to put it in. Penlights were the only kind that actually fit inside the pool noodle so that they could be concealed with tape, but ours were not strong enough to shine brightly throughout the lightsabers.
Ideally, if you want to use a flashlight to make your lightsaber glow, you’ll find a pen flashlight that has a removable clip and at least 1000 lumens of light for maximum brightness.
Glow Sticks
Glow sticks (the fat kind) definitely shine the brightest in the lightsabers. However, we only had 6-inch sticks and the lightsabers were noticeably darker where the end of one stick touched the end of another. It also took four glow sticks to fill up a single regular-length lightsaber. However, this type of glow stick was perfect for the crossguard on my Kylo Ren lightsaber!
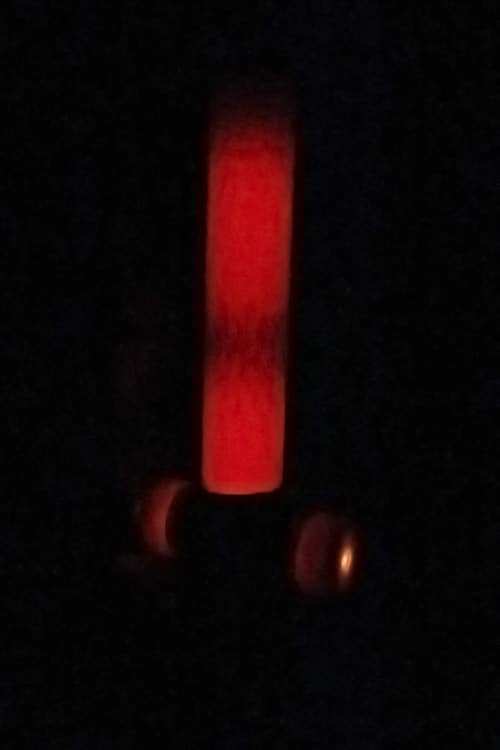
You can also get 12-inch long fat glow sticks so that there’s only one potential dark spot in your weapon.
Glow Necklaces
Glow necklaces ended up being a great alternative for illuminating our lightsabers. They’re usually about 22 inches long, which was close to the full length of our average lightsaber, meaning there were no dark spots.
Since the necklaces are really skinny, though, it takes more than one to create a good glow within the pool noodle. The Kylo Ren lightsaber pictured below had four glow necklaces inside (but they weren’t even white – we had to use yellow, orange, green, and blue from the pack, which are not as bright).
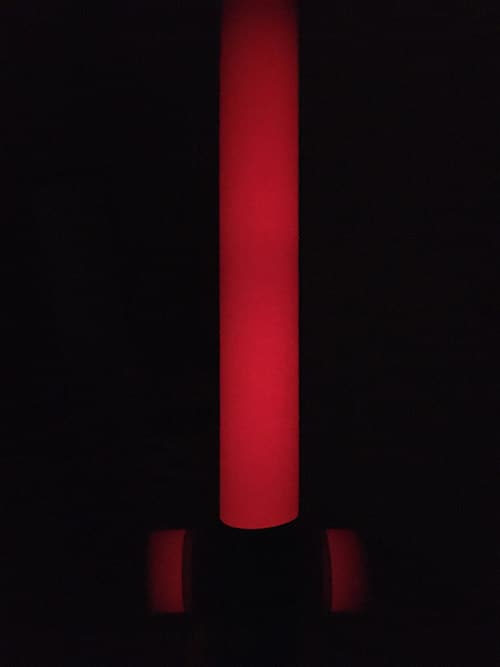
If you have all-white necklaces, you might not need as many. Also, the darker the foam color, the harder it will be to illuminate. It only took a couple of necklaces for the green lightsabers to clearly glow, while four of them barely lit up the deep blue foam.
Making Foam Lightsabers Sturdier
First of all, please do not use these methods on kids’ lightsabers. They are MUCH more likely to injure someone than regular floppy pool noodles. These modifications should be reserved for adults who accept the risks involved.
There are a couple of different ways to make your pool noodle rigid, making it feel more like a real lightsaber when wielding it. Keep in mind that you will not be able to make your lightsaber glow once you’ve inserted a rod in the middle.
PVC Pipe
One method is to insert PVC pipe into your pool noodle before taping off each end. You can use clear packing tape on the colored end. If you don’t like the way that looks, you could also put some super glue around the PVC pipe and wait for it to dry in place inside the pool noodle.
Since the smallest PVC pipe has a 1/2-inch diameter and your pool noodle’s opening is also that width, it can be extremely tricky to insert the pipe all the way through. You’ll want to trim the pipe to length ahead of time, sand both ends to get them as smooth as possible and wet both the end of the pipe you’re inserting as well as the inside of the pool noodle right before inserting.
If you like, you can even cut the PVC pipe to be six inches longer than the foam noodle so that you can decorate the excess to be your hilt. This will provide a more realistic feel than gripping the fat foam noodle. You can then slip on some thinner tube insulation to make it close to the actual width of a lightsaber handle (and for comfort). Decorate the tube insulation as the hilt as you normally would.
Wooden Dowels
An alternative to PVC pipe would be to insert a wooden dowel cut to length, then taping over the ends and/or gluing the rod in place inside the noodle. I recommend getting 3/8”-diameter rods instead of 1/2” rods to make insertion easier, though you may feel it wobble inside just a bit during your battles if it’s not glued in.
If you plan on leaving some of the wooden dowel visible to use as the hilt, you’ll want to use the snuggest size possible, which should be 1/2-inch dowels.
Guide to Jedi and Sith Lightsabers
Sure, these kid-safe lightsabers don’t look anything like the ones in the movies, are just for fun, and totally goofy. But that doesn’t mean you can’t try and make them as authentic as possible. With enough effort, you can even make your pool noodle lightsaber recognizable for which character they belong to.
Here’s a guide to the different blade colors. Choose yours wisely to reflect your place in the Star Wars universe.
Jedi Lightsabers
- Blue lightsabers are used by Jedi Guardians. The most famous blue lightsaber of all time is the one that passed from Anakin to Luke and finally, to Rey.
- Green lightsabers are used by Jedi Consulars. Luke’s first personally designed lightsaber was green, as was Master Yoda’s.
- Yellow lightsabers are used by Jedi Sentinels, who are seen as the moderate Jedi, holding the values of both Guardians and Consulars. They know the Force is not the answer to everything; it is just a useful tool. Yellow lightsabers are very rare, as many people tend to see the world as one way or the other; the most significant yellow lightsaber seen is Rey’s personally constructed lightsaber at the end of the saga.
Unaffiliated Lightsabers
- White lightsabers are for Force users committed to the light side, but uninterested in the rules of the Jedi. The Imperial Knights consisted of such beings. Ahsoka Tano carries two white lightsabers.
- Purple lightsabers are exceedingly rare, with purple kyber crystals being found in a select few locations. Owners of purple lightsabers tend to have affinities for both the dark and the light. Mace Windu is the most famous character with a purple blade, but they are not exclusive to the Jedi.
- Orange lightsabers are usually associated with the light, but have been known to be used by Sith as well. (Perhaps they did not have quite enough hate in their hearts to make them red.) They are extremely rare and the crystals are usually passed down through generations.
Sith Lightsabers
- Red lightsabers are the signature of a dark Sith. Darth Vader, Darth Maul, Kylo Ren, and Darth Sidious are famous examples.
- The black saber is known as the Darksaber. There is only one in existence, and it must be won by combat. While originally created by a Jedi, its history holds nothing but death and destruction. It is sought by the most evil of Force users.
Measurements for Creating Proportionate Lightsabers
If you’d like to make your pool noodle lightsaber a shorter but proportionate replica of your favorite character’s blade, I’ve put together a fun little guide to make it easy for you. It contains some interesting history about each lightsaber owner and their weapon. I’ve also listed their overall lightsaber length, blade length, and hilt length, and translated these measurements into pool-noodle sizes as well!
DIY Pool Noodle Lightsaber
Perfect for a Star Wars birthday party craft or a fun May the Fourth activity, these DIY pool noodle lightsabers will provide plenty of great memories. Kids and adults love decorating - and fighting with - them!
Materials
- Skinny pool noodles with hollow centers
- Silver duct tape
- Black electrical tape
- Red electrical tape
- Other washi tape colors or vinyl shapes (optional)
- Penlights or glow sticks (optional)
- Baby wipes, or Goo-Gone and paper towels
Instructions
- Using the serrated knife over a cutting board, cut a pool noodle to your desired length. We recommend about 24 inches or half the length of the noodle.
- Wrap a piece of duct tape around the cut end of the noodle, leaving just over half its width hanging off of the end.
- Cut snips about a quarter-inch apart around the excess tape all the way up to the foam.
- Fold the new tabs of duct tape over the end of the noodle one at a time. Once finished, you should have a nice spiral design and a fully covered end.
- Wrap a few more pieces of duct tape around the pool noodle to create the hilt to your desired length. We recommend about 6 inches/a fourth of the cut noodle.
- Use electrical tape, washi tape, and/or markers to decorate your hilt any way you like!
Notes
Children should not be allowed to use serrated knives. They should not be allowed to cut tape with scissors while unsupervised.
You’ll Also Like…
- Star Wars scavenger hunt: These lightsabers make an excellent prop or game prize for this printable scavenger hunt! Be sure to check it out – both kids and adults have raved about it.
- Printable Star Wars activity sheets

