Like many little boys this day and age, my son is inexplicably obsessed with Pokemon. As in, Pokemon creatures – because he doesn’t actually play the card game. And he rarely watches the show. But he loves all the cute little characters anyway. Naturally, he wanted a Pokemon birthday party when he turned six! Featuring the adorable Pikachu, of course.
This is a deep dive into his classic Pokemon-themed party and all the planning and DIY that went into it. I’m an experienced and detailed party planner, so his party is a bit “extra” compared to the average kids’ party. But it’s still an at-home party done on a budget! My goal with this post is to entertain you and inspire you with ideas to steal for your child’s special day.
I’ll go over the DIY invitations I made (my favorite I’ve ever made!), the homemade decorations and store-bought essentials, and my Pokemon-inspired food table ideas and snacks. The activities and games for the kids will crack you up. You’ll also get to see “the cake that couldn’t be” (it’s a story) as well as the AMAZING Walmart cupcake-cake that replaced it in the end, too. And finally, I’ll show you the party favors the kids were actually impressed by – and the special ones for adults that were a HUGE hit.
This post may contain affiliate links. If you make a purchase after clicking one, I may receive a small commission at no cost to you.
Unique DIY Pokemon Birthday Invitations
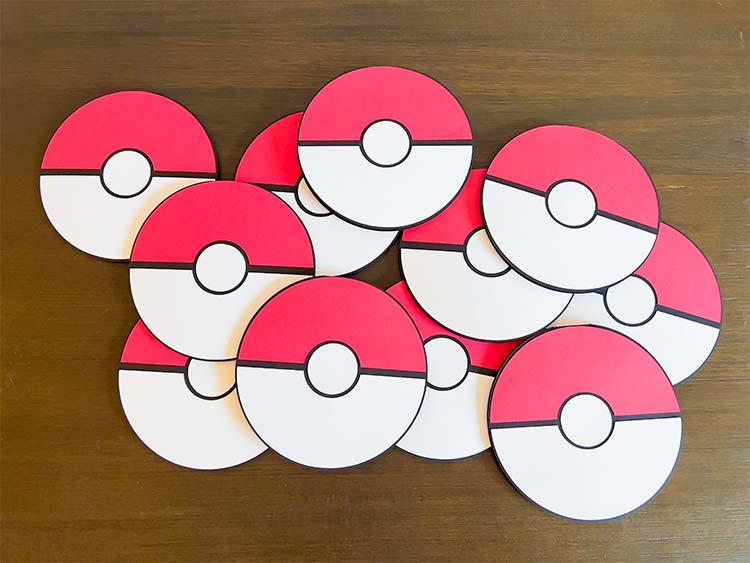
I design most of my kids’ invitations in Photoshop and order 5×7 cards from Mpix to mail to family (see Hugo’s Mario and Paw Patrol invites for examples). This time, I got a little more creative using my Cricut Maker 3. You see the Poké balls above? They all look the same, and very simple and easy, right? Well, this is what they looked like when they were opened up.
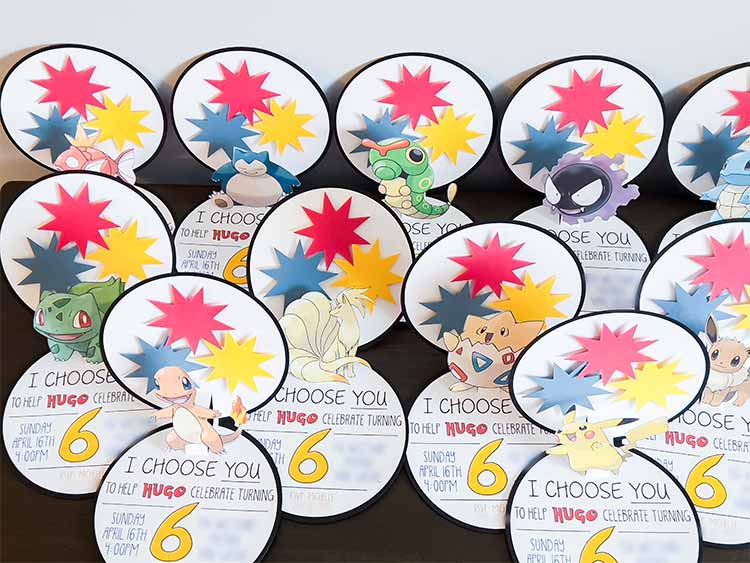
How cute is that?! Each address got a unique classic Pokemon creature in their invitation (and I admit I matched many critters to the corresponding human’s personality).
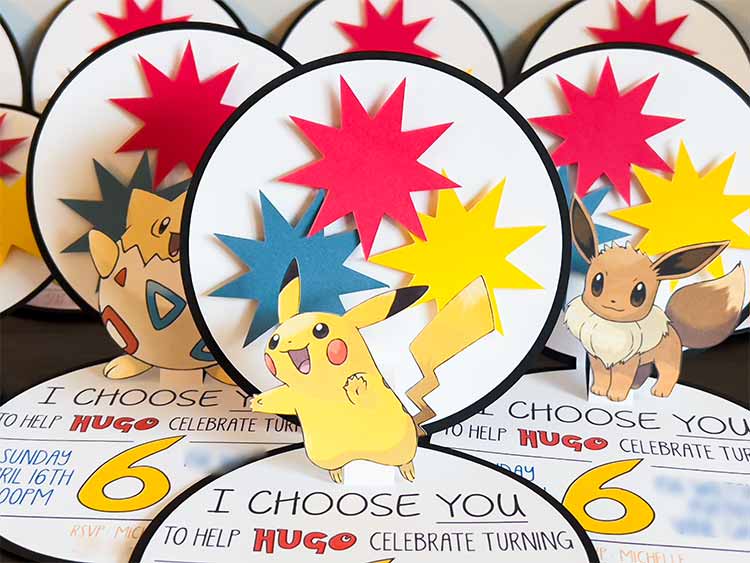
How I Made Them
I designed the layout of the text in the bottom half in a white circle in Photoshop, including the iconic quote from the show: “I choose YOU!” Then I uploaded that to Cricut’s Design Space to finish my design. It was easier than it looks, with the simple welding of two large circles and a small rectangle for the two halves and a few starburst shapes I found Googling.
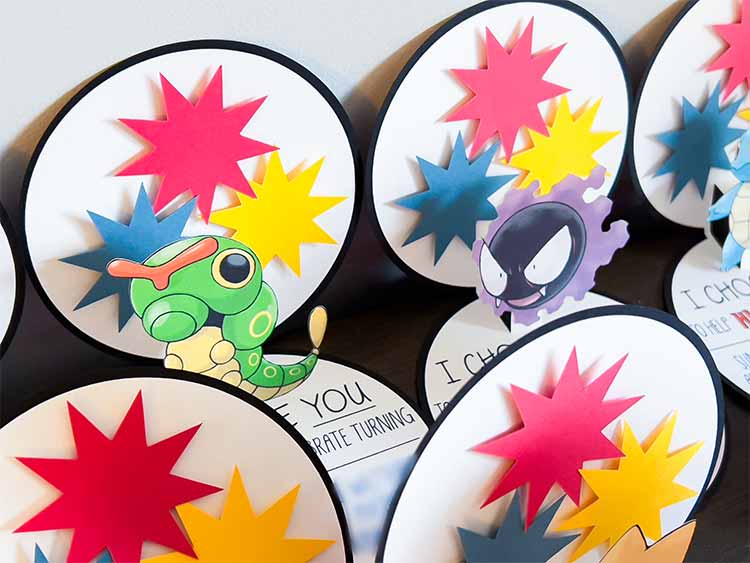
To get the pop-up effect, I added two vertical cut lines in the center of the white layer (long enough to extend a bit into each half) with a horizontal score line (using the Scoring Wheel attachment) in between. When they opened, the white strip that was cut could pop up as the score creased.
I cut the Pokemon out using Print-Then-Cut (all the images were found on Google) and attached them with double-sided tape below the fold of the white bit that popped up while it was open. This was done while the invites were propped open to make sure they were placed high enough not to get creased when it closed. The starbursts were attached with foam glue dots to add some depth and shadows.
They were mailed in regular 5×7 envelopes I had on hand. I made more than I needed so my son and I could each choose one as a keepsake, and believe it or not, he chose Caterpie over Pikachu!
DIY Decorations
Most of the ready-made Pokemon decorations available are super boring. So, as usual, our house was full of DIY projects leading up to the party!
Front Porch Welcome (and Exit) Sign
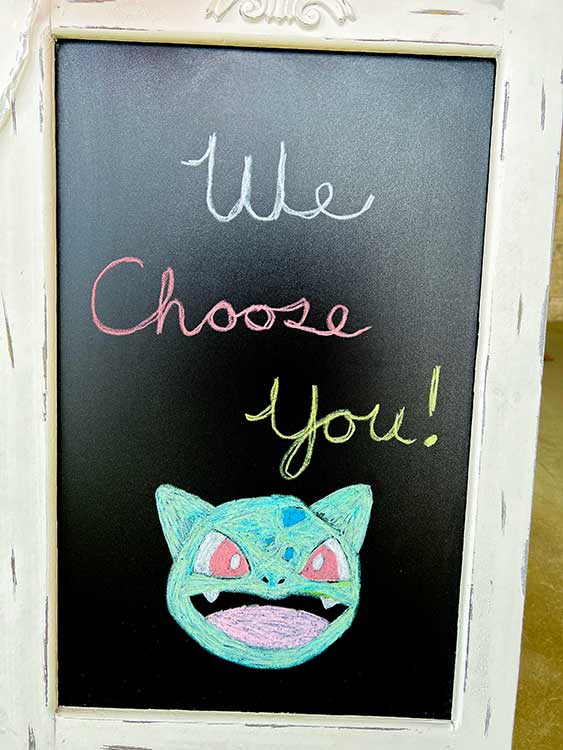
As family members walked up to the house, they already knew what to expect – my trusty easel chalkboard with a party-themed greeting! Hugo chose Bulbasaur to be featured, while I picked the “We choose you!” text. Dustless chalk is my go-to for this; it works way better than regular chalk or even liquid chalk markers! I had my husband attach a few balloons in the classic red, yellow, black, and white Pokemon colors.
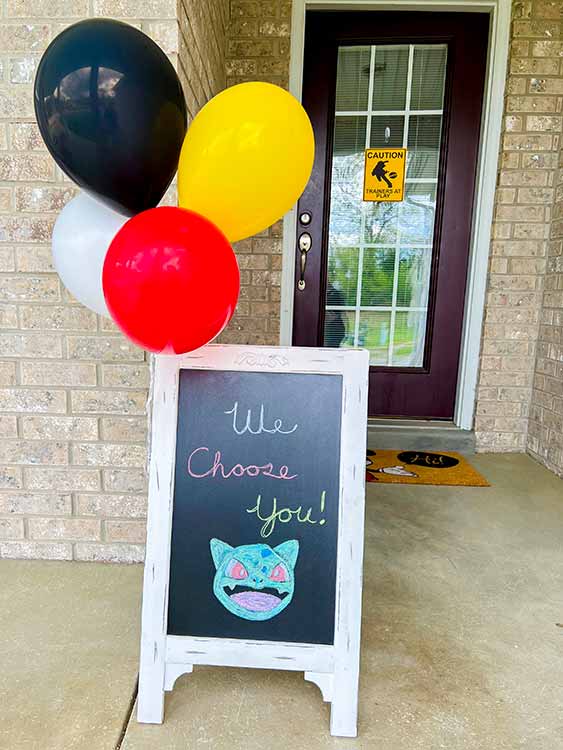
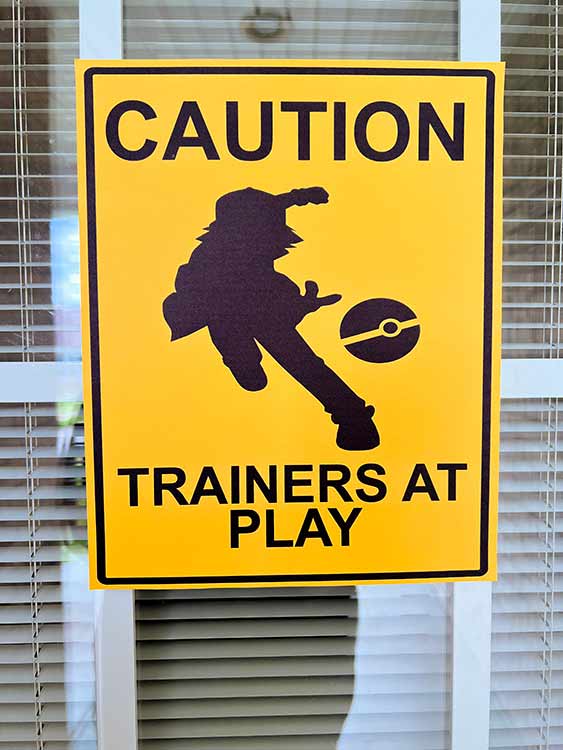
I whipped up a cute little Pokemon-appropriate caution sign to tape to the front door as well. It said “CAUTION Trainers at Play” with a silhouette of Ash flinging a Poké ball.
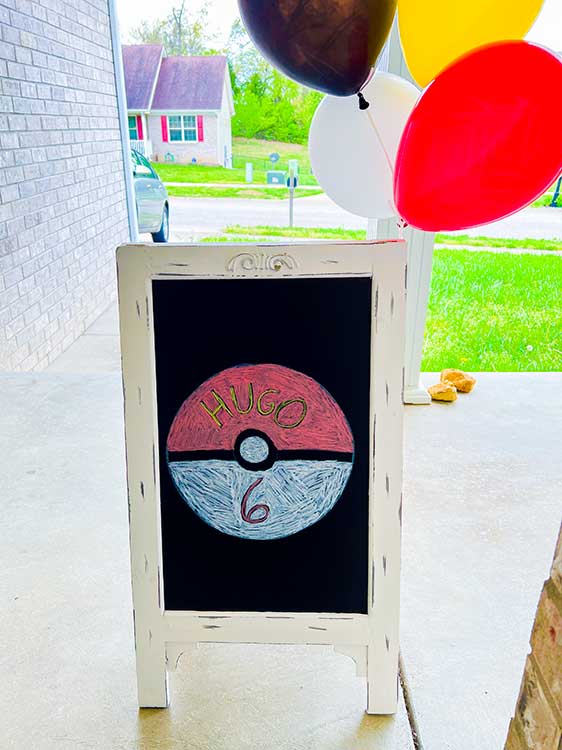
As everyone left after the party was over, they got to see a fun chalk drawing of a Poké ball featuring Hugo’s name and his new age: 6.
Entryway Impression
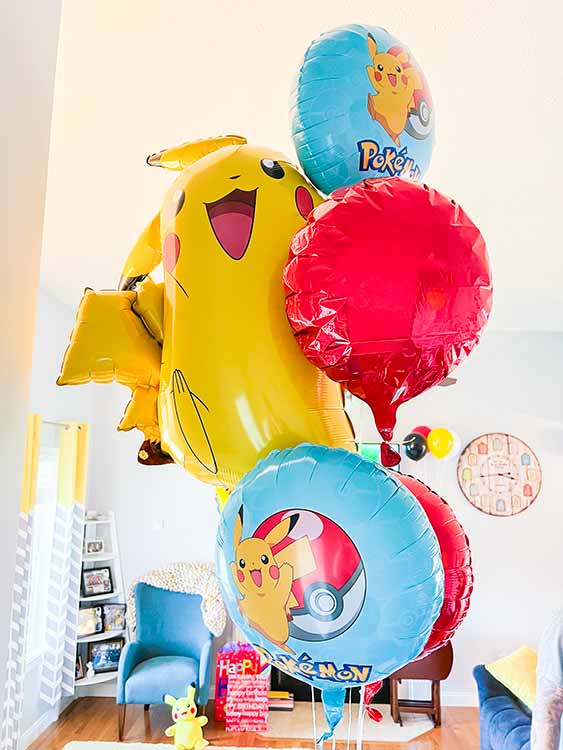
The very first thing everyone saw when they entered was a collection of official Pokemon mylar balloons floating on a half-wall that separates our entry from the living room. But once they looked straight ahead, they saw this feature:
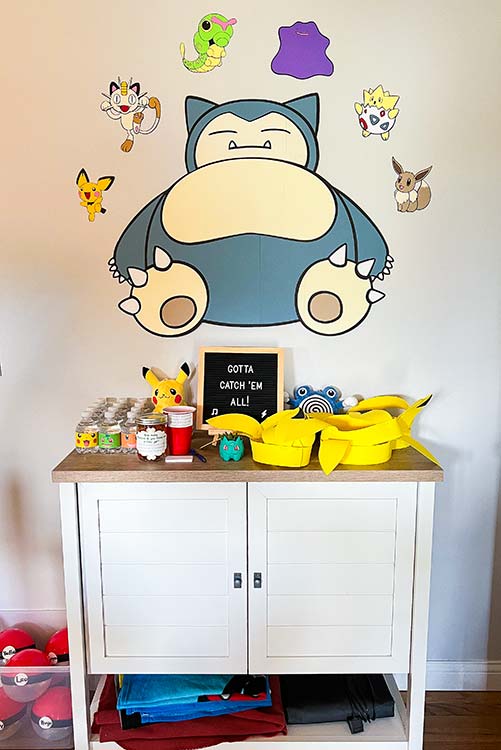
This little cabinet is where I usually keep party favors and a few special decorations. I always decorate the wall above it in some way, too. Hugo really loved Snorlax at the time of his party, so I pieced together a giant cardstock Snorlax with the help of my Cricut.
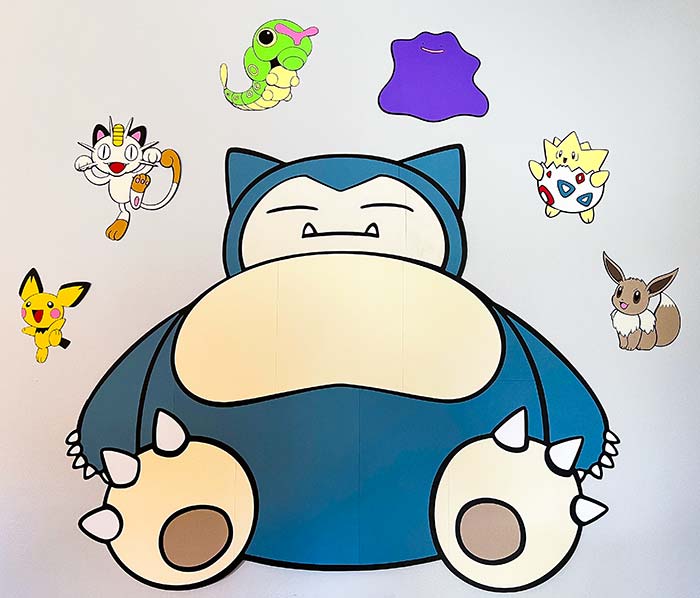
I knew that project would test my patience, so I chose a bunch of smaller Pokemon to surround him. You can see Pichu, Meowth, Caterpie, Ditto, Togepi, and Eevee. Yes, I learned a lot about the creatures in this process, haha!
The top of the cabinet held some party favors and decorations, as well as the Caterpie guessing game (more on that toward the bottom of this page).
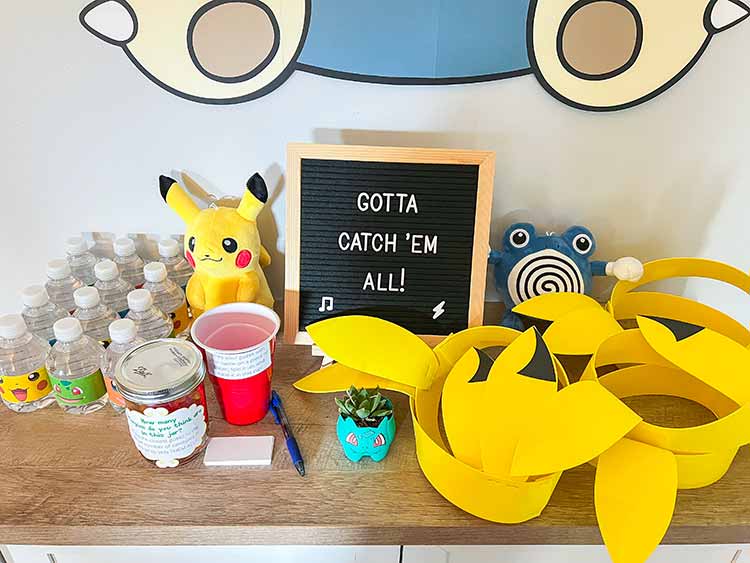
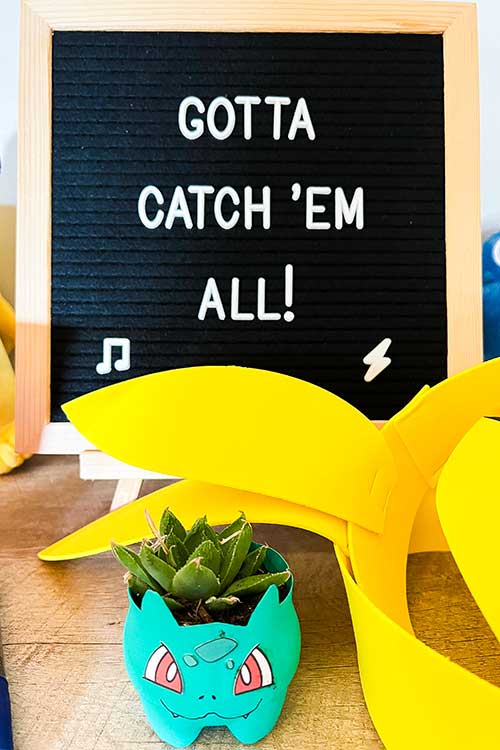
I changed my letter board to say “Gotta catch ‘em all!” And isn’t that tiny Bulbasaur planter CUTE? I’ll talk about that more in a minute too.
Paper Lantern Pokemon Everywhere
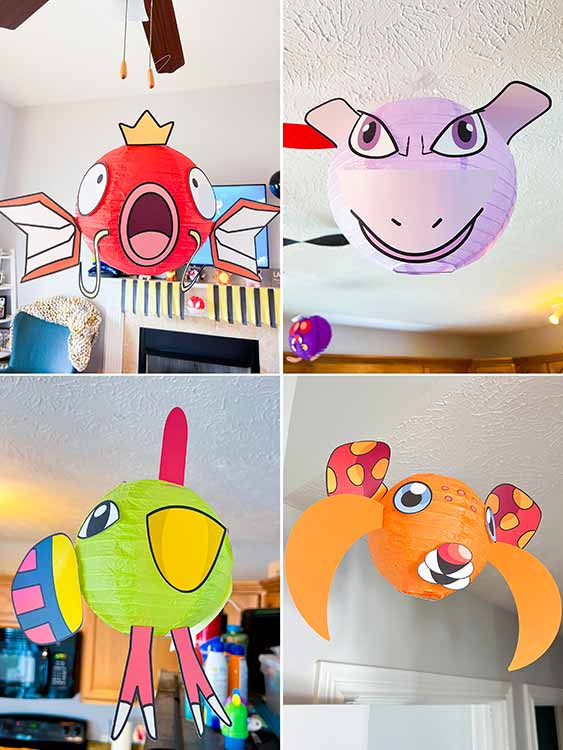
This collection of DIY Pokemon creatures was one of my best ideas ever, IMO. I needed to decorate a whole house in Pokemon creatures on a budget, and these paper lanterns met that need.
To start, I chose a pack of paper lanterns on Amazon that came in multiple sizes and colors so that I knew what I had to work with. Then I chose the Pokemon I turned them into based on their size and color! Naturally, I made sure there was a yellow paper lantern to make Pikachu first.
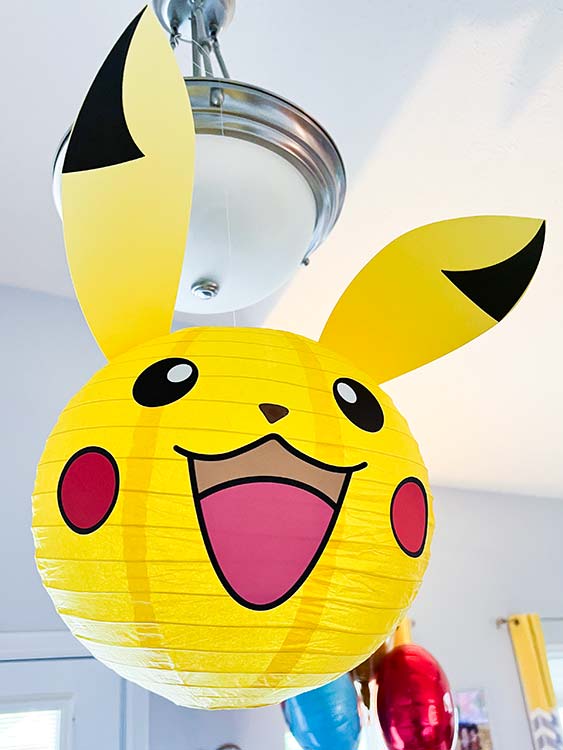
For each character, I traced certain features (such as ears, eyes, and mouth) in the Procreate app on my iPad and uploaded them all to Design Space to cut out using Print-Then-Cut on cardstock.
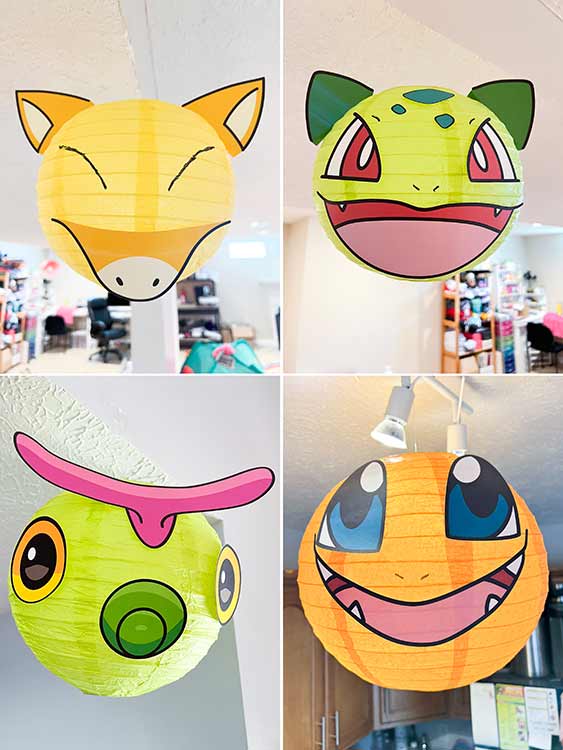
Then I carefully hot-glued the cardstock pieces to the paper lanterns, folding ends to attach as needed so ears and legs would stick out.
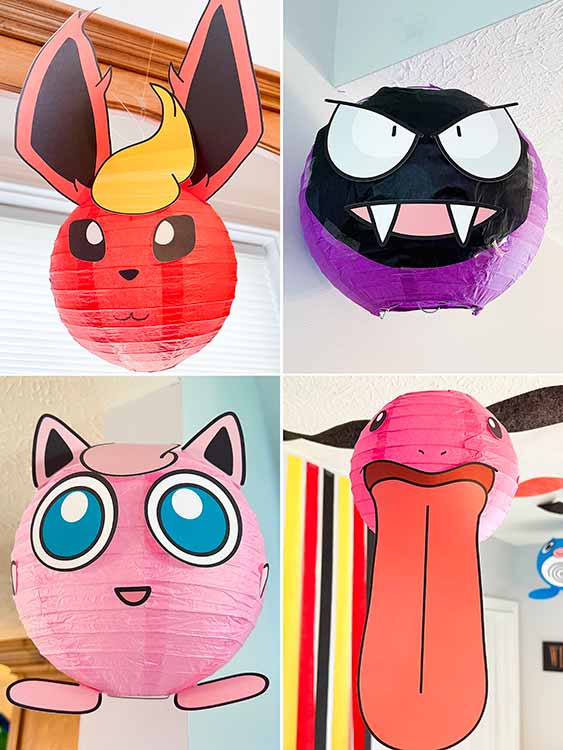
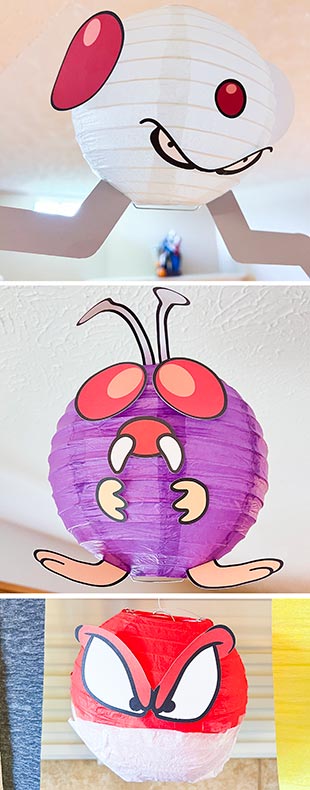
Yes, it was a lot of work (as I’m sure you can imagine). But they turned out so well and everyone was so wowed by them, it was all worth it!
I always let the kids pick one or two DIY decorations to keep in their rooms before I give the rest away to another family planning a party of the same theme. To my surprise, Hugo chose to keep the Paras lantern! I guess he does look the coolest with his many attached appendages.
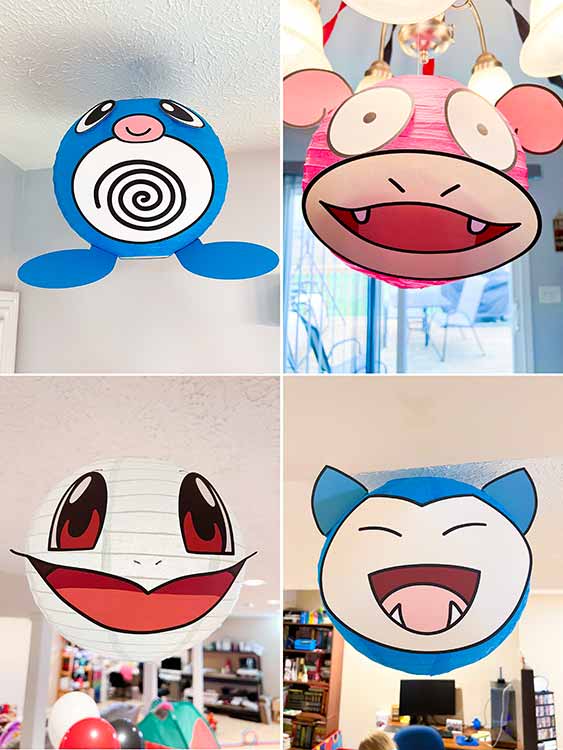
These Pokemon balls hung all over the house, including in the basement.
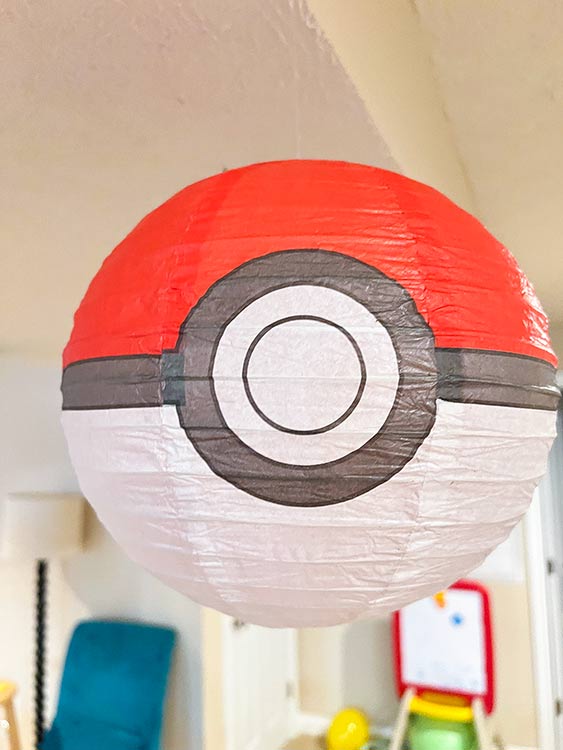
As if that weren’t enough, I also bought some premade Poké ball paper lanterns to hang!
Hand-Drawn Pikachu Balloons
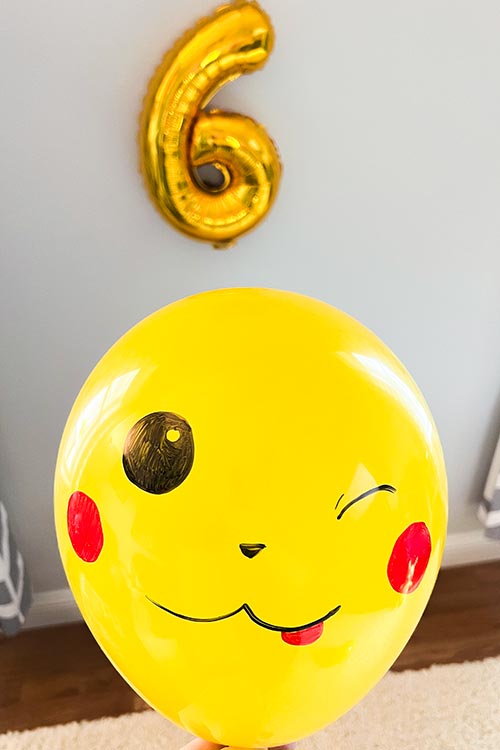
Without fail, even with all the cool games and stuff I have planned for the kids, all they really want to do is play with balloons. So I came prepared this time and blew up a bunch of non-helium yellow balloons to leave around the house. I used black and red Sharpies to draw various Pikachu faces on each one for added fun! The gold 6 balloon on the wall in the background came from Dollar Tree.
Living Room Decor
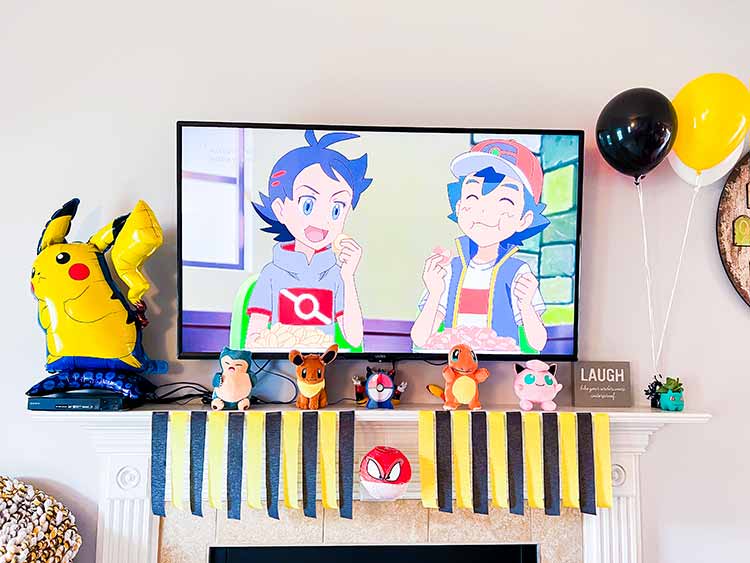
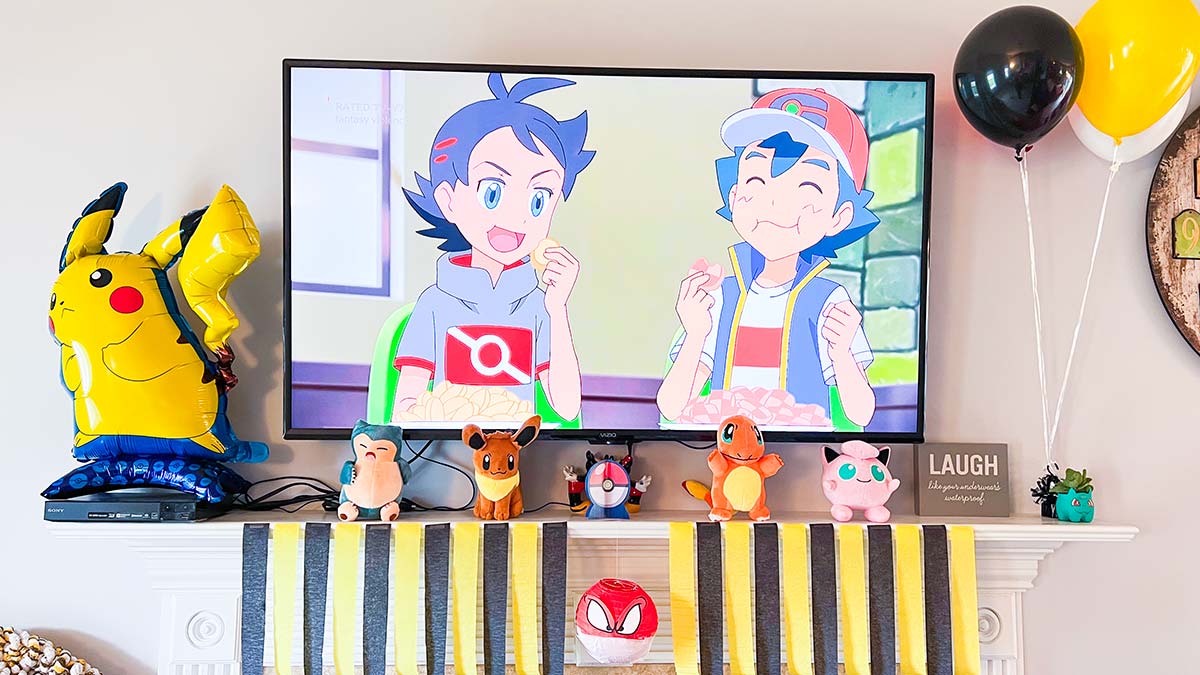
We had Pokemon playing on Netflix on our living room TV above the fireplace. There were some more floating balloons and another Bulbasaur planter on the right.
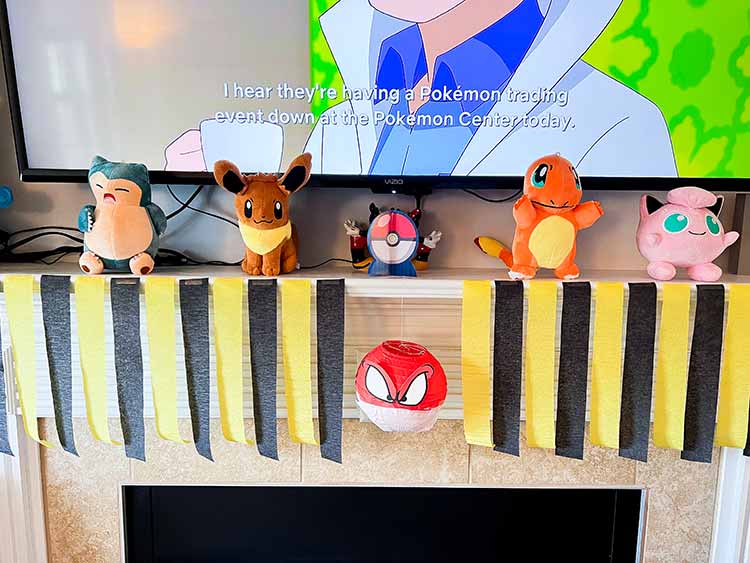
The mantle was decorated with some yellow and black streamers, Voltorb, and some Pokemon plushies I got very cheap from AliExpress. The little Poké ball came with a table decorating set.
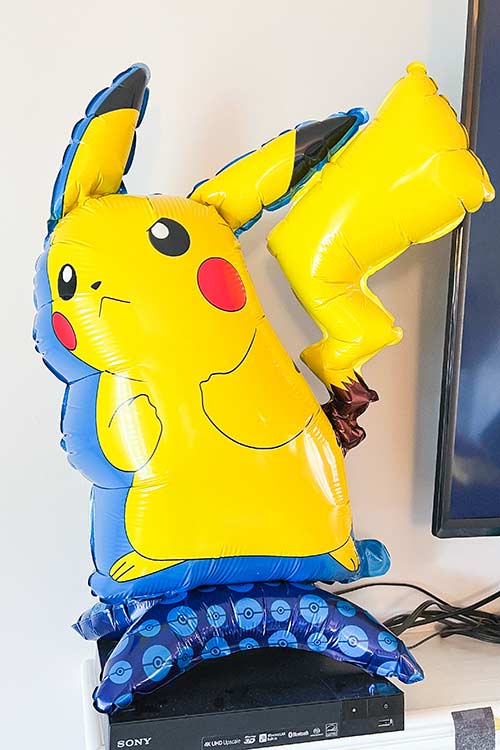
This “standing Pikachu” balloon is available on Amazon. I blew it up with a little straw and taped him to the movie player so he didn’t fall down!
The Kitchen (aka the Hub)
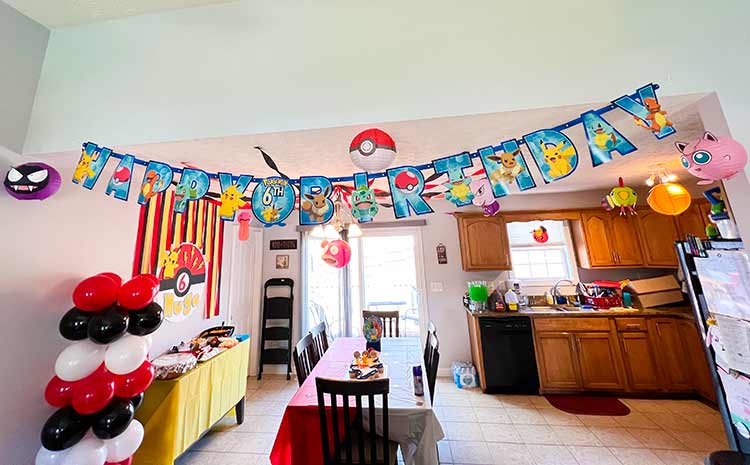
This is a massive 10-foot Pokemon birthday banner from Party City! (Unfortunately, this exact one has been discontinued.) It’s perfect for this bit of wall where the ceiling height changes between the living room and kitchen.
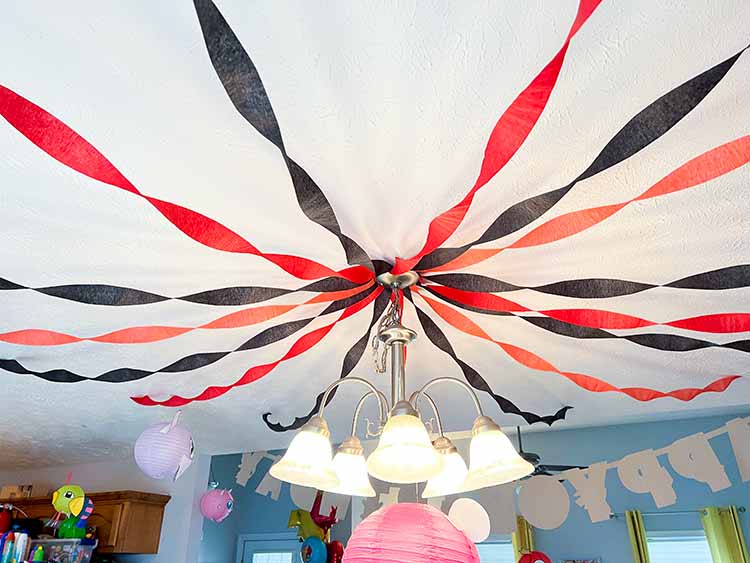
I always hang streamers in the kitchen fanning out from the chandelier. It adds a great vibe to a kids’ party.
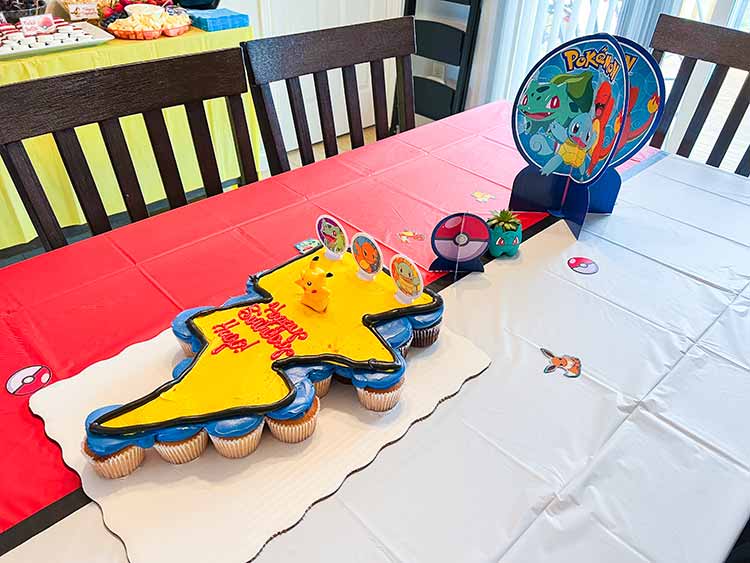
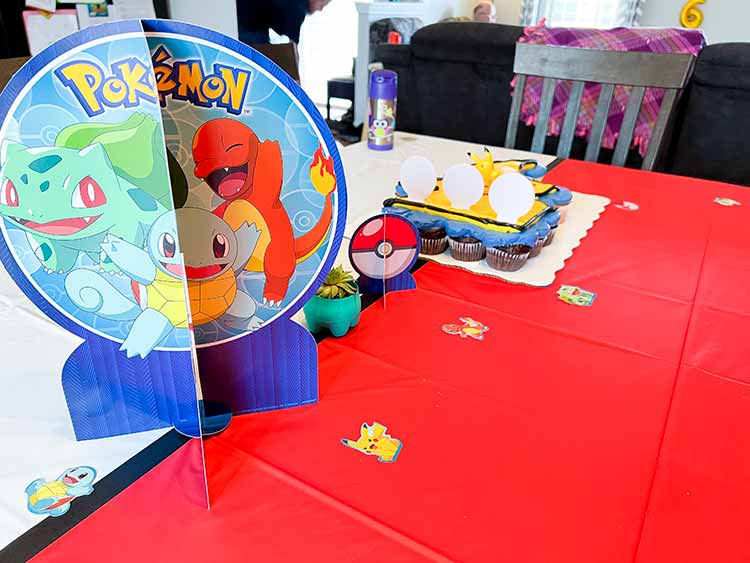
The kitchen table was actually covered in two plastic table covers – red and white – with black electrical tape running down the middle! It held them together, as well as gave the impression of a Poké ball.
I placed the cupcakes I had to order (yes, I made a cake too, more on this in a minute) center-left, with another standing Poké ball, some scatter pieces, and a larger premade centerpiece from the branded pack toward the right.
The Main Backdrop
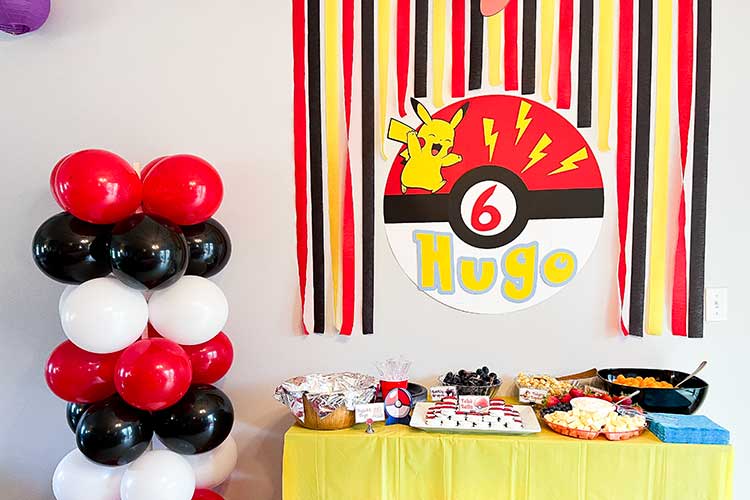
Food is important at a party! I like to decorate the area around the server well, because everyone spends a good amount of time there. The server itself was covered in yellow in honor of Pikachu. I’ve had a balloon column kit since my daughter’s Sleeping Beauty birthday party, so I decided to bust it out for a Poké ball-themed column using red, black, and white balloons.
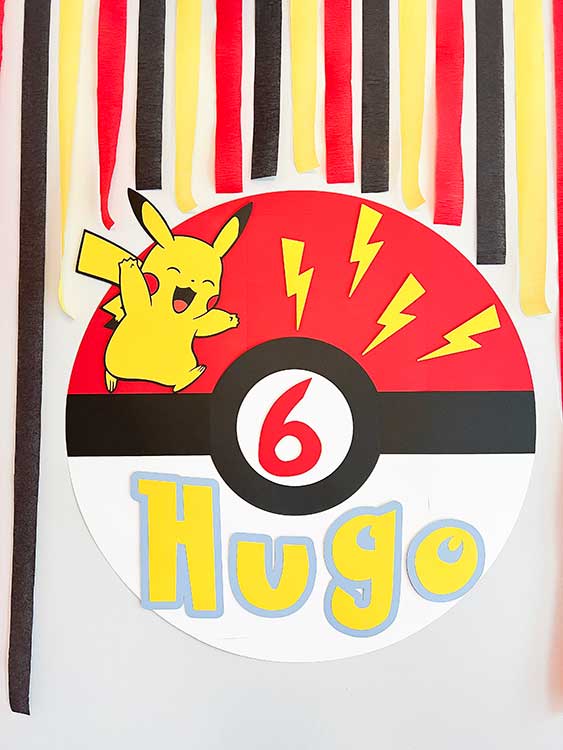
I made this large wall piece out of cardstock, designed with my Cricut and pieced together with lots of tape on the back! It’s almost three feet wide. I hung it first, then hung the red, black, and yellow streamers so that they formed a curtain tightly around it.
Basement Table
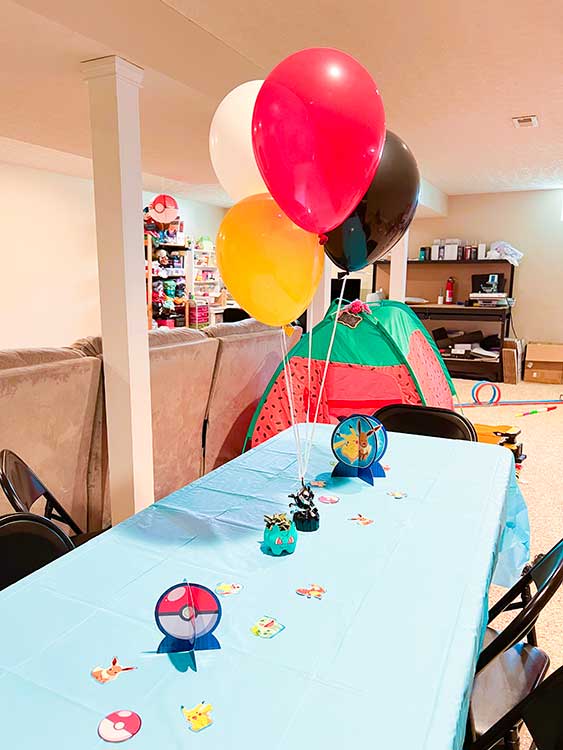
A handful of party guests always prefer to eat in the basement (where it’s cooler and quieter), so I like to set up a table to look nice down there, too. The table itself was covered in a blue color that matched much of the premade decor I bought. I used the rest of the small premade centerpieces and table scatter here. It also featured another Bulbasaur succulent and some floating balloons.
Special Extra for the Birthday Boy
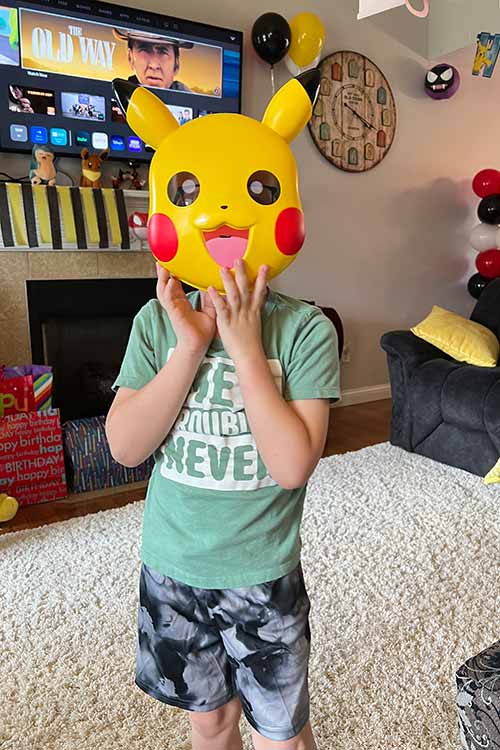
I was shopping at Five Below a few weeks before the party, helping the Easter Bunny find some goodies for the kids, when I happened upon this $5 Pikachu mask. So of course I bought it and saved it till the day of the party!
Pokemon-Inspired Food and Drinks
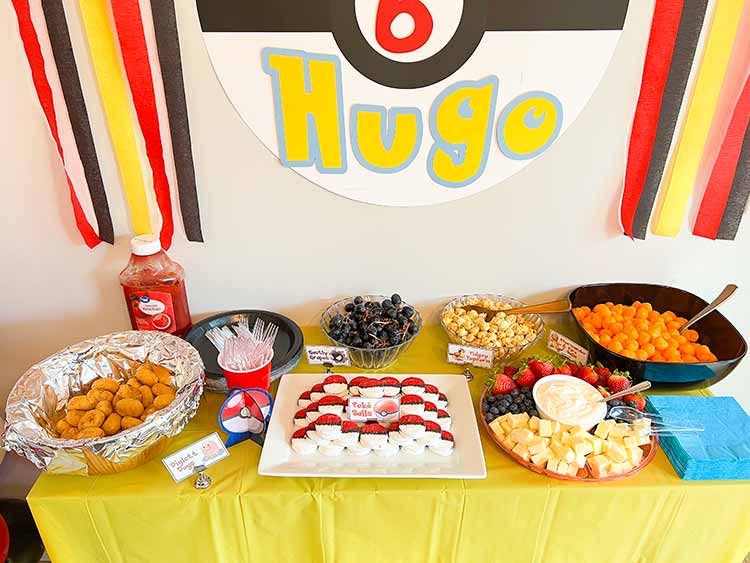
I always go the extra mile to brand my food and drink choices with the party’s theme, each item featured with its own unique title card. Thinking about characters actually helps me come up with food ideas!
Pikachu Pizza
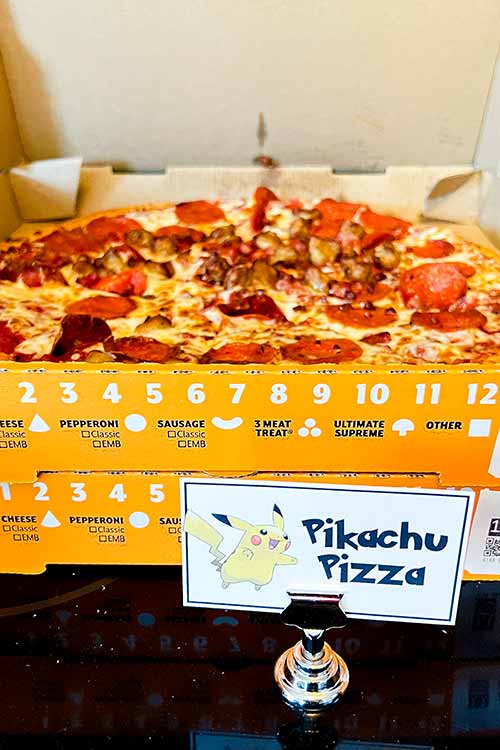
Believe it or not, I don’t serve pizza as the main dish at every kids’ party. But when the alliteration fits, it fits. And the kids do love pizza.
Diglett Dogs
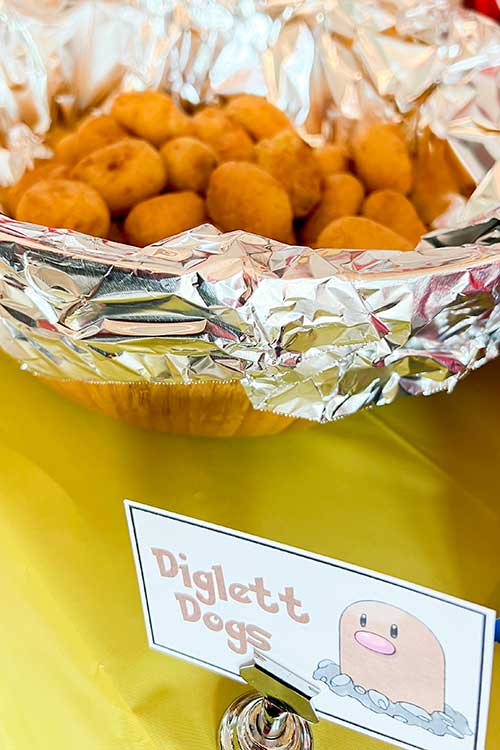
Do Digletts not look exactly like mini corn dogs?! This was a no-brainer, and was a great alternative for the heartburn-prone adults who try to avoid pizza.
Charmander Fire Balls
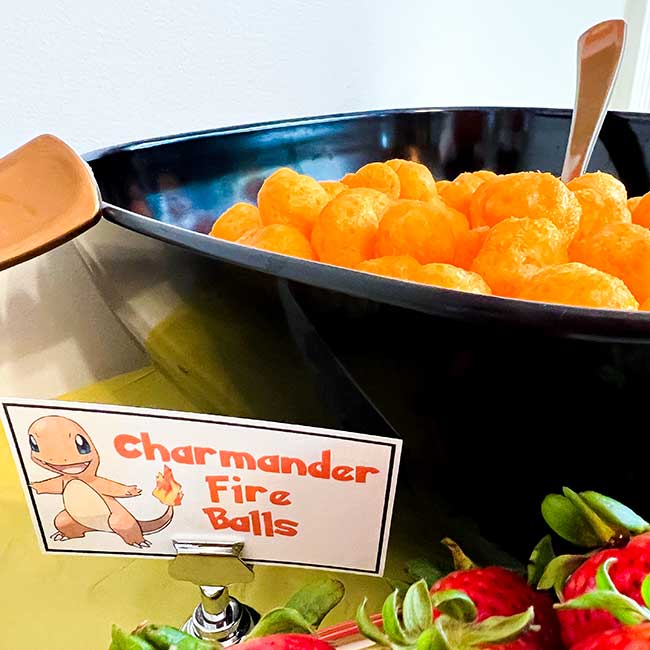
No original Pokemon is better suited for orange cheese balls than this fire-breathing buddy.
Fruit & Cheese Tray
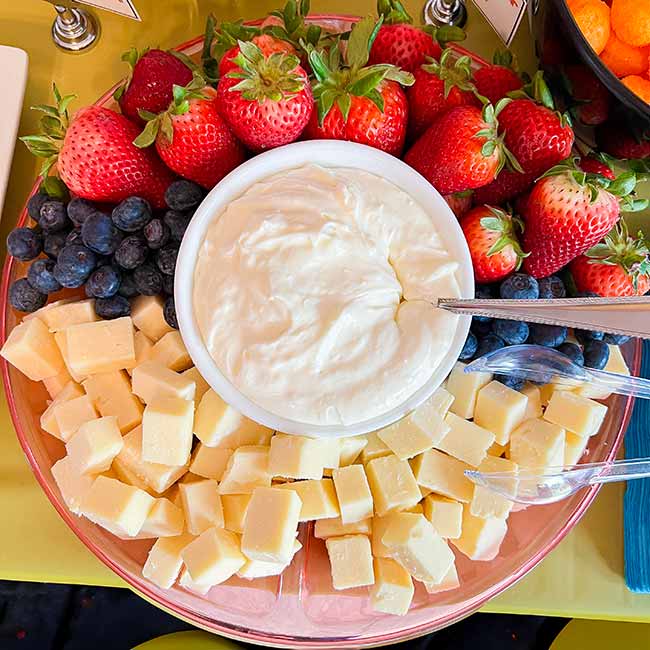
I loved this SO much! This big, round red tray was on hand already from Dollar Tree. I turned it into a giant Poké-ball with carefully arranged strawberries, blueberries (my son’s favorite), and white cheddar cheese cubes. The center was a bowl of homemade white chocolate fruit dip!
Gastly Grapes
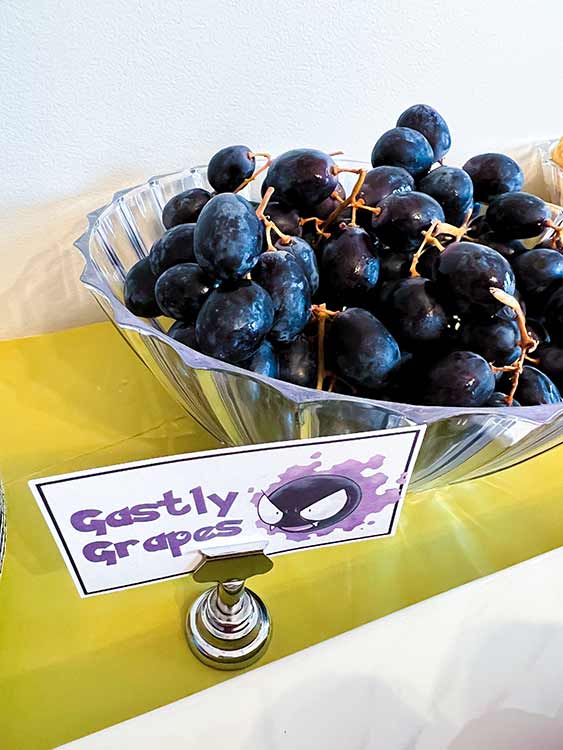
While Gastly is technically black, he has purple “smoke” around him, and these deep red-purple grapes worked perfectly. We rinsed them and cut the stems into small bunches for easy-to-grab servings!
Pidgey Popcorn
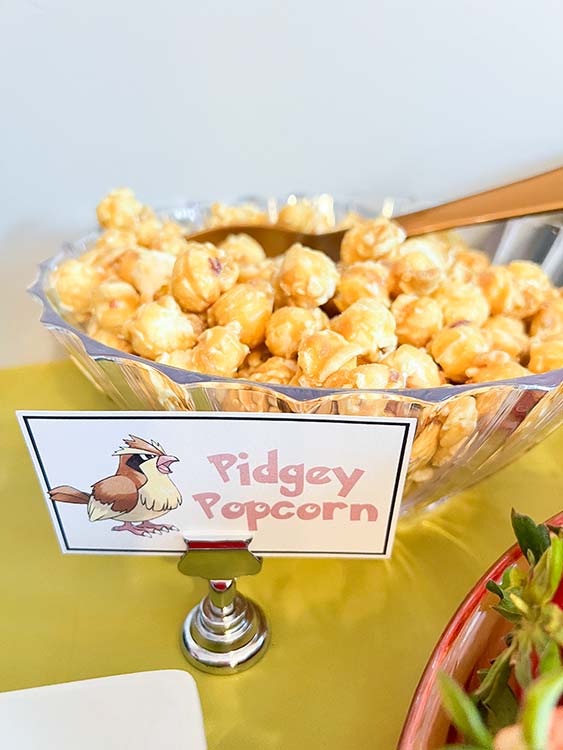
No popcorn holds up to open air as well as butter toffee corn! You might spot a peanut or two in the bowl as well, because I just dumped a box of Crunch ‘n’ Munch in a bowl.
Poké Balls
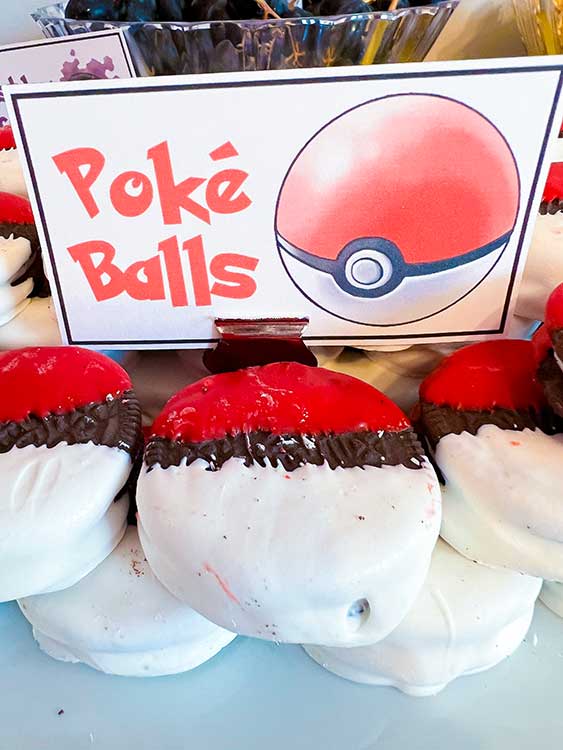
These cute little sweet treats were Double Stuf Oreos dipped in red and white melting chocolates. I let one color dry on all of them before picking up to dip in the second color. I’d intended to add mini white chocolate chips to the centers as the “button,” but I lost steam and decided they looked fine enough.
Blastoise Blasts
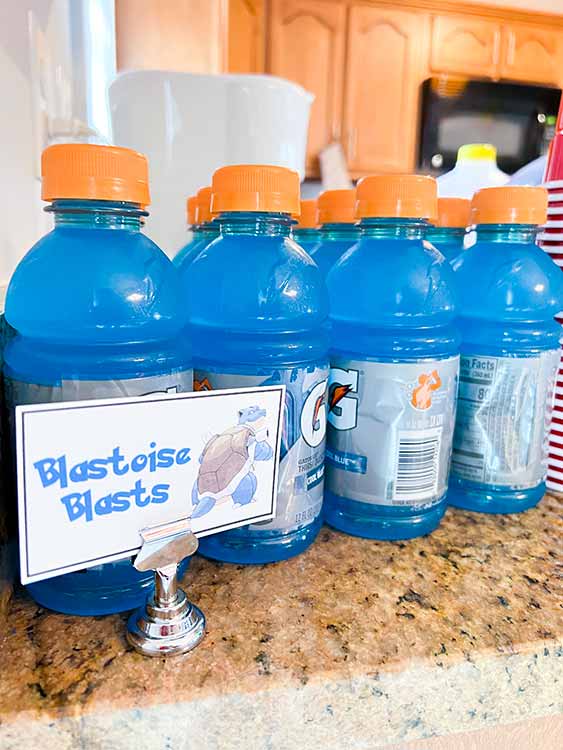
Small bottles of blue Gatorade just for the kids – no adults allowed to blast!
Squirtle Spit
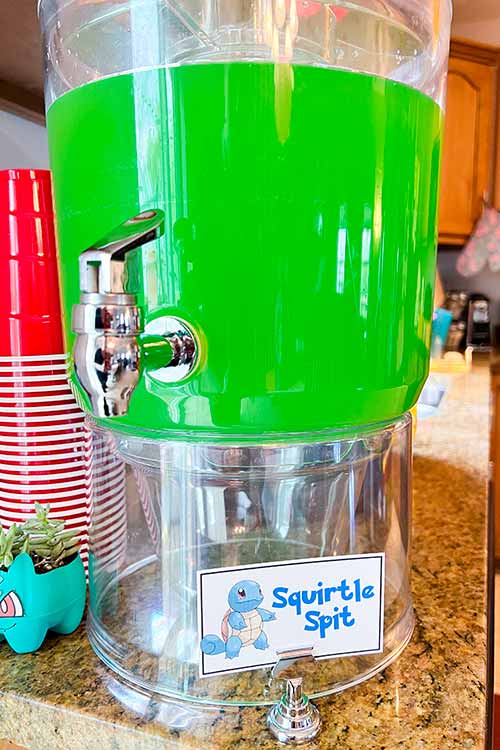
Is the name disgusting? Yes. Did the kids enjoy it anyway? Of course! It was 1 part blue raspberry Kool-aid, 2 parts green Hawaiian Punch, and a little bit of lime juice. The Kool-Aid didn’t make it as teal-colored as I had hoped, but it made it taste awesome! You can get a drink dispenser like mine here. We also had sweet tea and water bottles available.
Simple But Fun Party Games and Activities
I always try to have at least two or three fun things for the kids to do during the party. The third one took a lot of my time to make this year, so the first two were pretty simple.
How Many Caterpies?
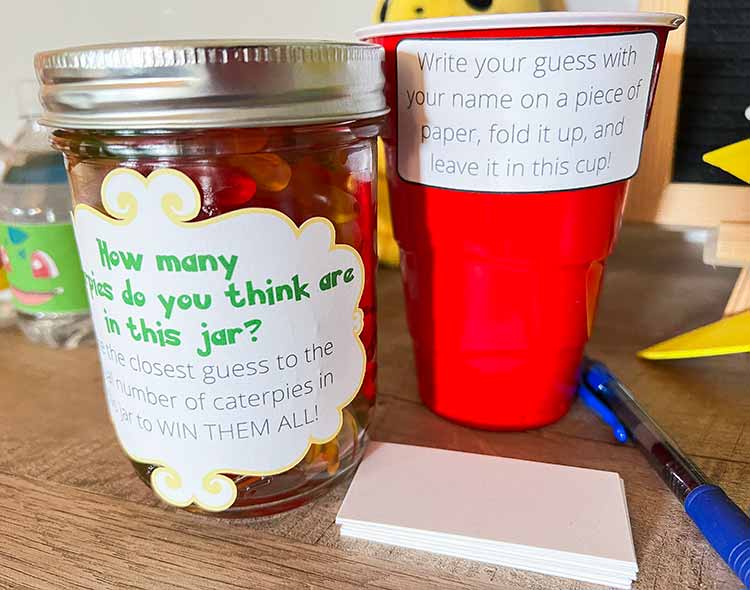
Using a food-safe gloved hand, I counted each and every gummy worm – I mean, Caterpie – that went into this mason jar before closing it up. Guests – including the adults – wrote their name and guess of how many they thought were in there as they arrived at the party.
At the end, I went through all the guesses and announced the winner – who got to keep the jar of gummy worms! To my delight, it was the oldest of the kids at the party who won (he was within two gummies of the right answer)!
A Classic: The Pinata
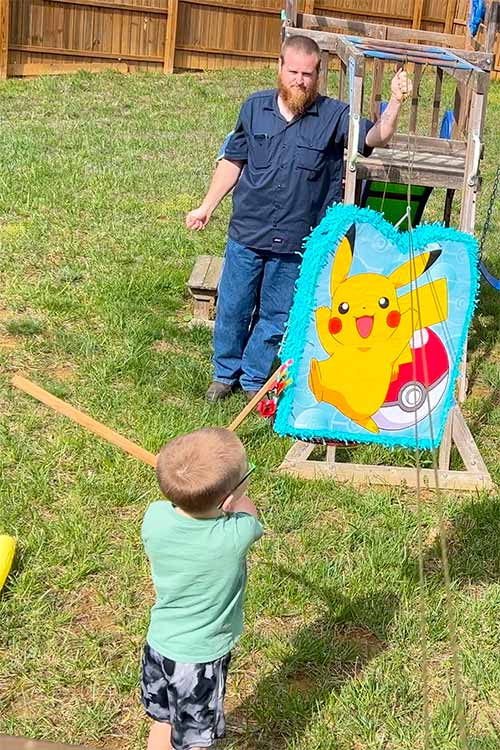
If you don’t have the energy to come up with cool, themed games and activities at your child’s birthday party, just get a pinata. It never fails to entertain. I happened to find this great Pikachu pinata, and we keep a large wooden dowel on hand for whacking them with. It was filled with Smarties, Fruit Chews, and other non-chocolate (and therefore less-meltable) candies.
Poké-Ball Punch Board!
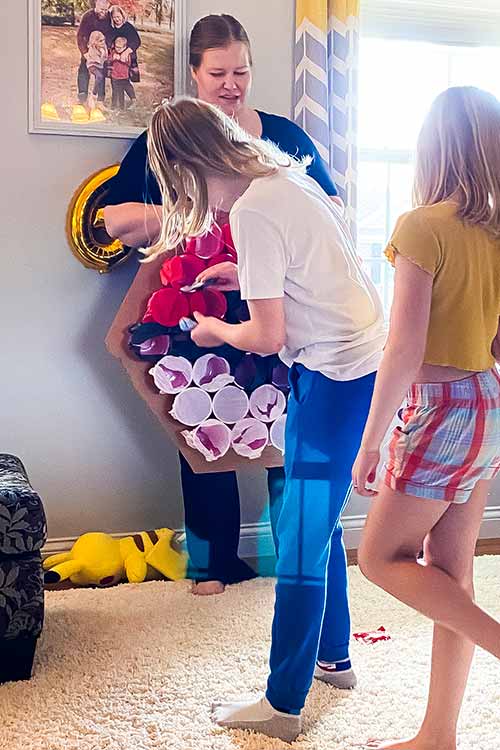
This idea took quite a while to put together, which is why I’m so MAD I forgot to take any pictures of my finished project! This is the only one I have, which my sister took while the kids were going at it.
How I Made It
My husband picks up brush on the side of the road as part of his job in the spring, and people tend to leave all kinds of non-brush things with it. I asked him to bring me home a large piece of solid cardboard when he found it, which took exactly one day, haha. I laid out a bunch of off-brand red party cups on the cardboard so that they were in the shape of a hexagon before marking off the cardboard and cutting it to size with old scissors.
Each cup was filled with tiny Pokemon figures from AliExpress, candy, Pokemon cards, and some even had money in them! Then I took a trimmed-down square of tissue paper in white, black, or red and held it securely around the neck of each cup with a rubber band.
Once the cups were all ready, I hot-glued the bottoms to the cardboard in the original pattern I’d laid them in to cut out the cardboard. For the final step, I took my X-acto knife and quickly poked holes into each piece of tissue paper so that it would break more easily. Tissue paper is ridiculously strong!
When game time came, the kids took turns picking one cup to punch through and collect their prizes. The first time someone pulled out money, oh boy, did they really get into it! This was a huge hit, and I hope to have a party theme where something similar would work again.
The Pikachu Cake That Wasn’t Meant to Be
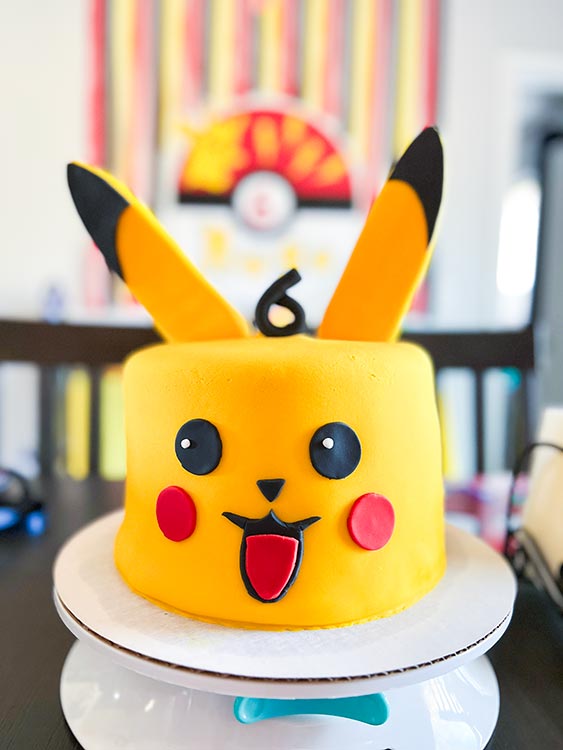
Since my parties are a bit elaborate for at-home birthday celebrations, I usually spend 3 to 4 days decorating the house, preparing the food, and making the cake(s). Yes, I make all my kids’ cakes, too! Two days before this party, I baked and decorated his Pikachu cake. It was covered in fondant, so it would still be plenty fresh after two days. I even made his cute little ears out of solid fondant with dowels inserted to hold them into his cake “head”!
There were cupcakes, too.
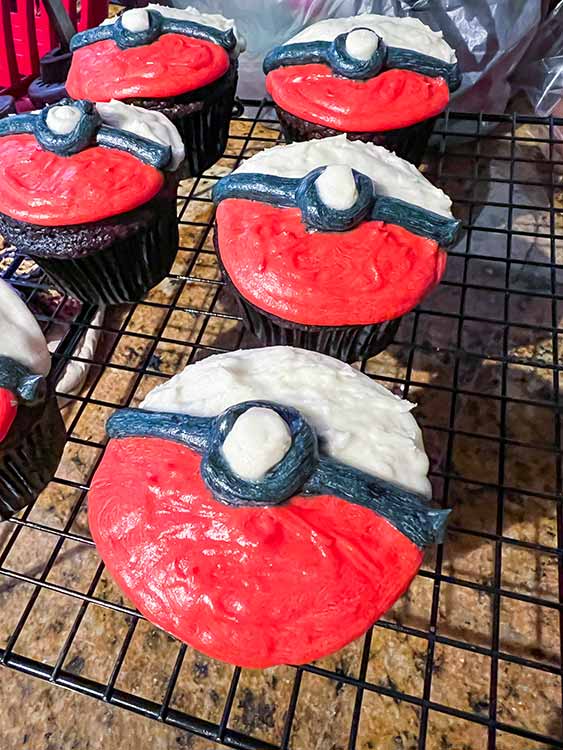
I had a little extra cake batter leftover, so I also made some buttercream-frosted Poké ball cupcakes. On top of that, my son’s party fell on the exact day of my brother-in-law’s actual birthday (don’t worry, I cleared it with him first) because their birthdays are only four days apart. I asked my BIL who his favorite Pokemon was (he’s a bit of a nerd too), but didn’t tell him why I wanted to know.
My reason? So I could make him his own special birthday cake to show my appreciation for letting me have this party on his actual birthday.
He picked Gastly!
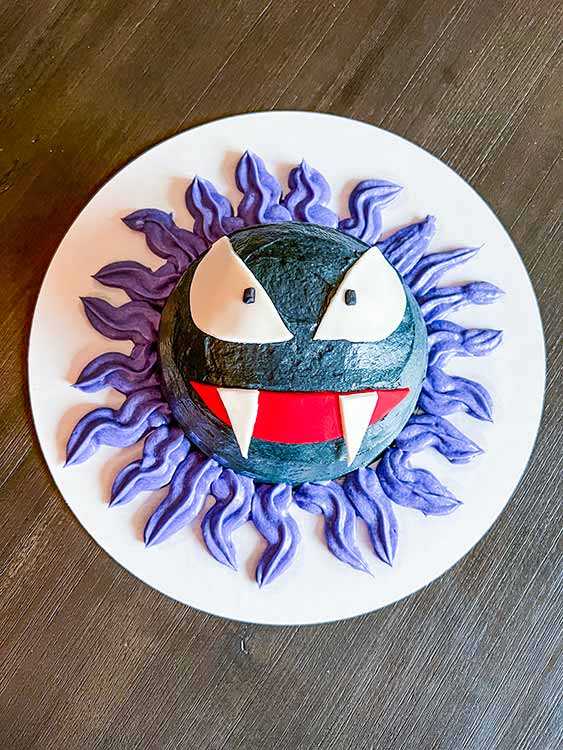
I absolutely loved how this cake turned out, probably even more than the Pikachu. I used one half of the Wilton ball cake pan to make it. Unfortunately, up until the day of the party, Hugo had been dealing with one of his worst ear infections ever – vomiting, fevers, the whole bit. I had hoped with his antibiotics he would be good to go on party day, but – you guessed it – he definitely was not.
The morning of the would-be party day, he STILL had a fever and felt awful. While I knew he most likely didn’t have anything contagious, I also knew I had to postpone. So I put my big girl pants on and drove the 35 minutes to my brother-in-law’s house to deliver him his special cake on his birthday, and made the announcement to everyone that we’d have to postpone Hugo’s party.
We already had other things on our schedule for Sunday, so Monday was the next possible day to have it. Well, I thought to myself, we’ll have to eat the cupcakes, but the fondant cake should be okay for Monday. Long story short, it was the following FRIDAY before Hugo was up for having a party. So I had this massive Pikachu cake that was definitely not going to survive – and be edible – 8 days after being made.
So you know what I did? I sliced it up, covered the chunks on platters, and delivered them to the houses of various friends and family that were to attend the party. I was NOT going to let that much cake go to waste!
The First Store-Bought Cake I Ever Used
As a result of all of this, I did something I have never, ever done before – I ordered a cake from the Walmart bakery for my child’s birthday party. I just didn’t have it in me to recreate Pikachu. And I don’t have anything against Walmart cakes. I think they’re delicious, and I’d say 70% of the time the decorating looks great. But since I have the tools and a small amount of cake-decorating skills, I like to make unique cakes for my kids’ parties.
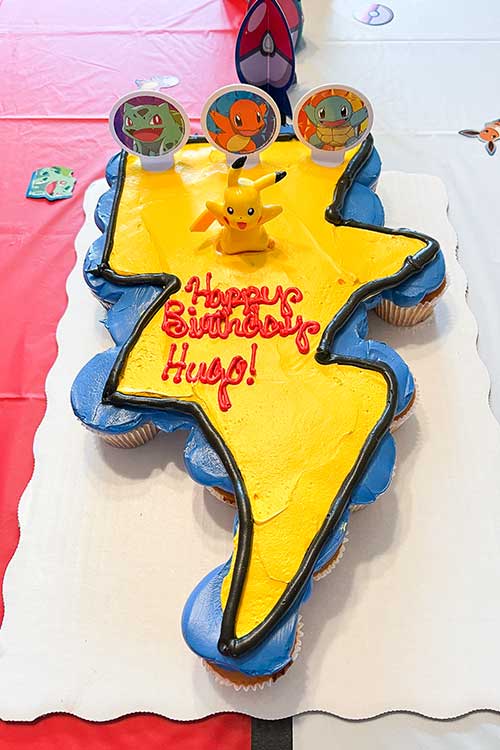
But you know what? The Walmart cupcake cake looked really cool, it was delicious, and it saved me from further stress. Also, I was honestly shocked by how cheap it was (because I’d never even looked into ordering one before). That big ol’ sheet of cupcakes was less than $25! I spent more than that on the fondant, cake mixes, and powdered sugar to make Pikachu.
Perfect Pokemon Party Favors
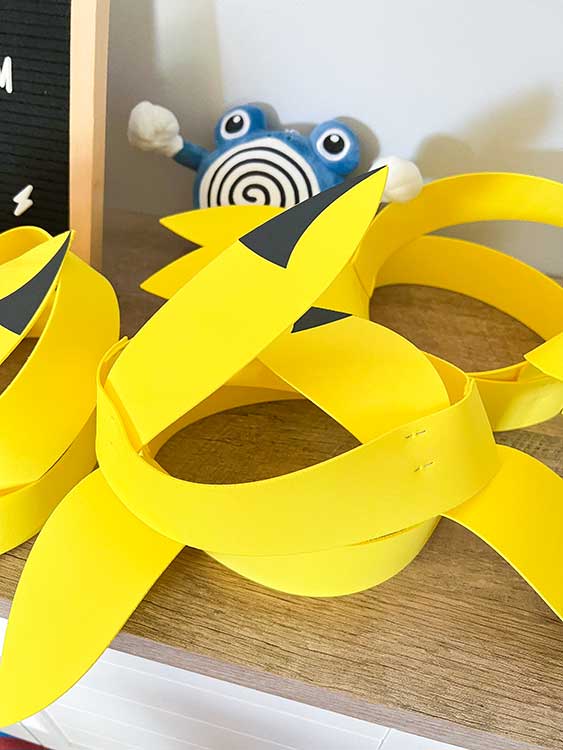
I had lots of fun party favors for the kids to take home. And the adults got to take home something cute, too! First, as kids entered the party, they were given some foam Pikachu ears I assembled with the help of my Cricut and a stapler. I got my yellow foam sheets and black foam sheets from Amazon, and each headband was made of two 2-inch strips of the yellow stapled together. A 23-inch circumference is the perfect size for most kids’ heads.
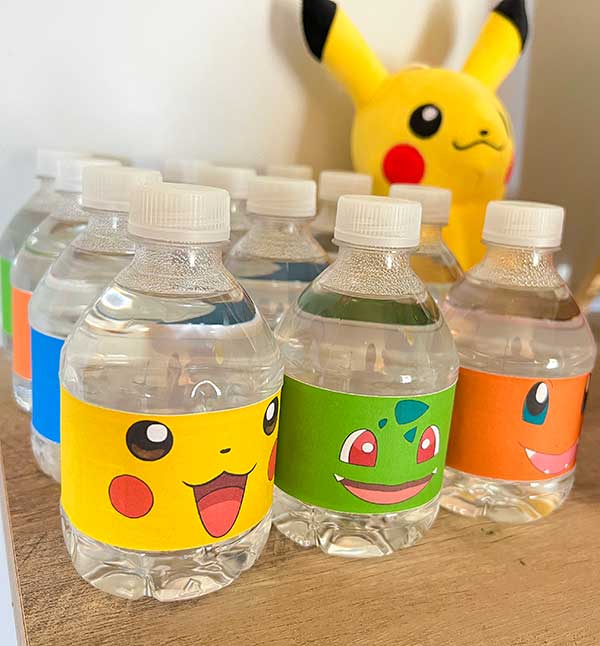
They all got to pick a mini water bottle in their preferred Pokemon character, too. Some kids grabbed them right away, and others grabbed one to take home.
And those plushie Pokemon characters you saw on the cabinet and fireplace mantle? Each kid got to pick their favorite to take home, too. But that’s not the best part! Each kid also got their own personalized Poké ball full of goodies!
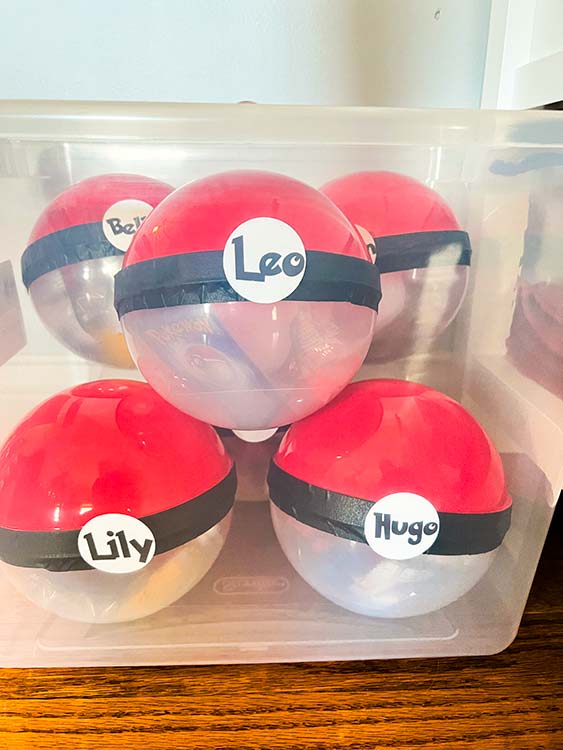
Believe it or not, the red-and-clear plastic balls were found at Party City and unfortunately they’re not currently listed anywhere. I filled them up with candy, temporary tattoos, more Pokemon cards, and plush Poké ball keychains from AliExpress. I “sealed” them with black electrical tape so they would perfectly resemble Poké balls, then added a little white circle “button” with each of their names.
Adult Favors That Doubled as Decor
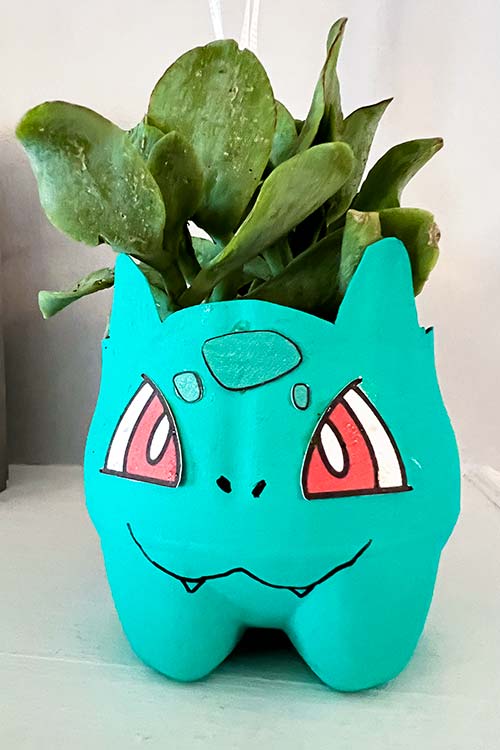
You may have noticed I had little Bulbasaur planters sitting around the house. Those were real, actual mini succulents I ordered from Succy Crafts a couple of weeks before the party. (They appear to no longer be in business.) To make the Bulbasaur “pot,” I used a Sharpie on six 16.9-ounce Coca-Cola bottles to create a line pattern that would look like Bulbasaur’s ears. I cut around the lines with an X-acto knife (carefully), then painted them each with teal acrylic paint.
My Cricut cut out the eyes and head spots. I glued those on after the paint dried and used a black Sharpie to draw on the nose and mouth. Then my husband helped me carefully transfer the mini succulents from their original containers to the Coke bottle bottoms, adding a little bit of potting soil as needed.
If I could do it again, I would’ve sprayed the containers with some kind of sealant before adding the succulents, because the acrylic paint chipped quite easily. Still, I never really expected these to last a long time.
After the party, the adults that wanted them got to take them home! My sister’s plant was still thriving a year later, but mine… well, let’s just say my thumb is not any shade of green.
And that’s a wrap! Remember, the most important thing is to have fun and create lasting memories with your child. Don’t stress over perfection; embrace your creativity and let your (and your child’s) imagination guide the party theme. With a little planning and a lot of enthusiasm, you can throw an unforgettable Pokemon party. I hope my son’s party has inspired you!

