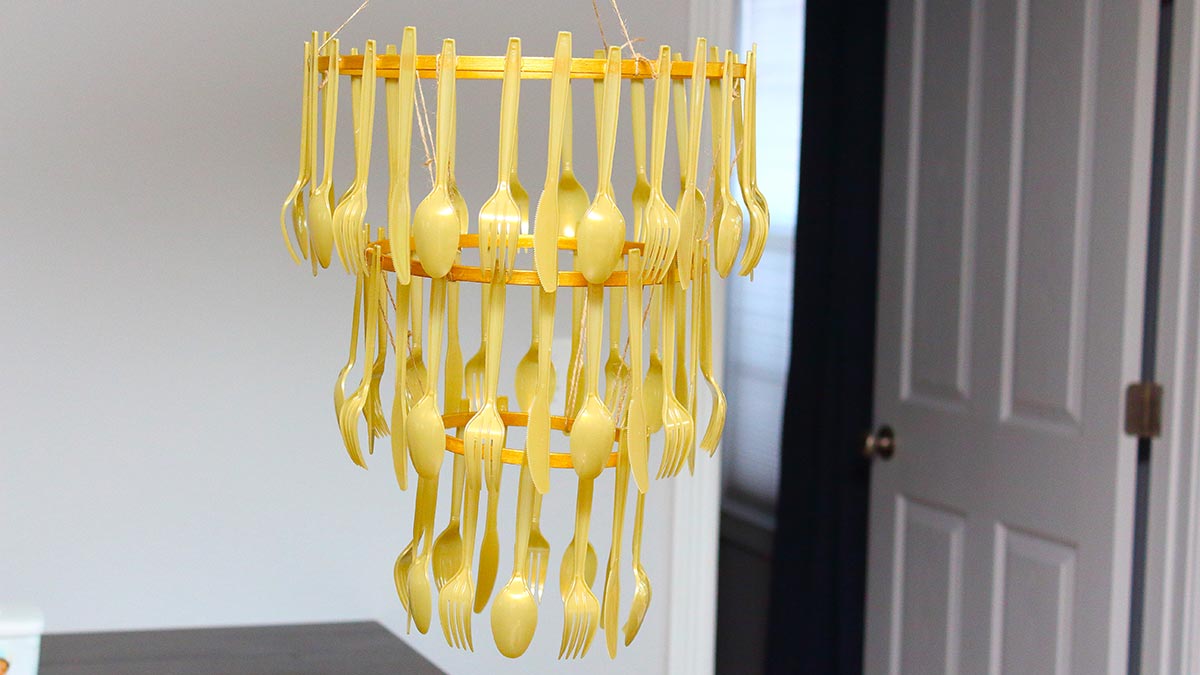
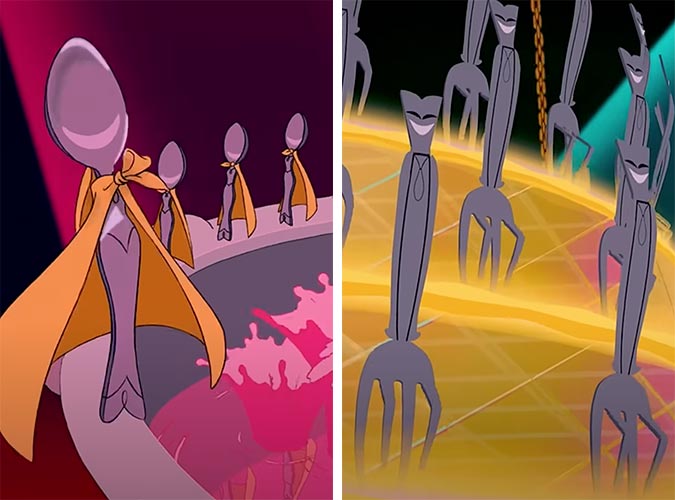
Remember that scene in Beauty and the Beast? The ballroom, the swirling yellow dress, and the gorgeous golden chandelier? Pure magic. And the dancing cutlery and dishes in the kitchen scene? Who could forget! Get ready to create a stunning DIY Beauty and the Beast chandelier that will be the belle of the ball (or, you know, your living room). By combining golden cutlery with a chandelier shape, you’ll have a beautiful piece that represents the best of both scenes.
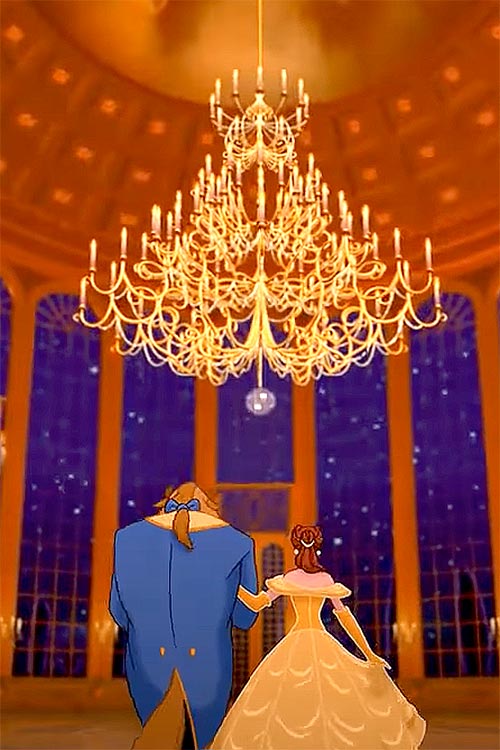
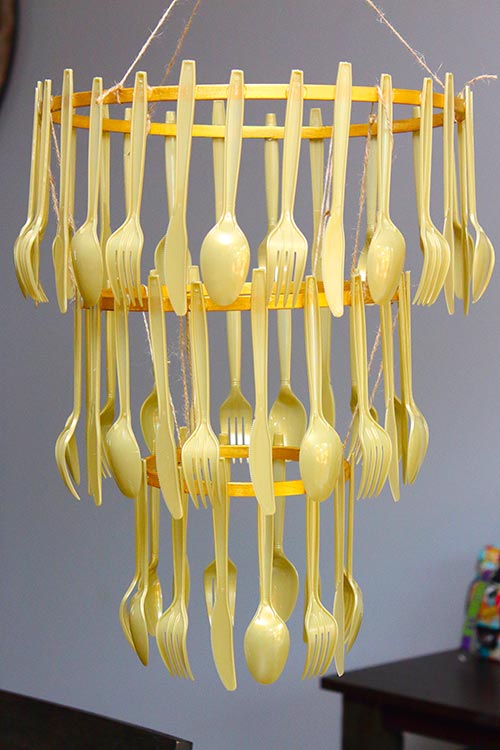
I made one for my daughter’s Beauty and the Beast birthday party and it was a huge talking point! This project is easier than you think. Let’s get crafting!
This post may contain affiliate links. If you make a purchase after clicking one, I may receive a small commission at no cost to you.
Materials Needed
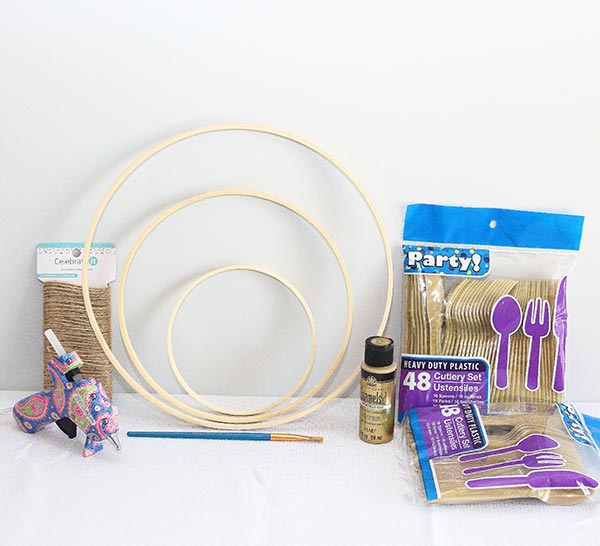
- Wooden embroidery hoops in three different sizes (I used 14”, 10”, and 6”)
- Metallic gold acrylic paint
- Small, flat paintbrush
- Gold plastic cutlery
- Hot glue gun
- Glue sticks
- Jute, twine, or gold craft string
Step-by-Step Instructions
1. Separate the embroidery hoops.
You’ll only need the solid wooden hoops on the inside. Unscrew the tighteners (if necessary) and remove the exterior hoop. Keep them for a future project or recycle them!
2. Paint the inner hoops gold.
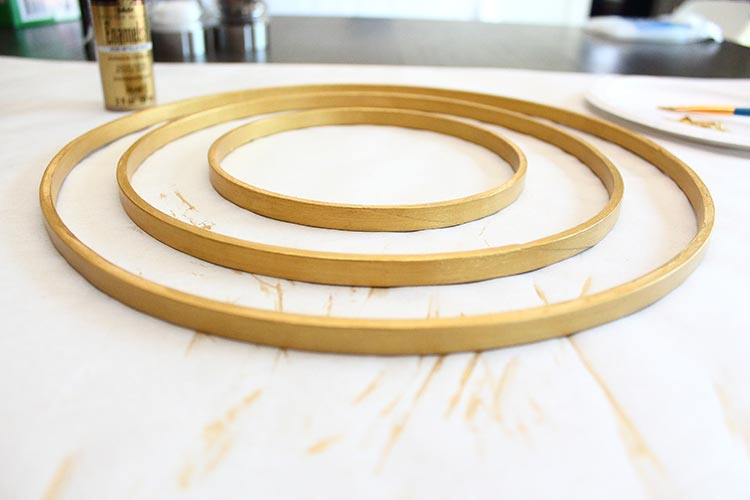
Using a small flat paintbrush, carefully brush the gold paint all over each hoop, making sure to get the outside, inside, and top and bottom edges. You may want to apply more than one coat for a bright, shiny finish. The first coat should dry quickly as it absorbs into the finely sanded wood of the hoop.
3. Glue your cutlery to the hoops by their handles.
After allowing your hot glue gun to warm up, apply a small dot of glue to the outside of a hoop. Immediately press a utensil handle onto the glue, holding it in place until it doesn’t move when released. Hot glue works quickly on plastic, so it should only take a few seconds.
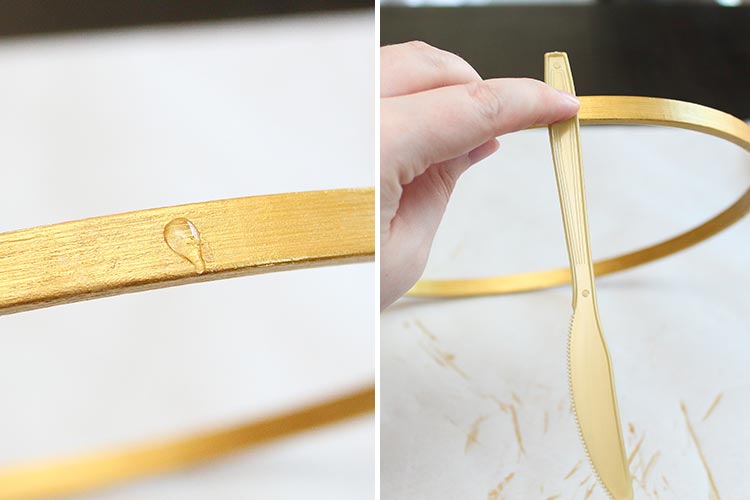
The exact placement of the handle is up to you; you can attach the very center of the utensil to the hoops or move closer to the end. You can even glue them standing up with the handle at the bottom! I attached them upside-down and left less than half an inch of each handle sticking out above the hoop.
Continue gluing on each piece of cutlery with one dot of glue at a time. Make sure you alternate your forks, spoons, and/or knives.
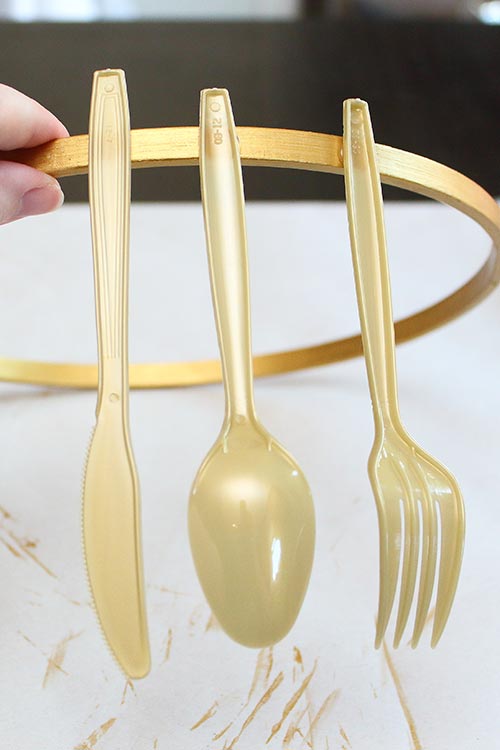
Since not all cutlery is the same length, decide whether you want them to line up at their handles or tips. I chose not to line up either end and centered them vertically instead.
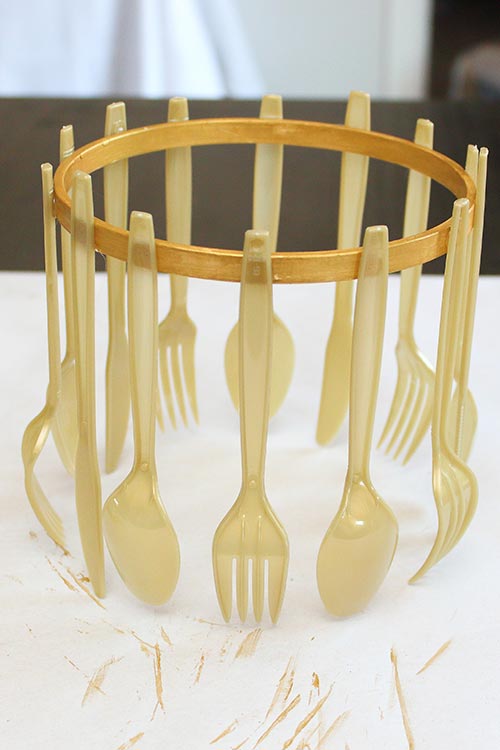
4. Connect the hoops with strings.
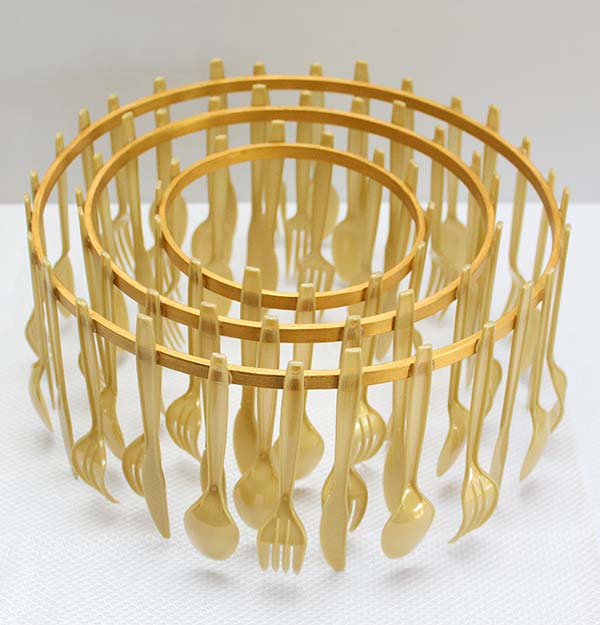
Once all your utensils are glued on, you need to tie strings to connect them all. Place your hoops inside each other, standing on the cutlery. (This is a great way to find out if any of your glue points are weak, too!) Cut six lengths of cord, each about 9-10 inches long.
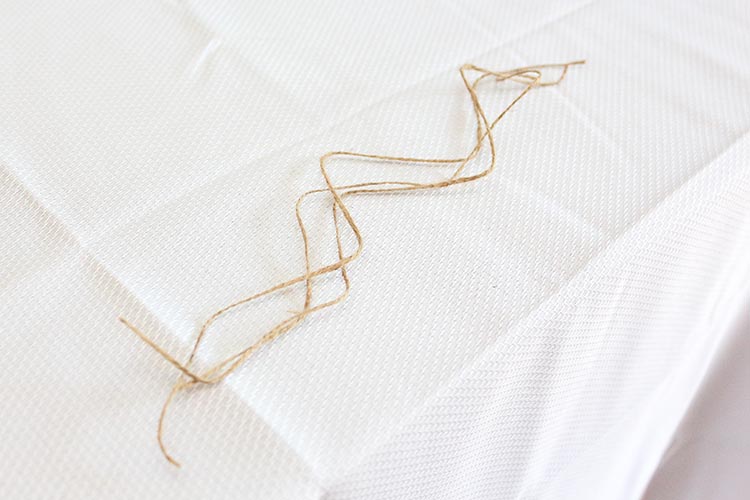
Weave one length around your innermost hoop and the middle hoop, bringing it together above them and tying it in a secure knot.
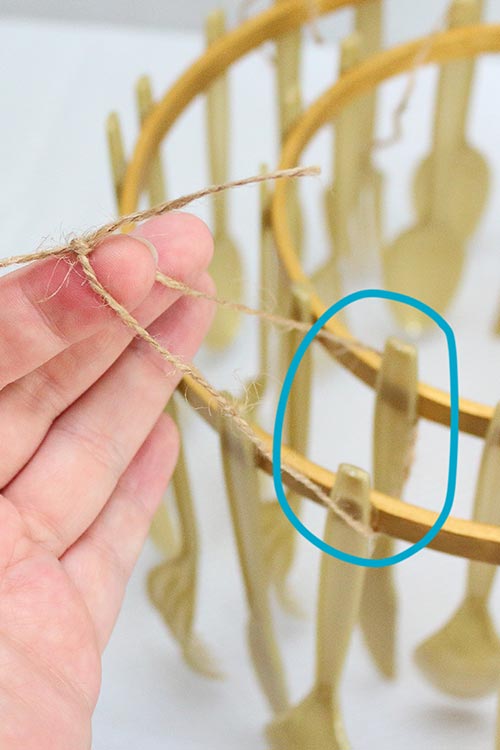
Do this in two more spots around those same two hoops, forming an equilateral triangle with the three loops.
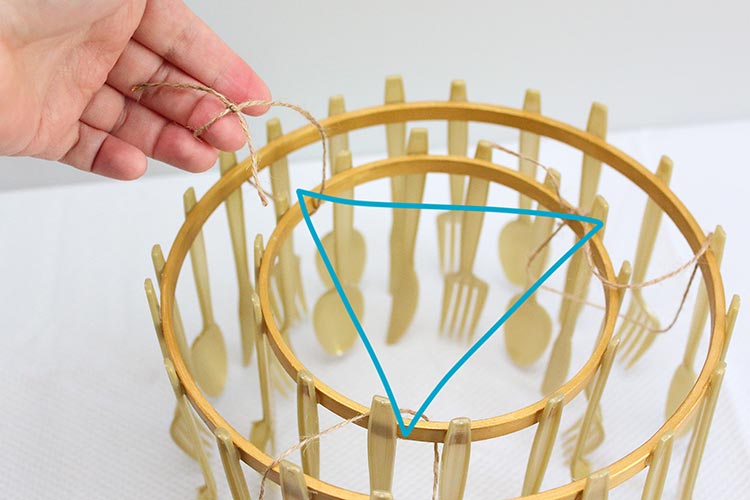
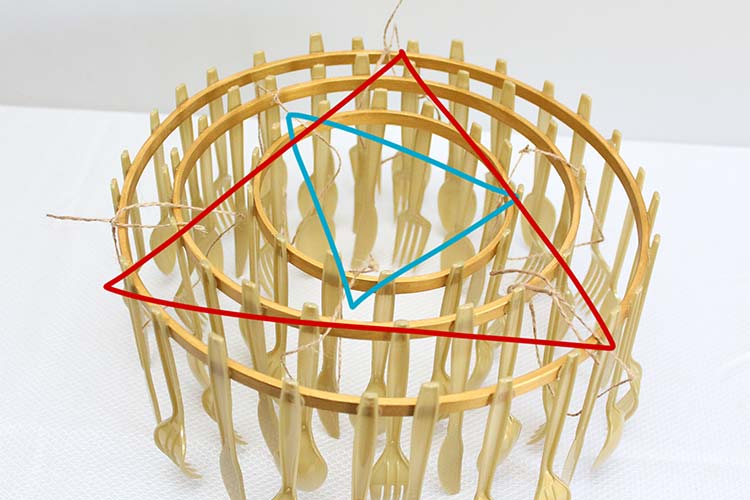
Do the same with the remaining three bits of cord, but tie them around your outermost and middle hoops this time. Place these loops in between the inner ones so they are all staggered.
5. Create a hanging knot.
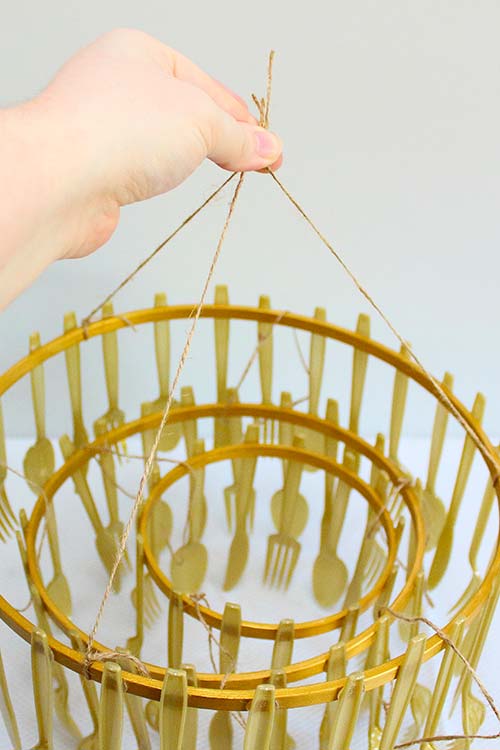
Cut three more lengths of cord, each about 12 inches long. Tie each one securely around the largest hoop, once again forming a triangle with their positions. Bring the three loose ends together and tie them together in a single knot above your hoops.
6. Carefully lift your chandelier and hang it!
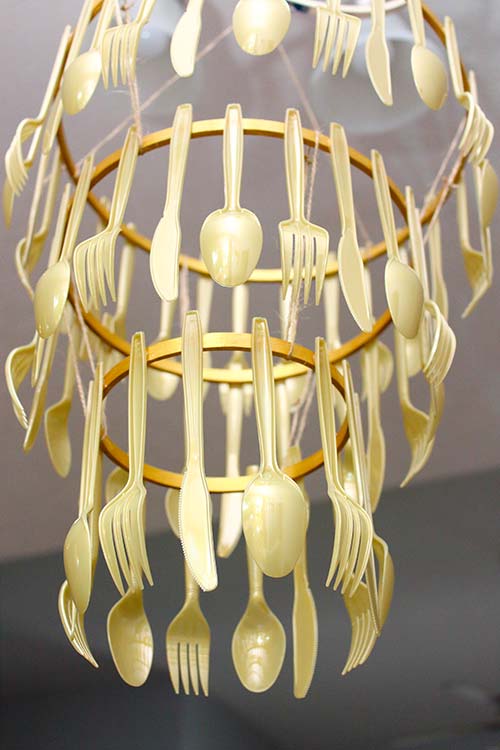
If everything has been tied together properly, when you lift your final knot it should pull up first the largest hoop, then the middle, and finally the smallest. And voila! You have a golden cutlery chandelier!
Tips & Tricks
Learn from my experience (and mistakes)!
Don’t use hoops too close in size.
Each hoop should be four inches apart in size – unless you plan on making a five-tier hoop! Then you can safely use embroidery hoops that are two inches apart.
Pay attention to the handles of the cutlery you’re buying.
I didn’t consider that the silverware I purchased had beveled edges that prevented the backs from lying flush against the wooden hoops. As a result, I had to glue the fronts of the handles to the rings.
Prepare your workspace.
Lay out craft paper, old newspaper, or cardboard before painting and gluing your chandelier.
The whole process is faster than you might think!
I painted the hoops, glued on the cutlery, and tied the strings around them all at once. It took about an hour.
FAQ
Can I use metal cutlery instead of plastic?
Yes, but you’d need to use a completely different assembly method. Hot glue will not hold metal utensils to the wooden hoops.
If you’re comfortable with power tools, I recommend drilling small holes into the handles of each piece and attaching them to the hoops with gold twist ties (then trim the excess off). You can use a dab of hot glue under the twist ties to keep them from sliding around.
An advantage of this method is that the cutlery is free to sway and “dance” as it hangs, fitting in beautifully with the Beauty and the Beast theme. The downside is the huge amount of weight it will add to the chandelier; you’ll need to be very careful where you hang it!
How many pieces of cutlery do I need?
That depends on two factors:
- the size of your embroidery hoops, and
- how close together you want them to be.
I used about 65 pieces of cutlery in my chandelier. If you’re using smaller hoops, you won’t need as many. If you’re going larger, or using more than three hoops, you’ll probably want more – unless you’re spacing them out farther.
To be sure you have enough before gluing them on, you can lay your utensils around each hoop with the ends pointing toward them. Remember that they will appear closer together once glued on than when splayed away from it.
Can I attach lights to the chandelier?
Absolutely! There are lots of ways to get creative with lights. I highly recommend wrapping string fairy lights around the inside of each hoop and running the wire up the cords connecting the tiers as you go. You can use clear tape or tiny dots of low-temp hot glue to hold them in place. The bundle of string for hanging the chandelier can be wrapped around the battery pack so it doesn’t add any bulkiness to the design of the actual fixture.
How should I hang this from the ceiling?
Assuming it’s a temporary decoration, my go-to is a clear toggle Command hook! Just make sure you have a very smooth ceiling. I have a textured ceiling, but I can always find smooth patches between the designs. Press the back onto the ceiling hard and let it rest for at least an hour before hanging the chandelier on it.
You can also hang it from an existing light fixture so it hangs lower and is more visible to your guests. I ended up hanging my chandelier from the track lighting in my kitchen, which provided it with a spotlight!
And there you have it! Your very own enchanted Beauty and the Beast-inspired cutlery chandelier. With a little creativity and some handy cutlery, you’ve transformed a bunch of forks and spoons into a show-stopping centerpiece. This project is a guaranteed conversation starter, and who knows, it might even inspire some waltzing. So hang it up and bring some Disney magic into your home!
Be sure to check out my DIY rose garland, too – it goes perfectly with the Beauty and the Beast theme.

